ASIC Canaan Avalon Q Home — The First Low-Noise ASIC Miner for Home Use
28/7/2025
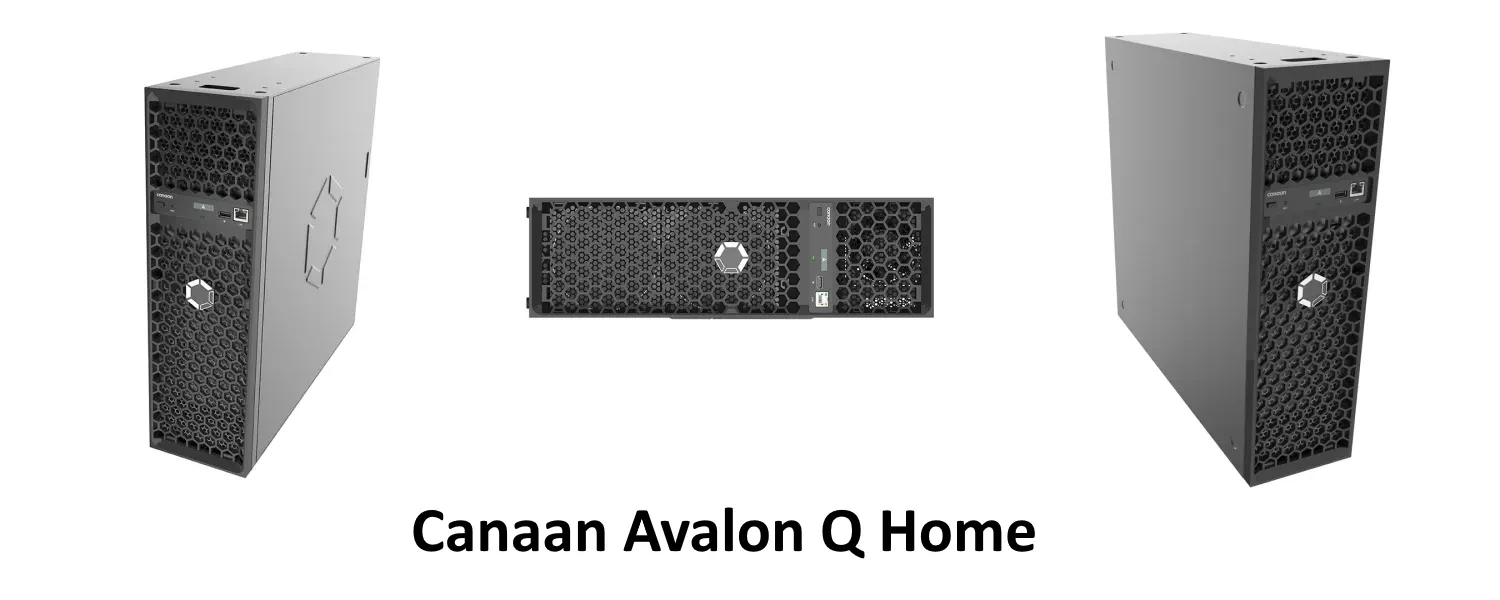
With growing interest in home Bitcoin mining, Canaan has introduced a groundbreaking device: the Avalon Q Home. It’s the first ASIC miner to combine high performance, low noise, and intuitive setup via a mobile app. We’ve tested the new release and are sharing our first impressions.
🔧 Who is this device for?
- Beginners looking to start mining without excessive noise
- Apartment and office owners — thanks to its compact size and quiet operation
- Enthusiasts seeking a flexible and transparent control system
On the Kryptex Pool, SHA256 Canaan Avalon ASICs can mine BTC, FB, XEC, DGB and BCH.
Additionally, merged mining for BTC+FB is available, allowing you to mine both Bitcoin and Fractal Bitcoin simultaneously.
- Start Mining Bitcoin BTC + Fractal Bitcoin FB — https://pool.kryptex.com/btc
- Start Mining Fractal Bitcoin FB — https://pool.kryptex.com/fb
- Start Mining eCash XEC — https://pool.kryptex.com/xec
- Start Mining DigiByte DGB — https://pool.kryptex.com/dgb
- Start Mining Bitcoin Cash BCH — https://pool.kryptex.com/bch
Canaan Avalon Q Home — Specifications and Size
| Model | Algorith | Coin | Hashrate | Consumption | Dimensions (cm) | Weight |
|---|---|---|---|---|---|---|
| Q Home | SHA256 | BTC, FB, XEC, DGB, BCH | 90 Th/s (±10%) | 1674 Watt (±10%) | 45 x 13 x 44 | 10.5 kg |
Canaan Avalon Q Home Hashrate
Avalon Q Home’s biggest advantage is its operating modes:
- Eco Mode — reduces noise to the level of household appliances. Hashrate: ~55 Th/s, Power consumption: ~875W
- Standard Mode — a balanced performance mode. Hashrate: ~80 Th/s, Power consumption: ~1450W
- Super Mode — high-performance mode for maximum profitability. Hashrate: ~85–90 Th/s, Power consumption: ~1700–1800W
- Start Mining Bitcoin BTC + Fractal Bitcoin FB — https://pool.kryptex.com/btc
- Start Mining Fractal Bitcoin FB — https://pool.kryptex.com/fb
- Start Mining eCash XEC — https://pool.kryptex.com/xec
- Start Mining DigiByte DGB — https://pool.kryptex.com/dgb
- Start Mining Bitcoin Cash BCH — https://pool.kryptex.com/bch
What to Mine on Canaan Avalon Q Home?
The Canaan Avalon Q Home is capable of mining coins based on the SHA256 algorithm, such as BTC, FB, XEC, DGB, and BCH.
On the Kryptex Pool, Canaan Avalon ASICs can mine multiple coins simultaneously through merged mining, specifically Bitcoin (BTC) + Fractal Bitcoin (FB).
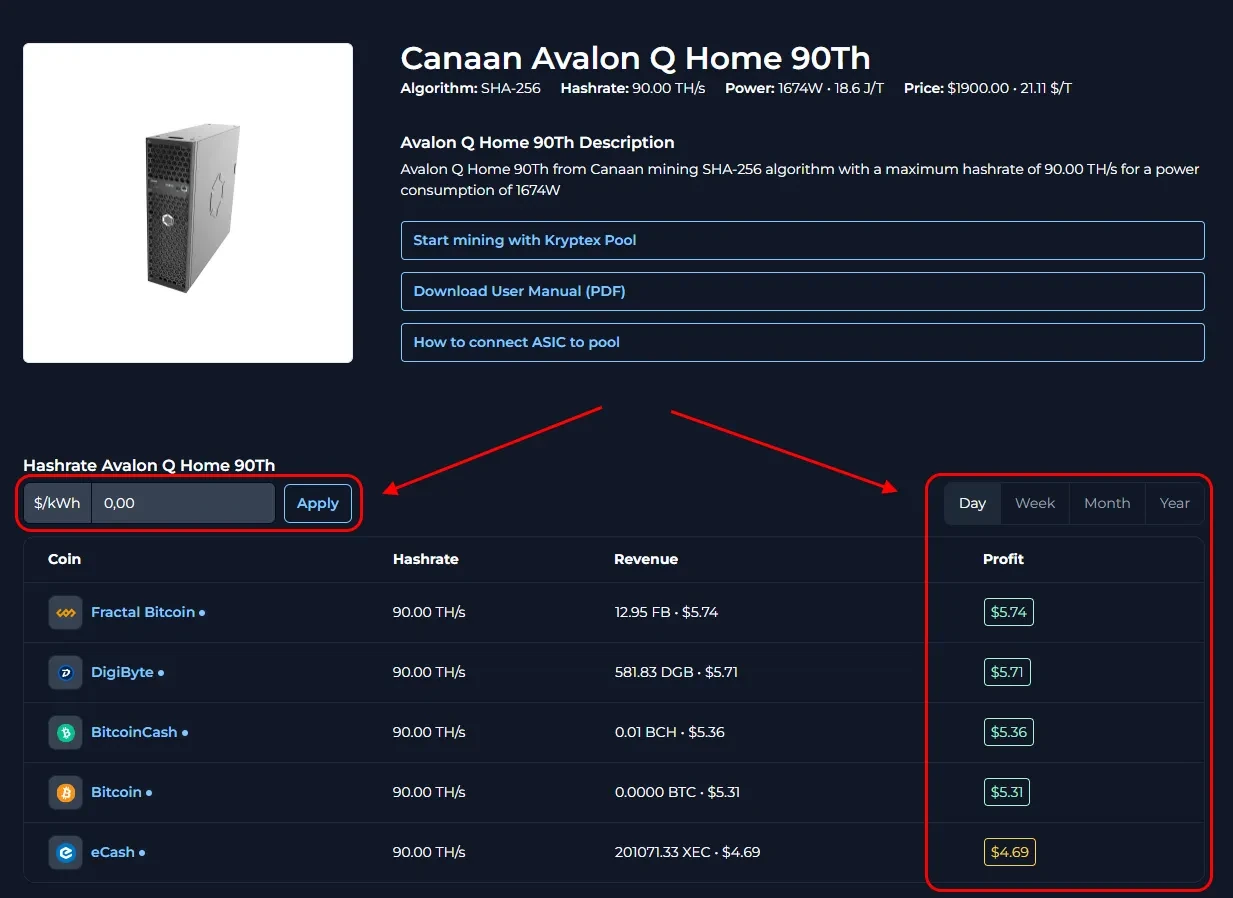
Canaan Avalon Q Home Profitability
Currently, the profitability of the Canaan Avalon Q Home is about $5.7 a day to $48.9/day, depending on its working mode, and excluding electricity costs.
We recommend to check the actual profitability in our mining calculator, where you can also calculate the profitability including your electricity costs.
| Mode | Hashrate | Consumption | Profit w/o El. Price |
|---|---|---|---|
| Eco | 55 Th/s (±10%) | 875 Watt (±10%) | ~$3.5 / day |
| Standart | 80 Th/s (±10%) | 1450 Watt (±10%) | ~$5.1 / day |
| Super | 95 Th/s (±10%) | 1790 Watt (±10%) | ~$6 / day |
Check the profitability of Canaan Avalon Q Home ASIC on the mining calculator.
Canaan Avalon Q Home Settings
Canaan takes equipment delivery seriously. Your Avalon Q Home will be securely packaged and includes:
- Canaan Avalon Q Home ASIC miner.
- User manual.
- Power cable.
- Wi-Fi USB adapter for wireless setup.
Before installation, place the device on a flat, well-ventilated surface.
Prepare and power on the device:
Insert the Wi-Fi adapter into the USB port on the front panel of the Avalon Q Home if you plan to connect via Wi-Fi.
- If using a wired connection, plug the LAN cable into the front panel.
Connect the power cable to the rear panel of the device.
Plug the other end into a wall outlet.
Wait for the LED indicators to start flashing — this means the miner is booting up.
Set up the configuration app:
- Download the Avalon Family mobile app from the App Store (iOS) or Google Play (Android).
- Open the app and tap the menu icon.
- Select “Add New Device.”
- Tap “Search” to find your Avalon Q Home.
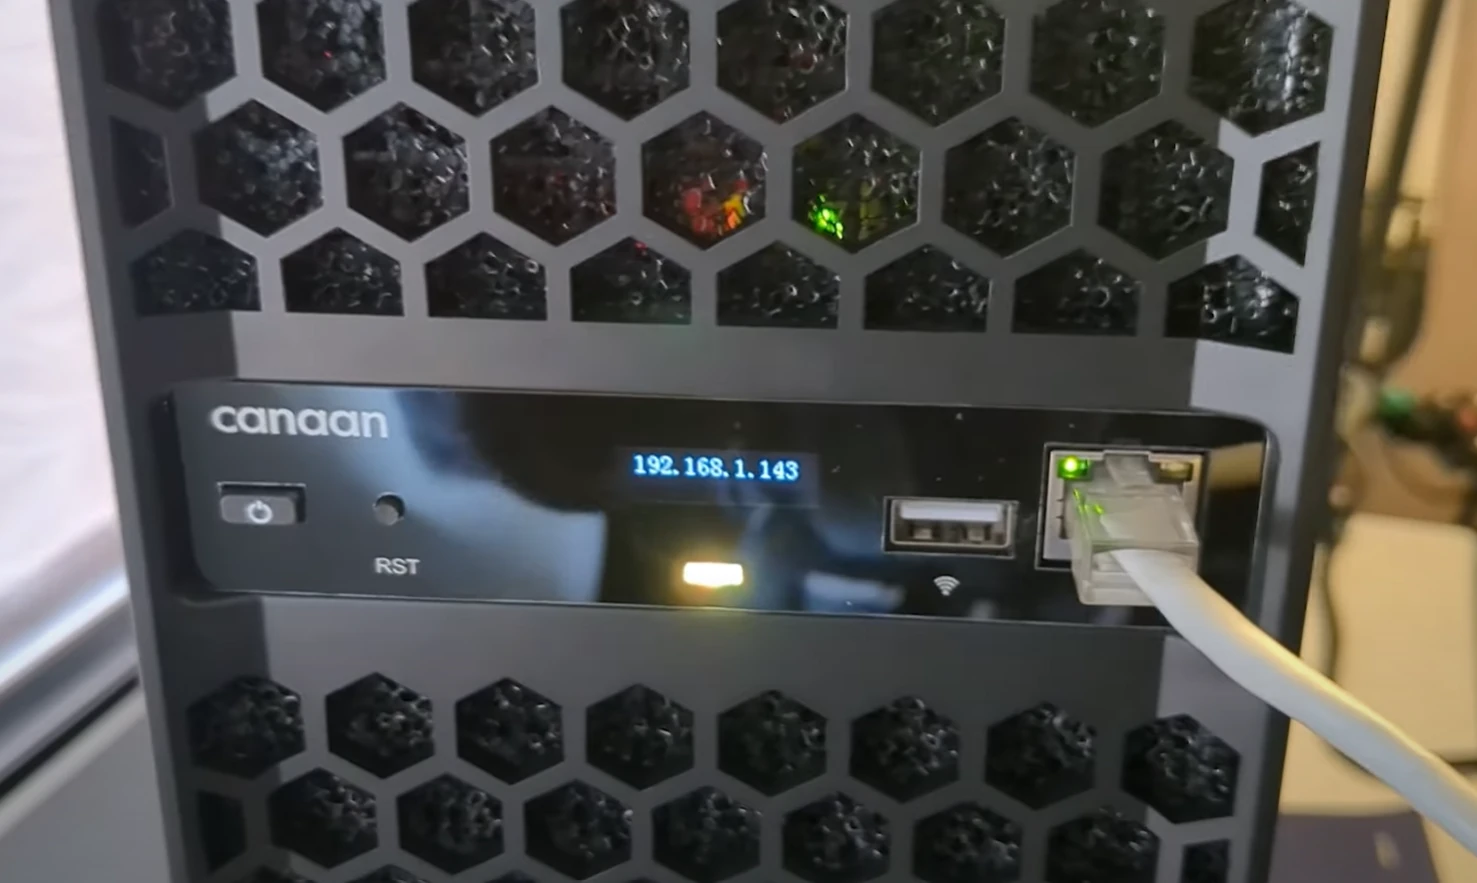
- If using a wired connection, tap “Manually add running device” and enter the IP address shown on the front panel display.
- When the device appears, tap it to connect.
- Enter your Wi-Fi network name (SSID) and password, then tap “Save.”
- The device will reboot and connect to your home network.
- Log in using the default credentials
admin, and create a secure new password when prompted.
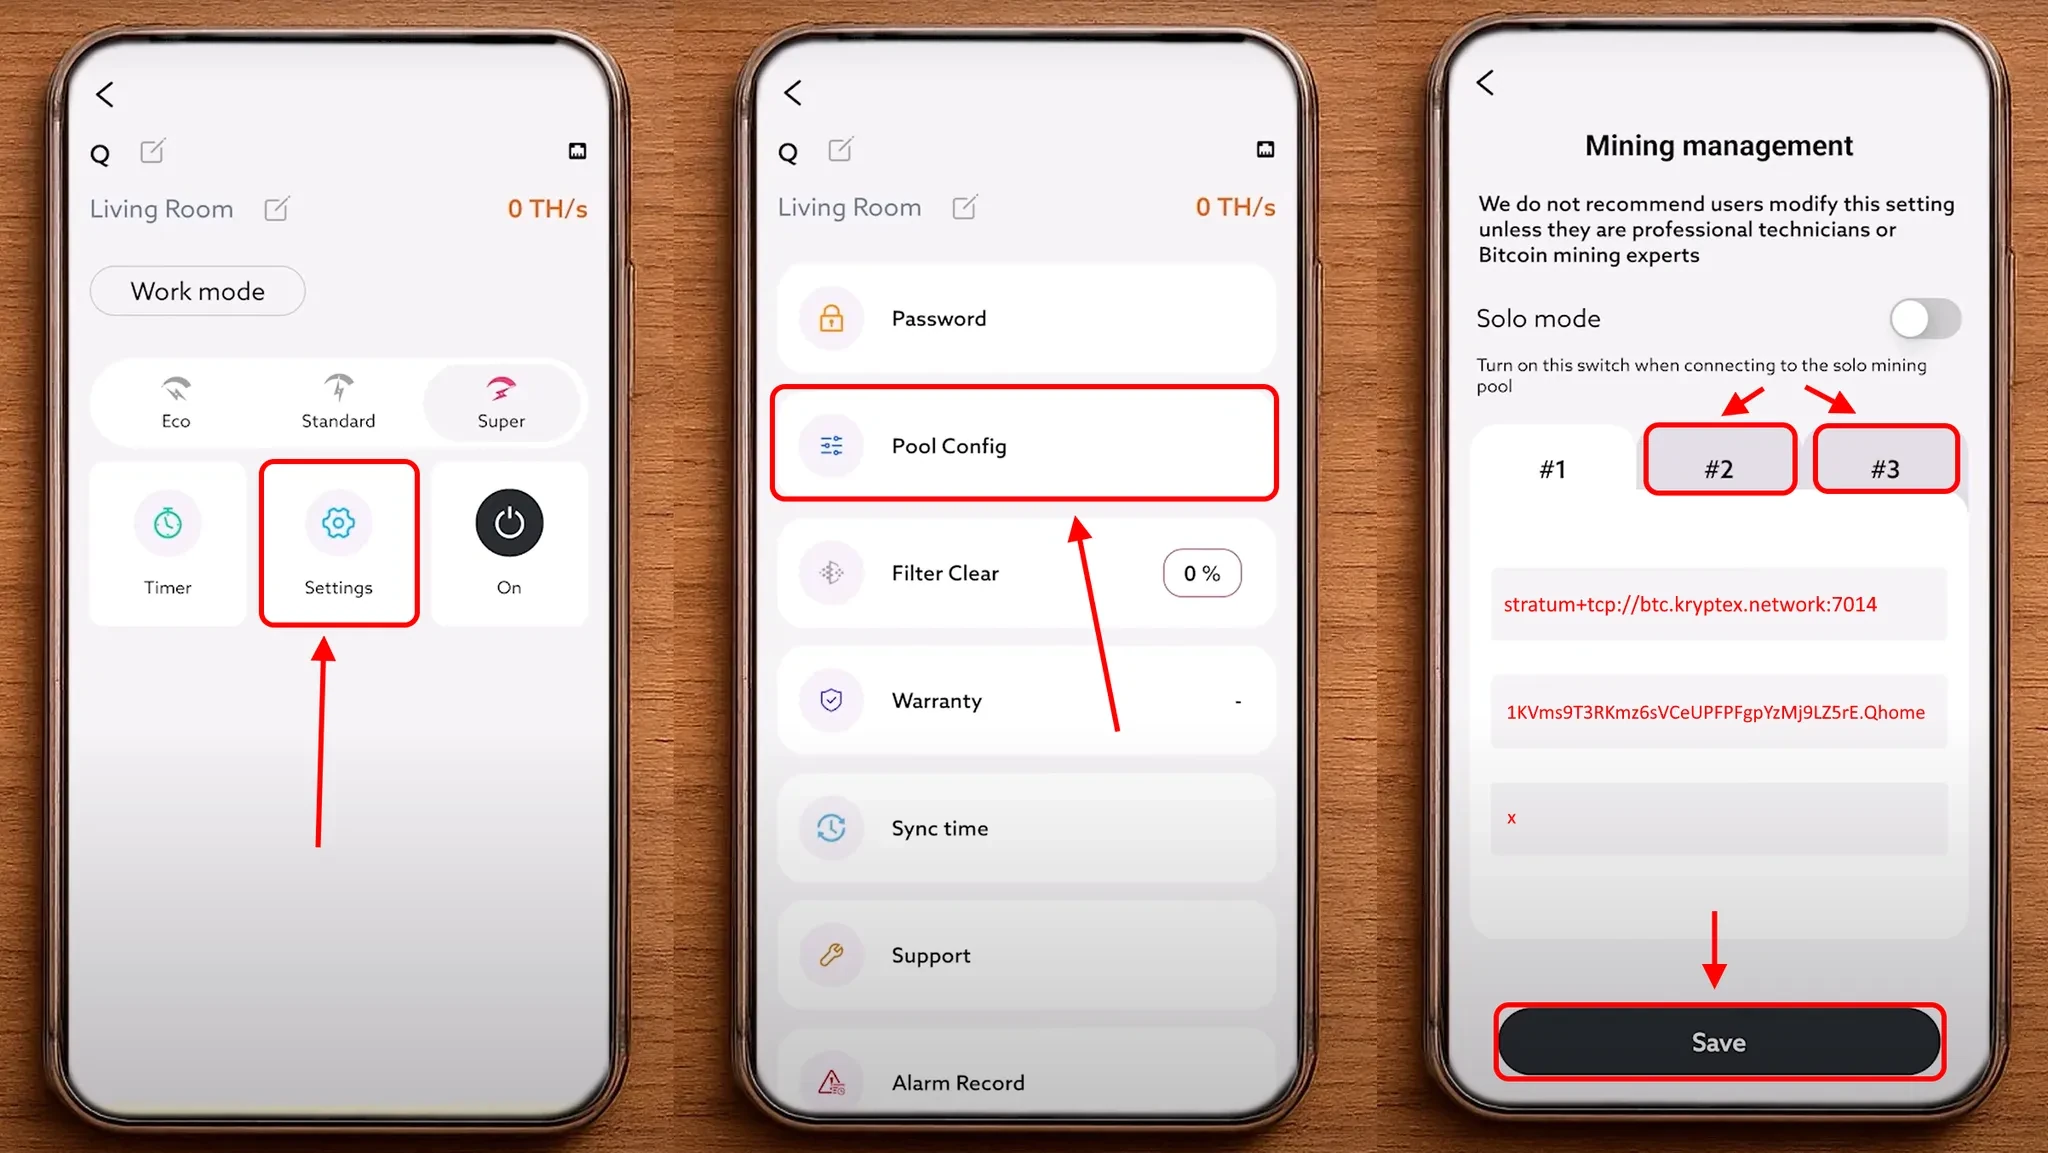
Configure Pool Settings:
In the app, navigate to the “Settings” → “Pool Config” section.
Enter the pool information (pool address, wallet address, and worker name).
Coin Pool Address — Pool Address Worker — Wallet Address and Worker Password BTC+FB stratum+tcp://btc.kryptex.network:7014orstratum+tcp://btc-eu.kryptex.network:7014BTC_WALLET_ADDRESS.WORKER_NAMExor leave blankFB stratum+tcp://fb.kryptex.network:7013orstratum+tcp://fb-eu.kryptex.network:7013FB_WALLET_ADDRESS.WORKER_NAMExor leave blankXEC stratum+tcp://xec.kryptex.network:7036orstratum+tcp://xec-eu.kryptex.network:7036XEC_WALLET_ADDRESS.WORKER_NAMExor leave blankDGB stratum+tcp://dgb.kryptex.network:7037orstratum+tcp://dgb-eu.kryptex.network:7037DGB_WALLET_ADDRESS.WORKER_NAMExor leave blankBCH stratum+tcp://bch.kryptex.network:7015orstratum+tcp://bch-eu.kryptex.network:7015BCH_WALLET_ADDRESS.WORKER_NAMExor leave blankMiner Name — Specify wallet and worker name in the format
1KVms9T3RKmz6sVCeUPFPFgpYzMj9LZ5rE.Qhomewhere:1KVms9T3RKmz6sVCeUPFPFgpYzMj9LZ5rEis your wallet address.Qhomeis the name of your ASIC, written in Latin characters or numbers.
Make sure to complete all three cells with the settings of the same pool. Click “Save” to save the settings and restart the ASIC.
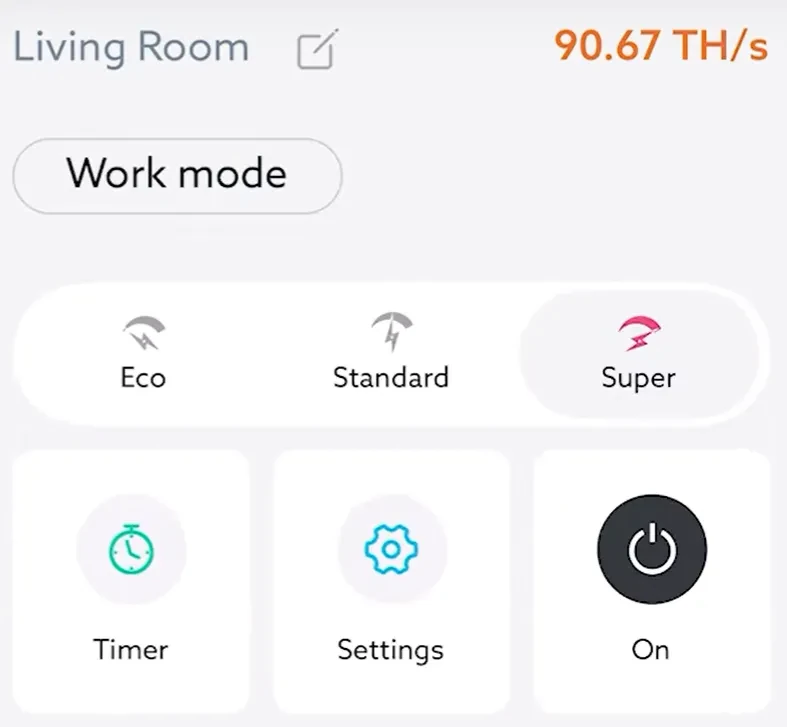
Verify ASIC Operation:
After the reboot is complete, wait a few minutes, then open your ASIC in the app. You’ll see its operating mode and current hashrate.
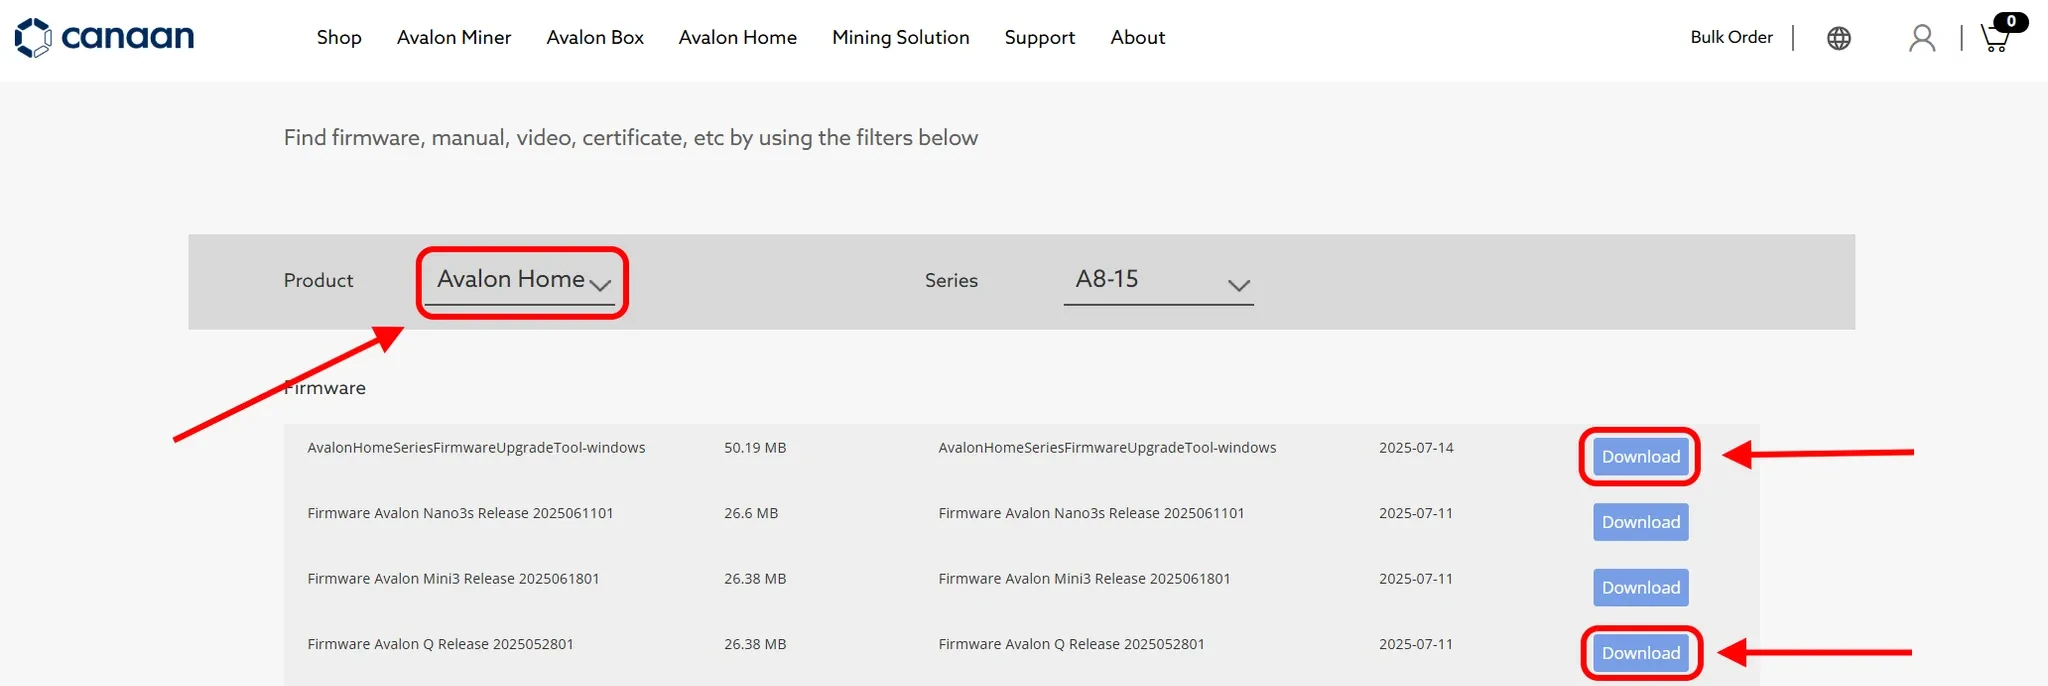
Canaan Avalon Q Home Firmware Update
If needed, you can update or change the firmware by following these steps:
Go to the developer’s support page and open the firmware download section: https://www.canaan.io/support/file_download
Select your ASIC model series — Avalon Home.
Download the firmware utility and the firmware file by clicking “Download”
Extract both the utility archive and the firmware archive to a convenient location on your PC, such as the desktop
Watch the video tutorial included in the utility archive for instructions on connecting the ASIC to your PC and updating the firmware
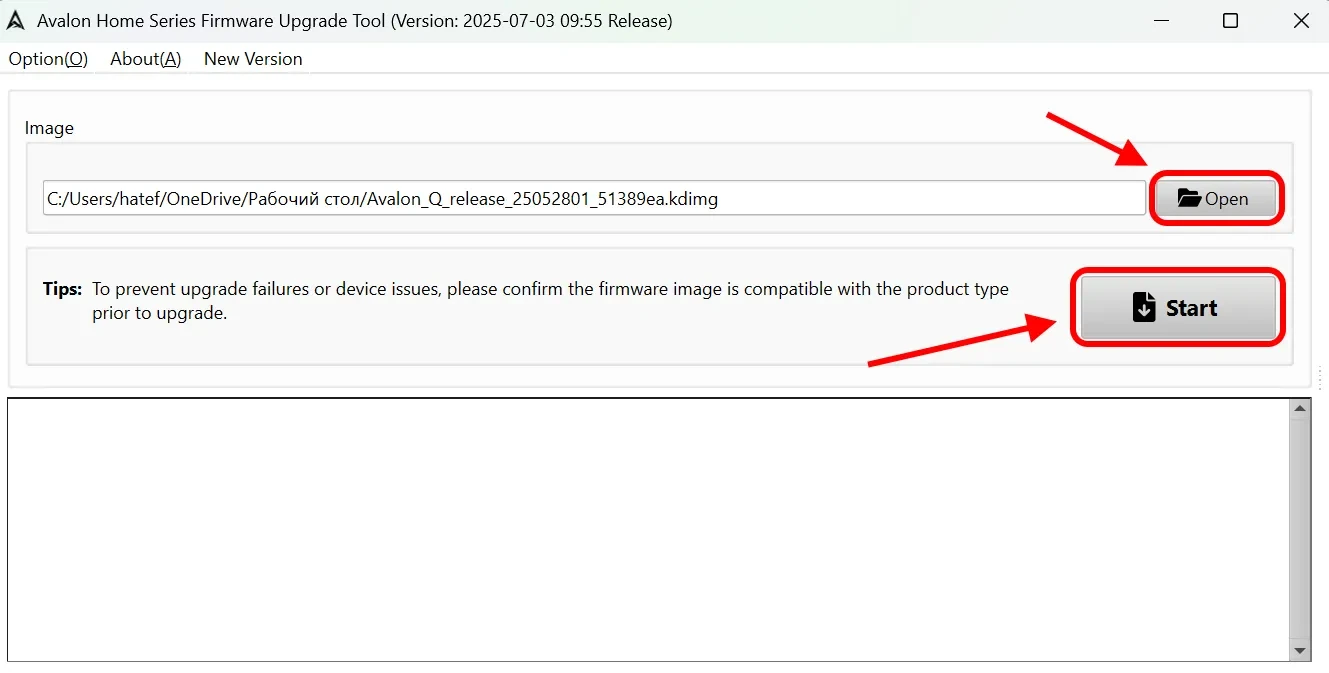
Connect the ASIC to your PC, install the drivers included with the utility, launch the firmware utility, and click “Open” to select the firmware file from your PC
Click “Start” and wait for the firmware update to complete. Do not disconnect the ASIC during the update process.