How to create Xelis (XEL) wallet
17/04/2026
Xelis (XEL) is a privacy-focused Layer-1 cryptocurrency — a Proof-of-Work BlockDAG written from scratch in Rust, with homomorphic encryption of balances and transfer amounts and native smart contracts (XVM + Silex, live since December 2025). See the Xelis glossary entry for background.
Xelis (XEL) can be traded on MEXC (primary venue), CoinEX, XT.com, NonKYC, and others.
We will discuss two methods for creating a Xelis coin wallet:
- Exchange.
- Online wallet.
We do not recommend mining to exchange. If you choose mining to an exchange, you do so at your own risk. Not your keys — not your crypto!
Notes:
- The Xelis (XEL) coin has one abnormality — your wallet address may change over time. In such a way, the coin increases the protection and anonymity of wallets — do not worry about it. Even if your wallet address has changed, you can continue mining or receive payments to your first address, which you received immediately after registration. The coins will also go to your wallet, and you will see them in wallet transactions.
- Can I change it? Unfortunately, or fortunately — no. We need to accept this feature and the fact that the addresses in the wallet will change.
- We recommend keeping the primary wallet address safe to avoid confusion. Use the first address for mining and use the refreshed address for daily transactions. Do not change the address in the miner, as the accrual on the pool will start over again!
How to Register a XEL Wallet on the Exchange
This method is convenient because you don’t need to register multiple wallets. Everything is stored on one exchange, and all coins and wallets are easily accessible. You can immediately exchange or trade your cryptocurrency without any hassle.
Some cons: The security of all your exchange wallets depends on the security of your exchange account. To ensure the utmost security, make sure to secure your email, exchange account, and enable two-factor authentication (2FA).
Keep in mind that sometimes exchanges change the address for depositing cryptocurrencies. The pool will not be able to change the address to which you are mining, so some of the cryptocurrency may be lost.
Sign up on any exchange that supports trading Xelis (in this example, we will use MEXC).
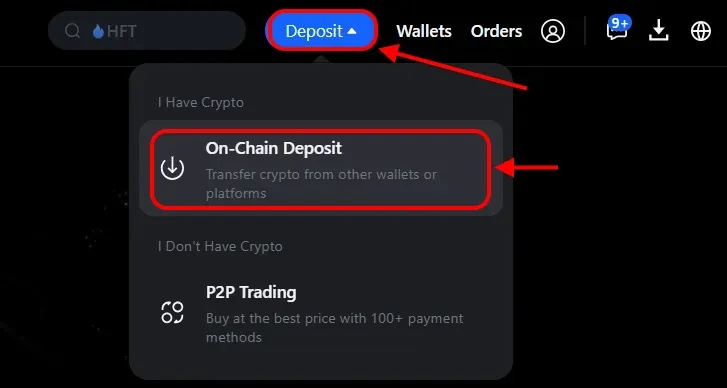
Once registered, click on “Deposit” icon, then choose “On-Chain Deposit.”
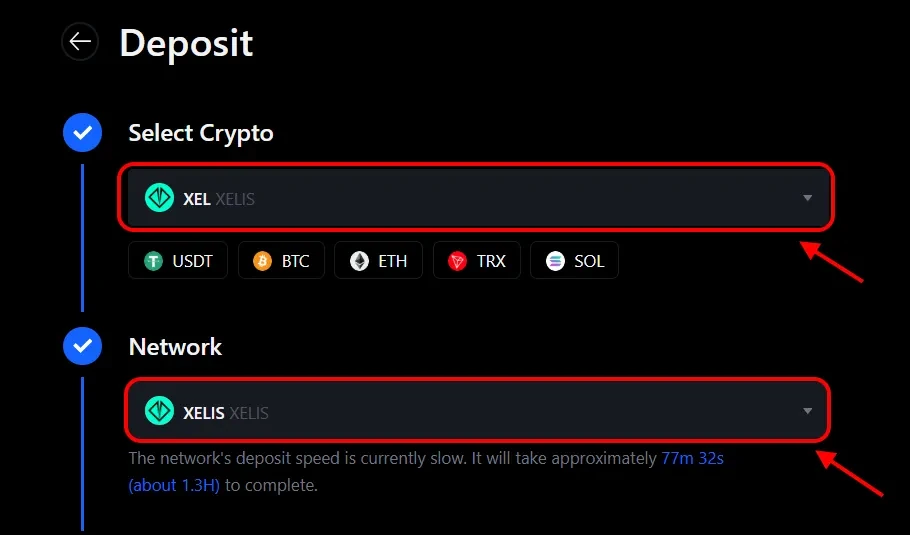
You will be taken to the deposit page. From the list of coins, select “XEL”, and from the list of networks, choose “XELIS.”
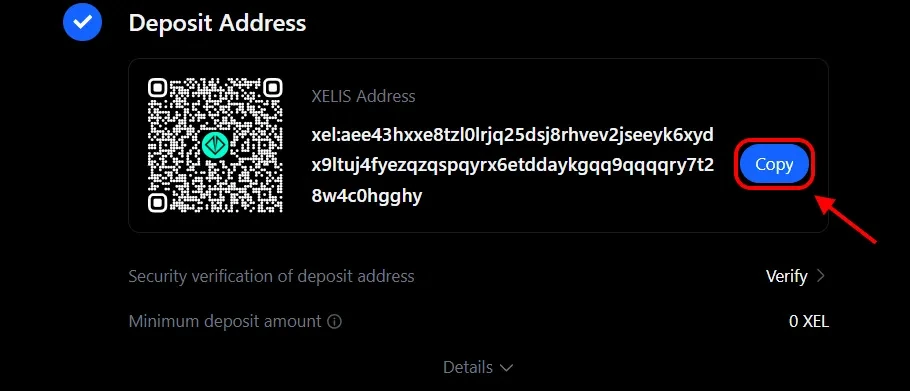
That’s it! You now have a wallet address for deposits to the exchange. Click the icon next to the address to copy it. Use this address for mining or receiving coins to your account.
How to Register an Online Xelis Wallet
This method is convenient for those who prefer not to keep all their money in one place or immediately exchange cryptocurrency. An online wallet, protected by a password and a seed phrase, will store your coins until you transfer them to another address.
Some cons: The security of your wallet relies on the security of your computer and the safety of the seed phrase. To ensure maximum security, protect your computer, create a strong login password for your wallet, and securely store your seed phrase.
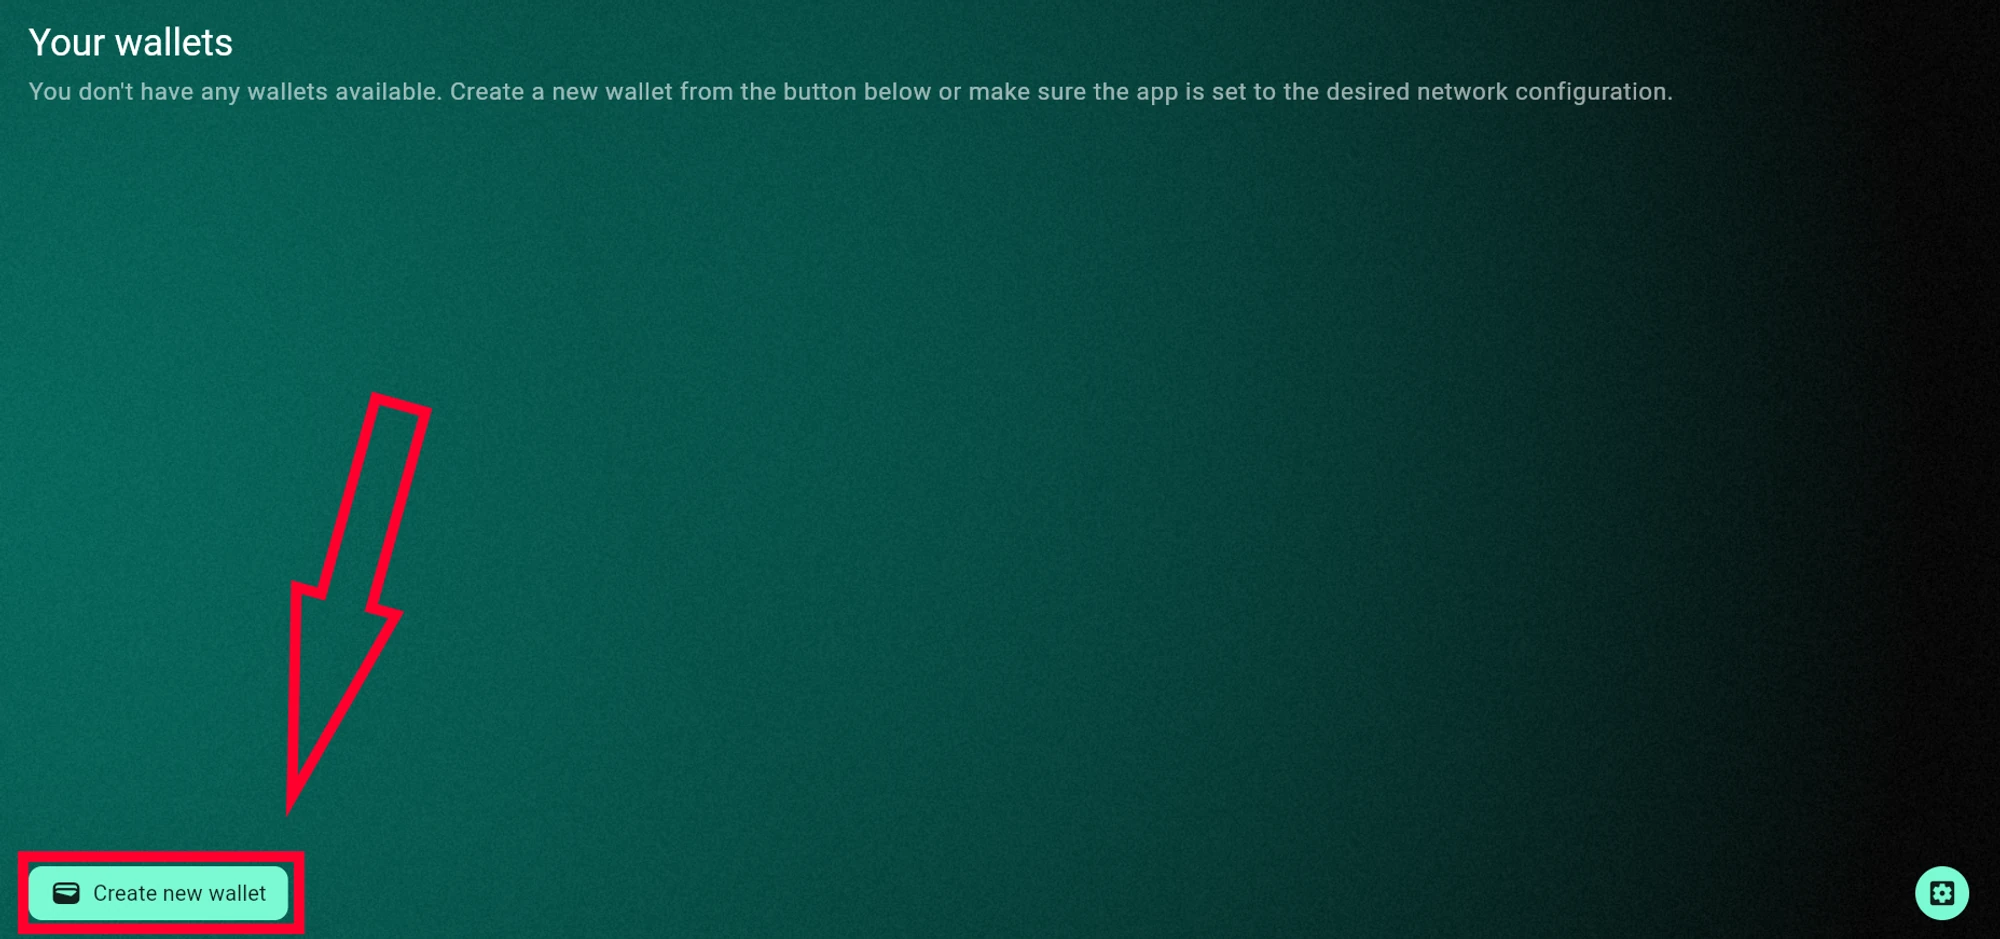
Open the wallet’s website https://wallet.xelis.io/#/open_wallet
The first time the wallet can load up to 5 minutes. Please wait until the wallet loads and saves the necessary data in the cache.
Click “Create new wallet”
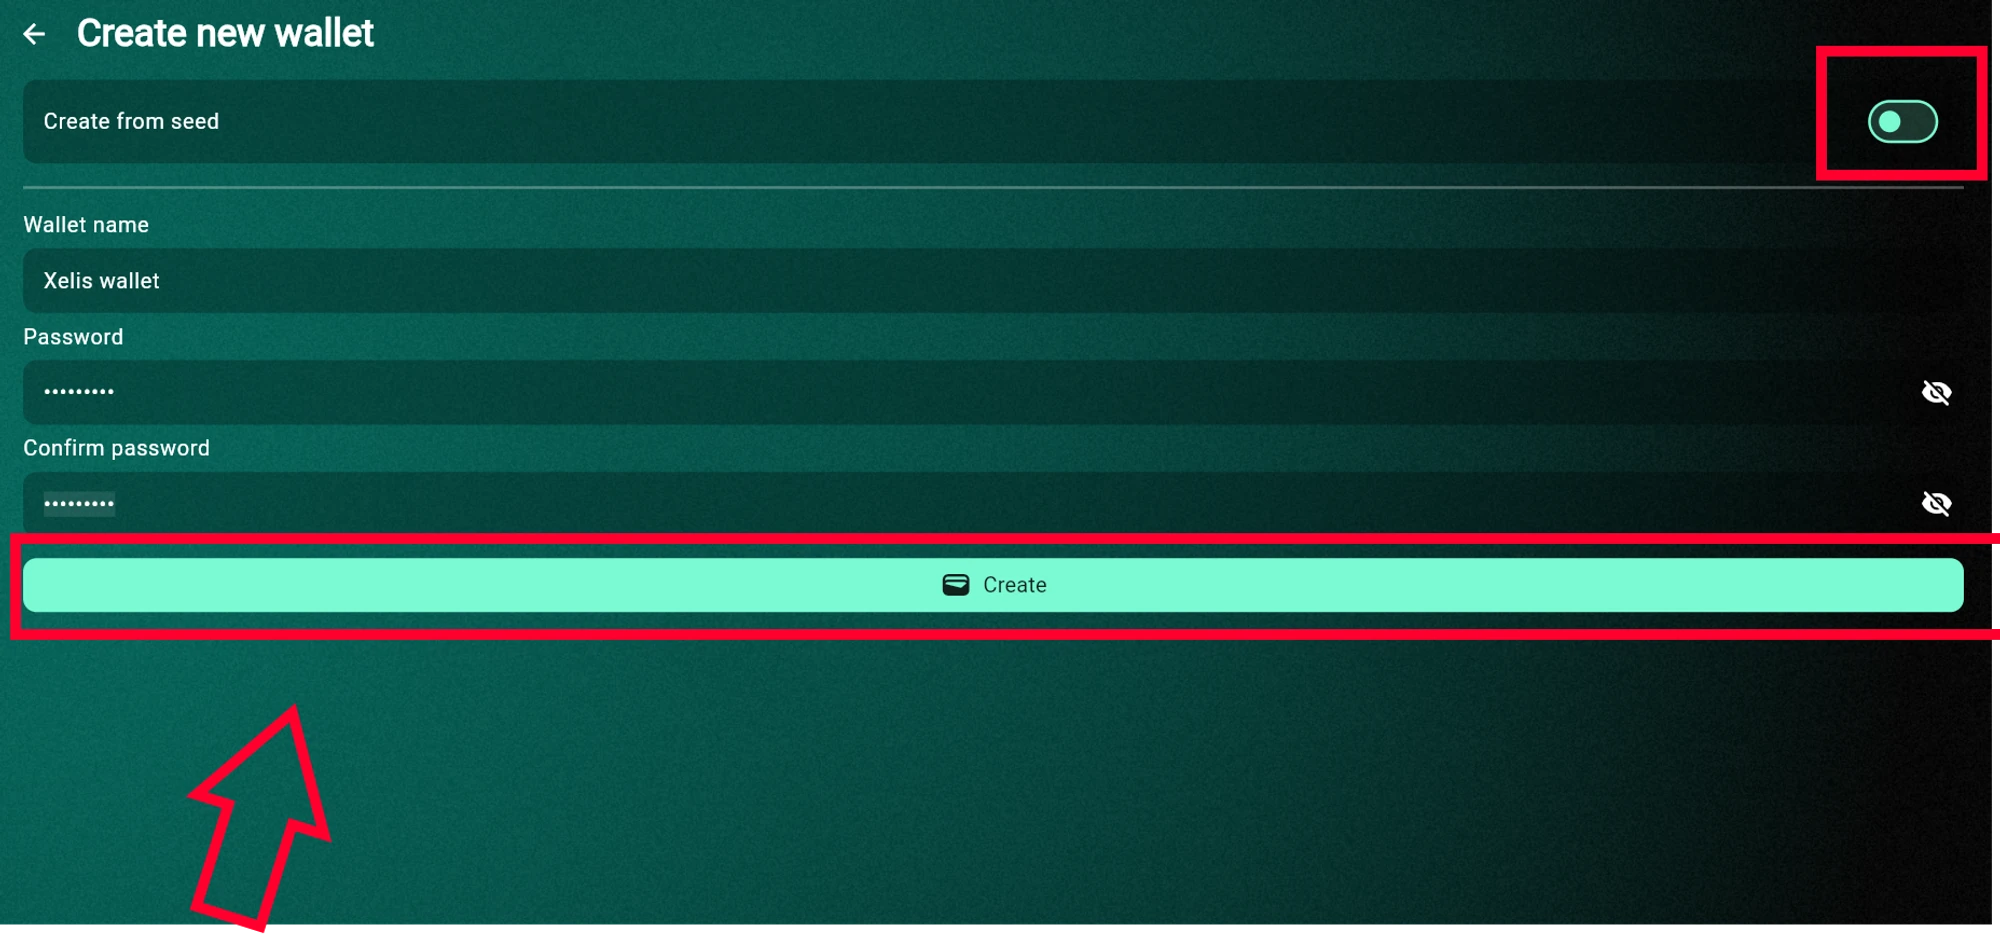
The wallet asks you to create the name and the password for your wallet. Generate reliable password with your browser or use the password generator. Enter the password, confirm it, and click “Create”.
If you want to import an existing wallet, then be sure to check the box next to “Create from seed” and insert the seed phrase.
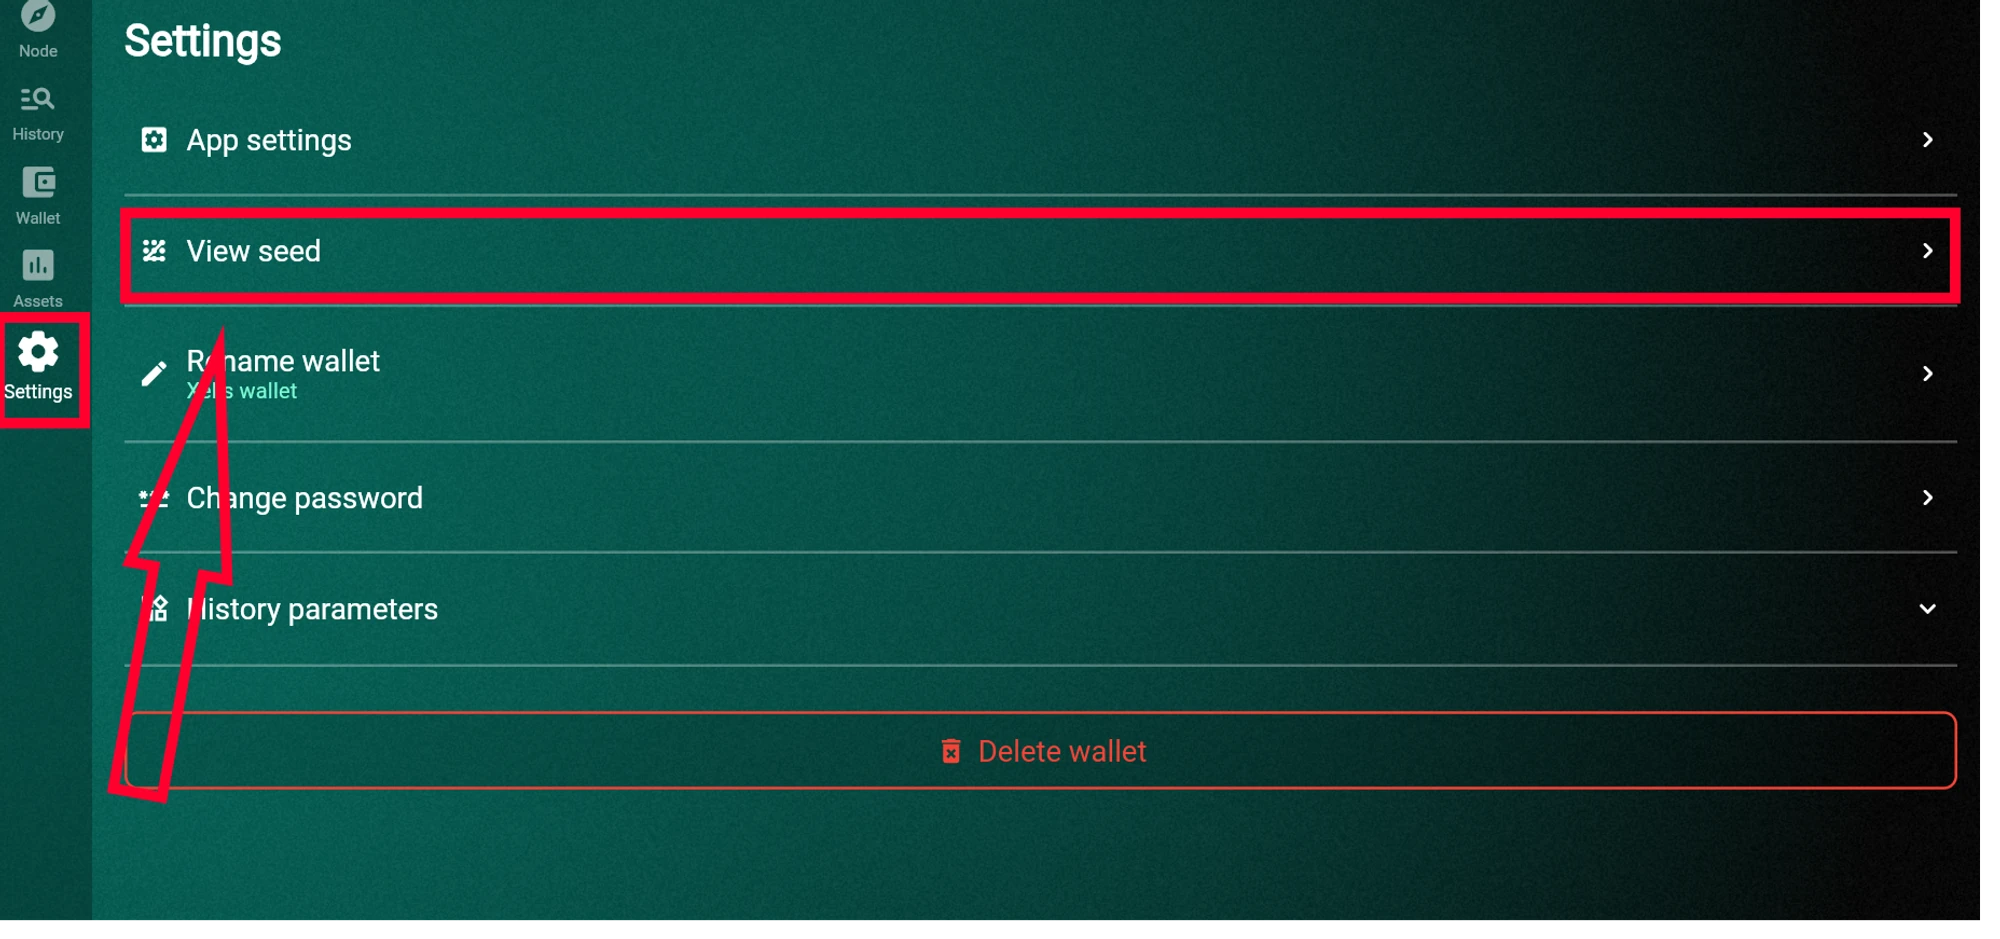
Once wallet created, go to the “Settings” section and click on the “View seed” button. Enter the password for the wallet that you came up with.
You will receive a secret phrase — a combination of words. Safely keep them in the same order as they appear on your screen. Losing them means losing access to your wallet!
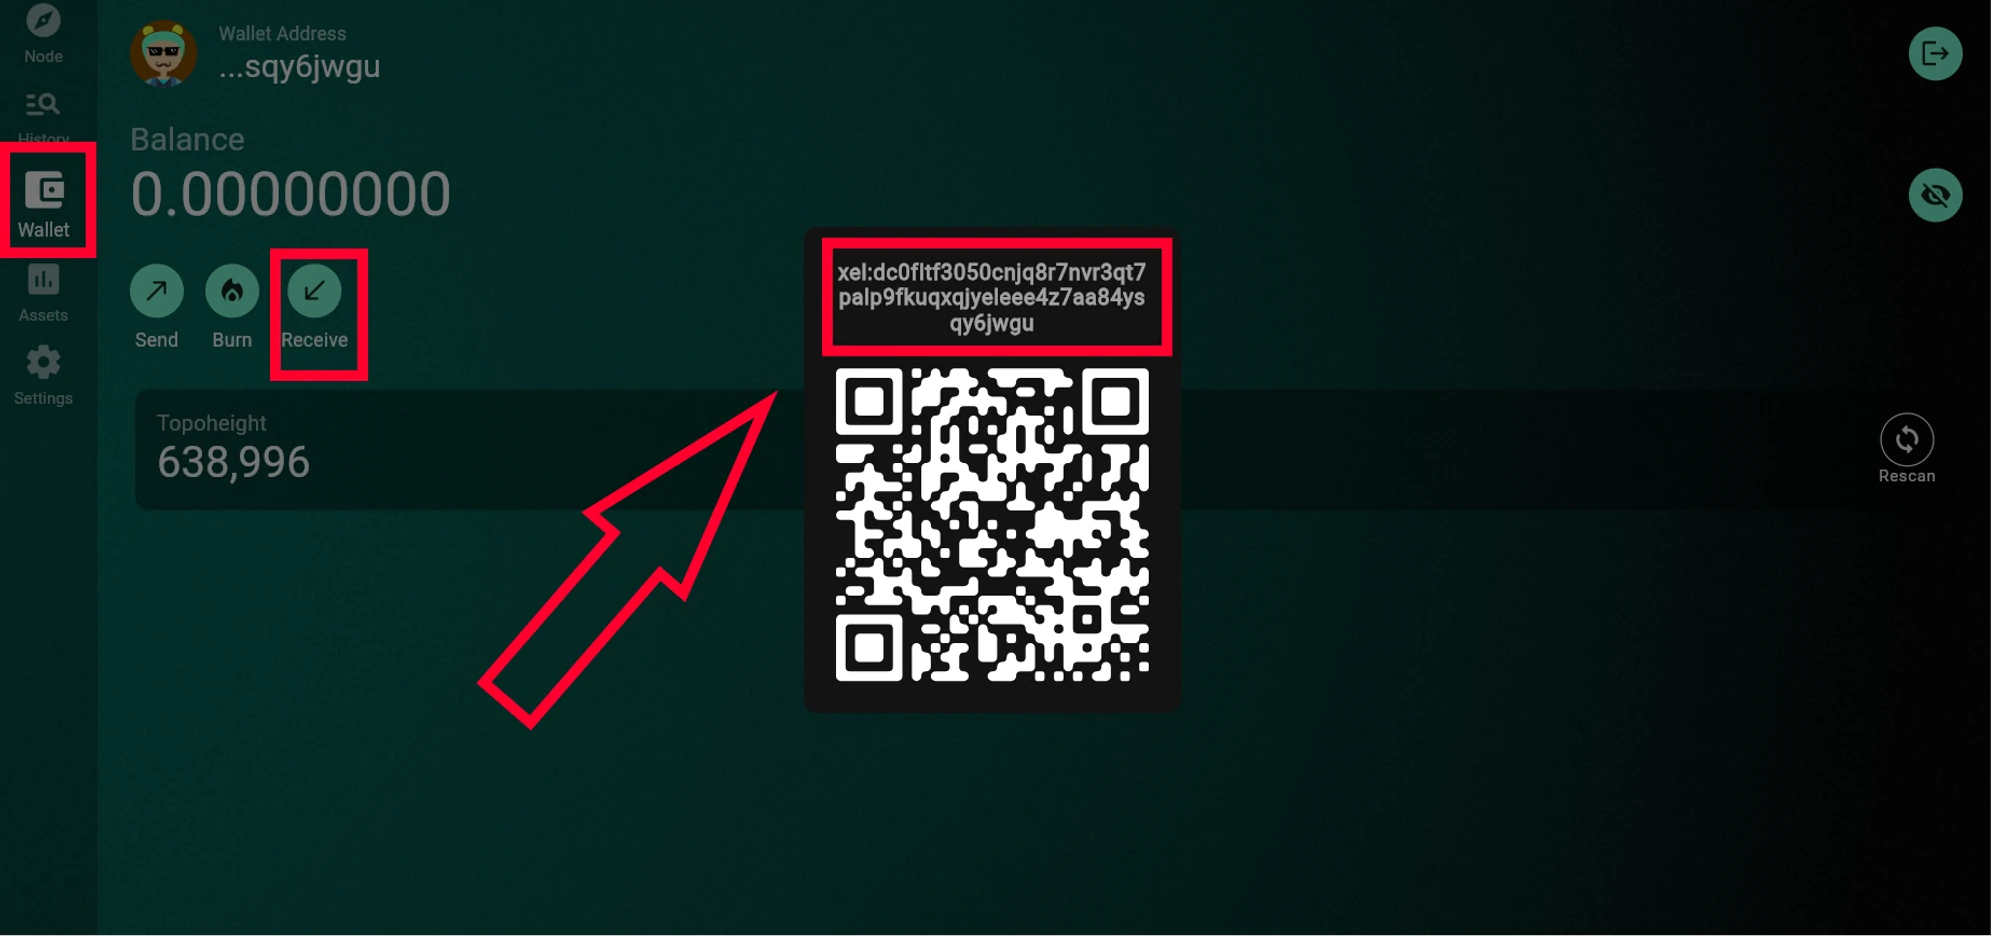
Get the wallet address. Go to the “Wallet” section and click on the “Receive” button. Copy the address and use it use it for mining or receiving coins to your wallet.