How to mine IRON FISH
17/04/2023
Video how to mine IRON FISH on Windows, HiveOS, RaveOS 👇
Step one — register a wallet
How to register a wallet: https://pool.kryptex.com/en/articles/ironfish-wallet-en
Or you can mine directly to the exchanges. Here is detailed instruction how to mine to the exchange: https://pool.kryptex.com/en/articles/mining-ironfish-with-memo-en
Quick-start mining settings
IRON FISH Pool — https://pool.kryptex.com/iron
Pool address: iron.kryptex.network:7017
Wallet format: WALLET_ADDRESS.WORKER_NAME
Almost any graphics card is suitable for mining IRON FISH.
Step two — download and set up the miner
If you are an experienced miner, use our guide on “How to start mining on Kryptex pools”. Don't waste a second of your time. If you are a beginner and have never set up mining on your own, this guide is for you!
Download a miner for IRON FISH coin. We recommend using SRBMiner(AMD, Nvidia, Intel), lolminer(AMD, Nvidia) or Rigel(Nvidia). We will provide an example of the SRBMiner settings to use.
Antiviruses don't like miners. During the download, your antivirus or firewall may warn of danger - they are reinsured because they do not know if you are downloading the miner consciously or not. Allow the download of the file, or pause the antivirus while the file is downloading.
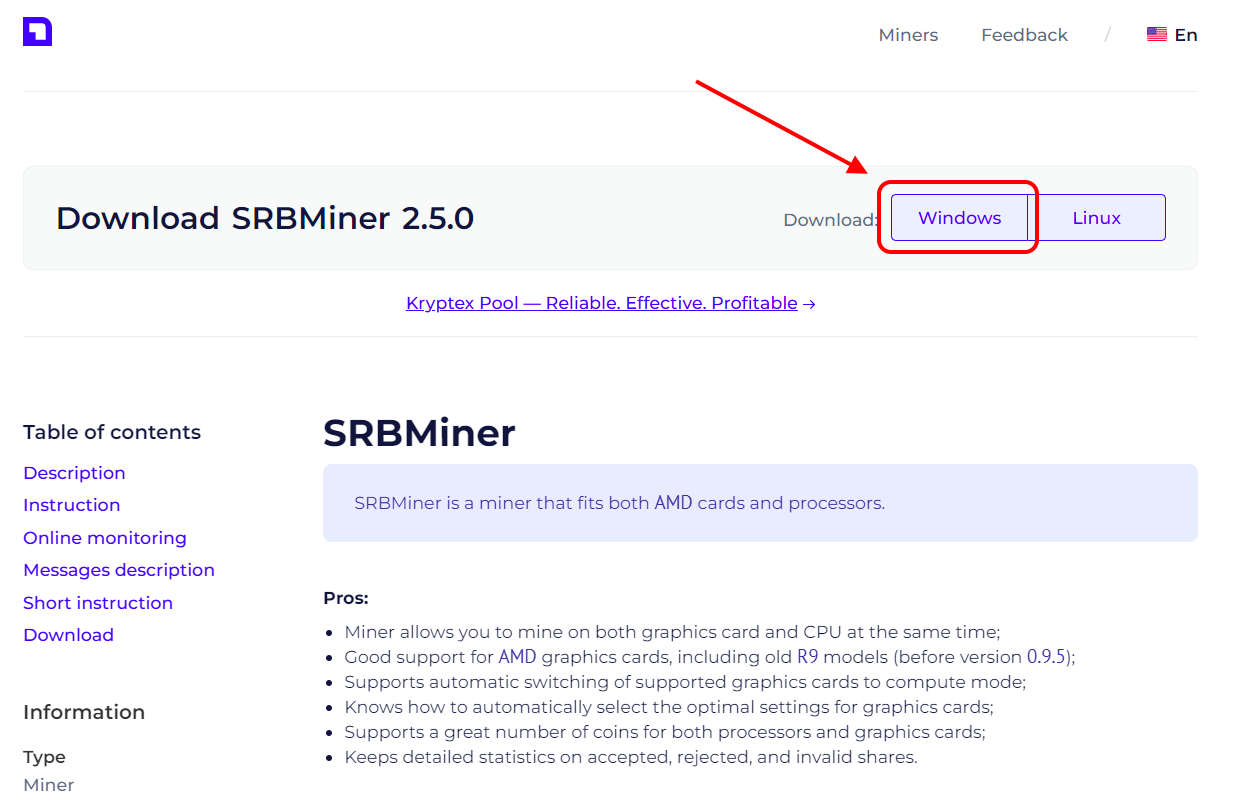
Extract the miner’s archive to a folder convenient for you, for example, to your desktop.
- Add miner files to your antivirus exclusion list if, for some reason, it decides to block or delete them. Disable PUA protection. Do not add the entire miner folder, but only specific files. Otherwise, if an actual virus gets into the miner folder, the antivirus will not be able to protect you.
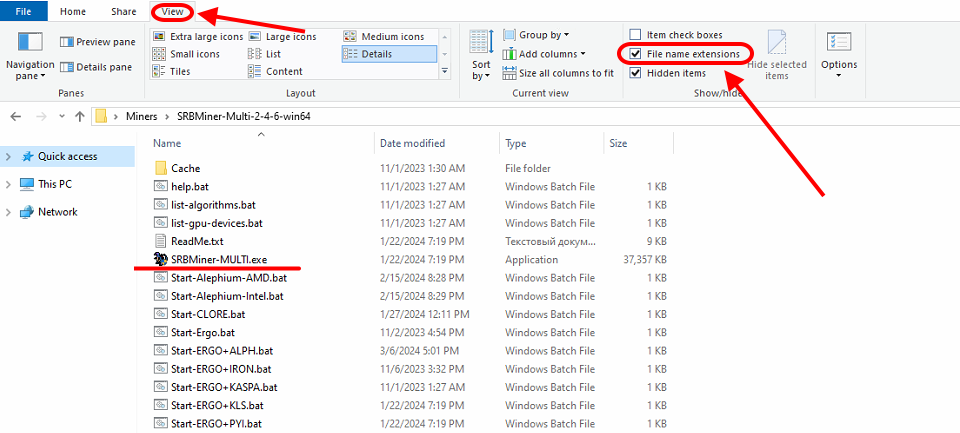
Open the folder with the miner, and turn on the display of file extensions:
In the explorer window, click "View”;
Tick “File name extensions” option.
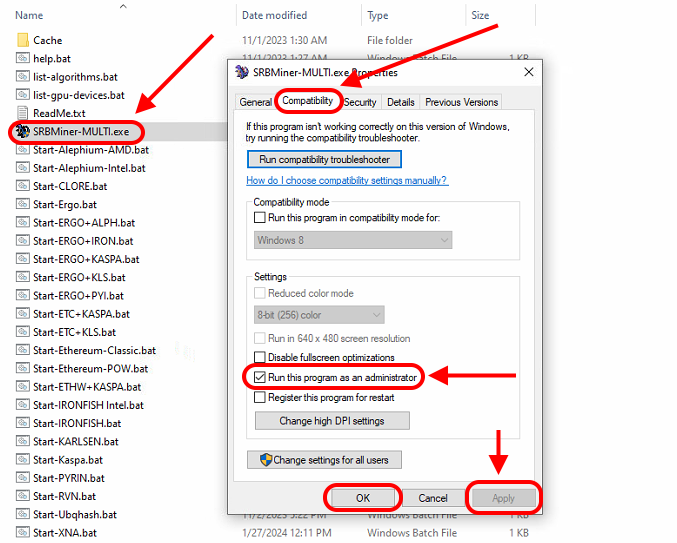
Allow the miner to run with administrative privileges:
Right Mouse Click
SRBMiner-MULTI.exefileChoose “Properties”
Choose “Compatibility” cell
Tick “Run this program as an administrator”
Press “Apply” and “OK”
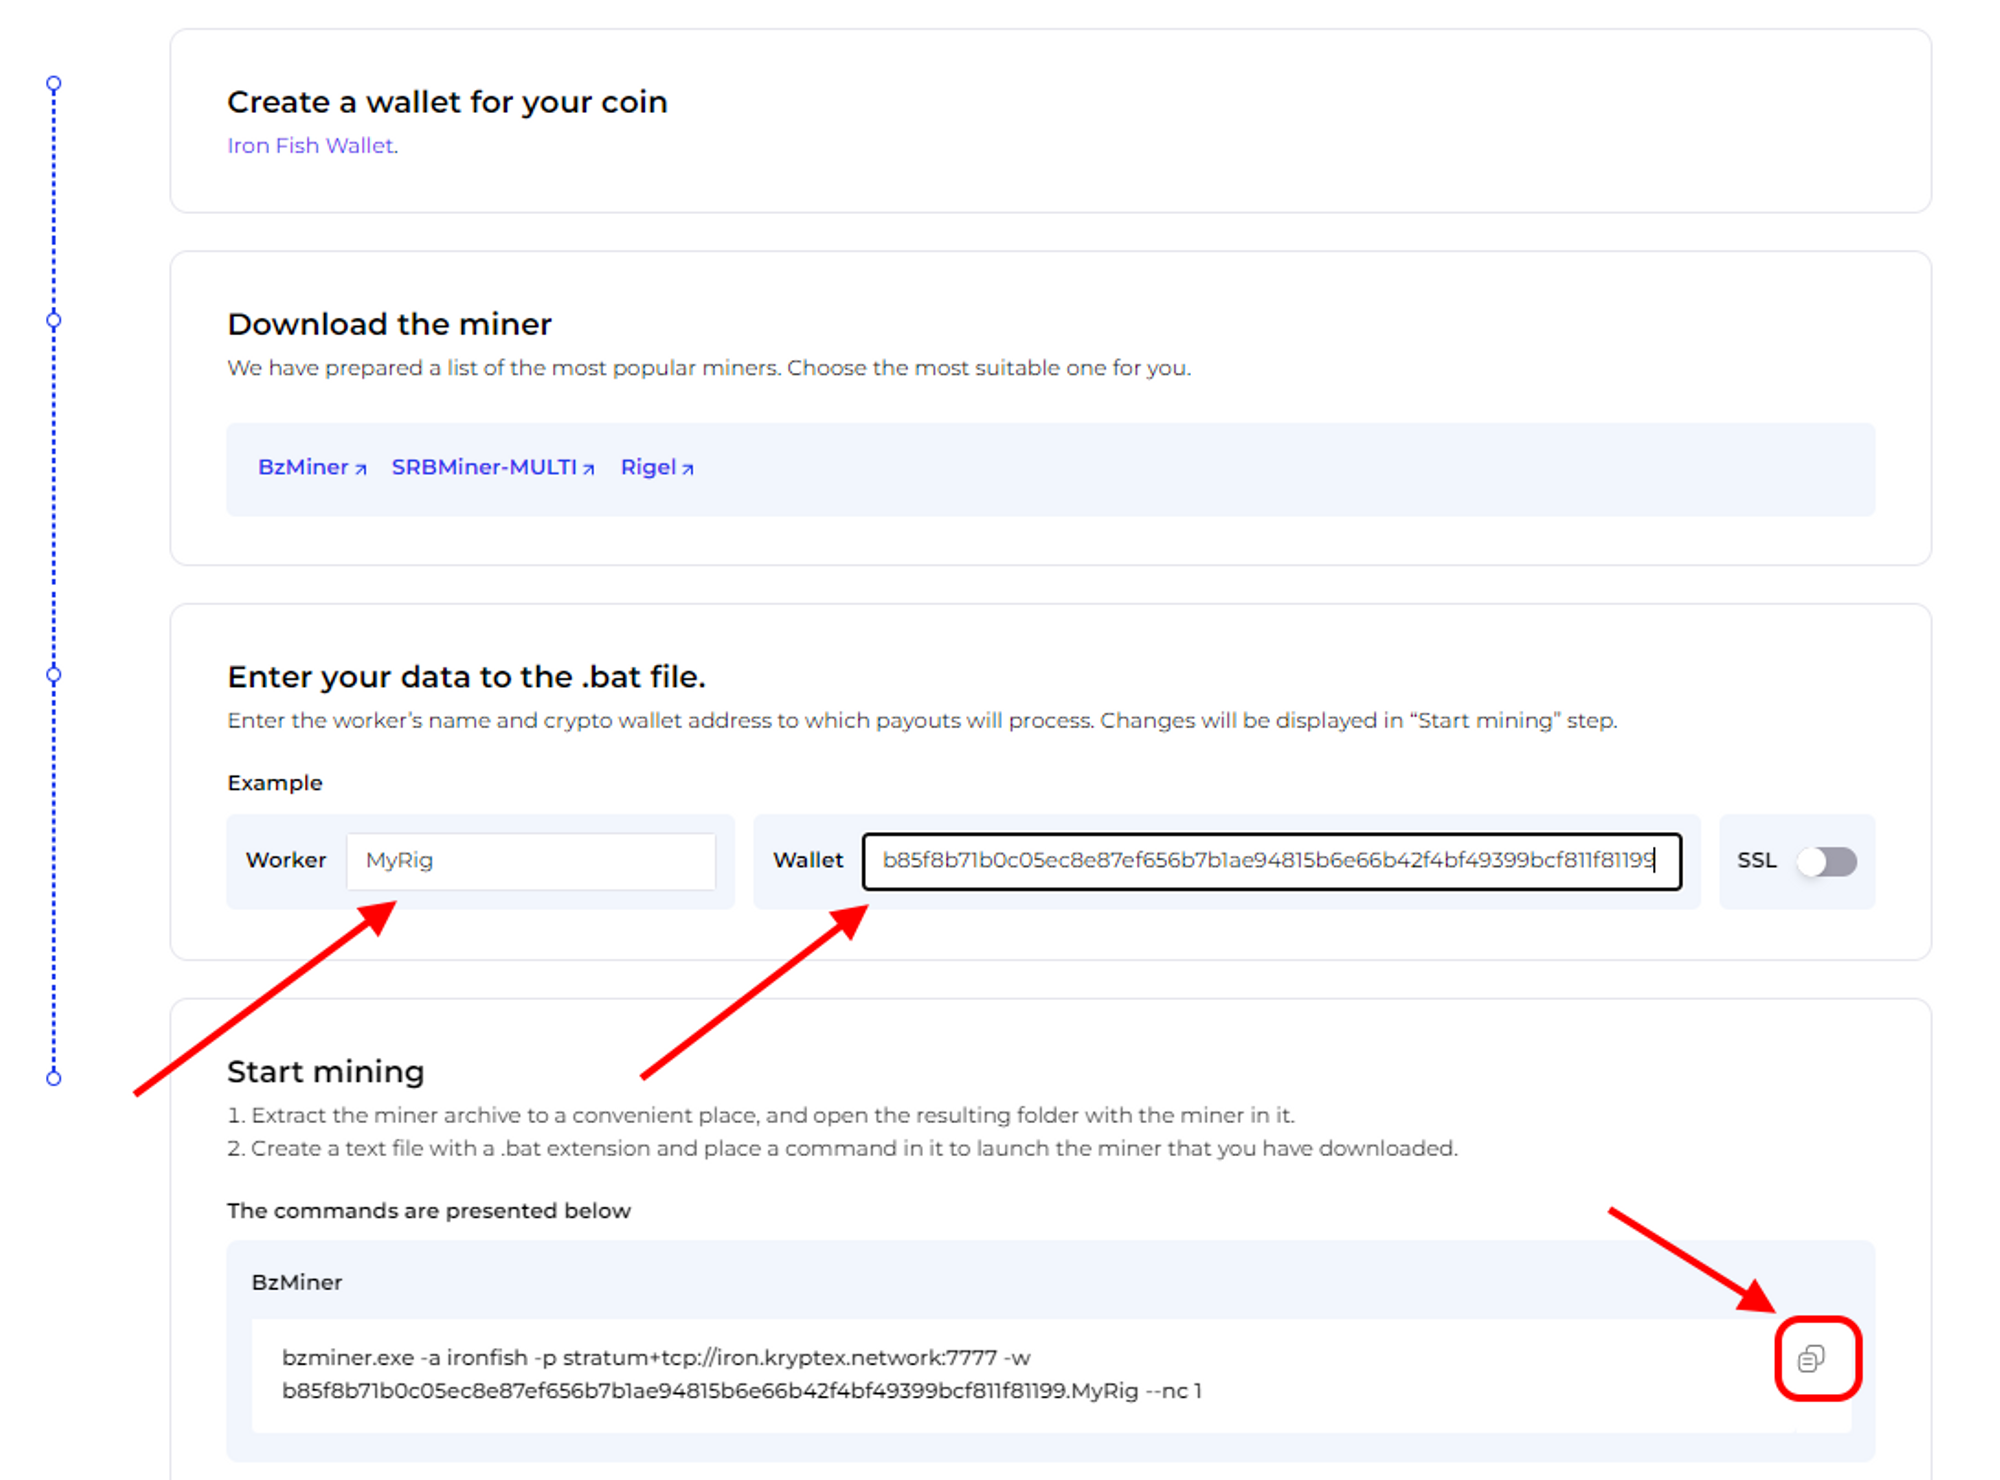
Open the IRON pool page https://pool.kryptex.com/iron
In the “Wallet address” field, enter the wallet address that you registered for earlier. Wallet address example:
b85f8b71b0c05ec8e87ef656b7b1ae94815b6e66b42f4bf49399bcf811f81199In the “Worker name” cell, enter the name of the mining rig that will mine on the pool, for example,
MyRig. Please note that the name is entered only in Latin letters, or numbers, without spaces.Copy the finished command from the cell “BAT file example” by pressing special “Copy” button.
In the folder with the miner, create a plain text document
.txtwith the Notepad application. Let's call itKryptex IRON Pool. Then, open the file, and paste the copied sample BAT file into the document.Save the file, and make it a BAT file. Rename your file’s
.txtextension into.bat
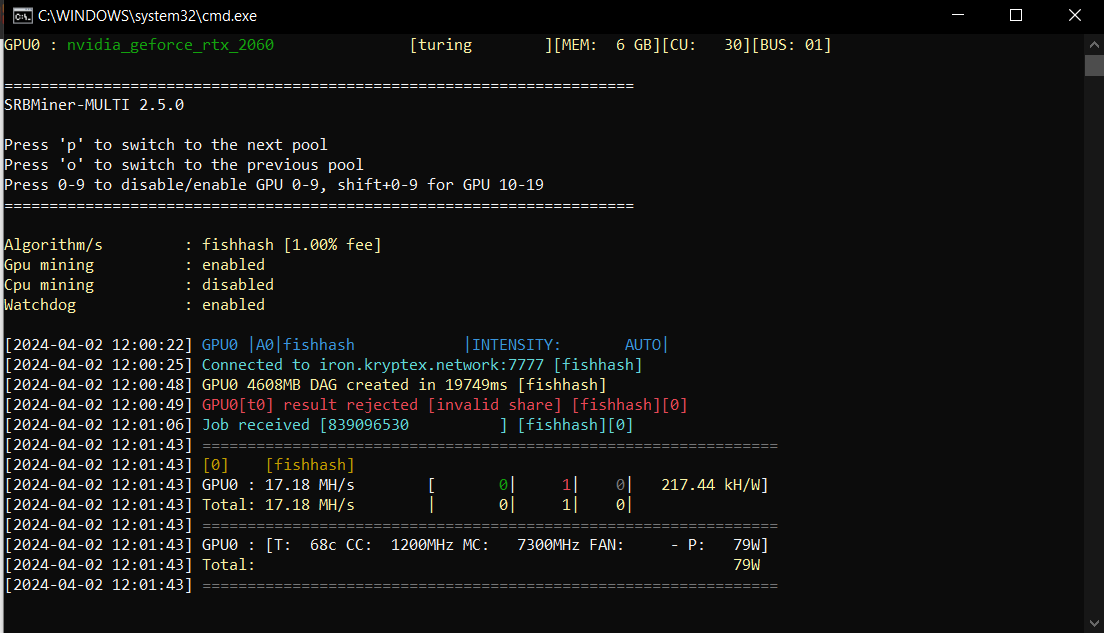
Run the BAT file and mining will start!
If, at the time of launch, your antivirus or firewall may display a message about a suspicious file or a request to provide access to the Internet — allow the access and add the miner's files to the exceptions.
Step three — monitor the work of your miner on the pool
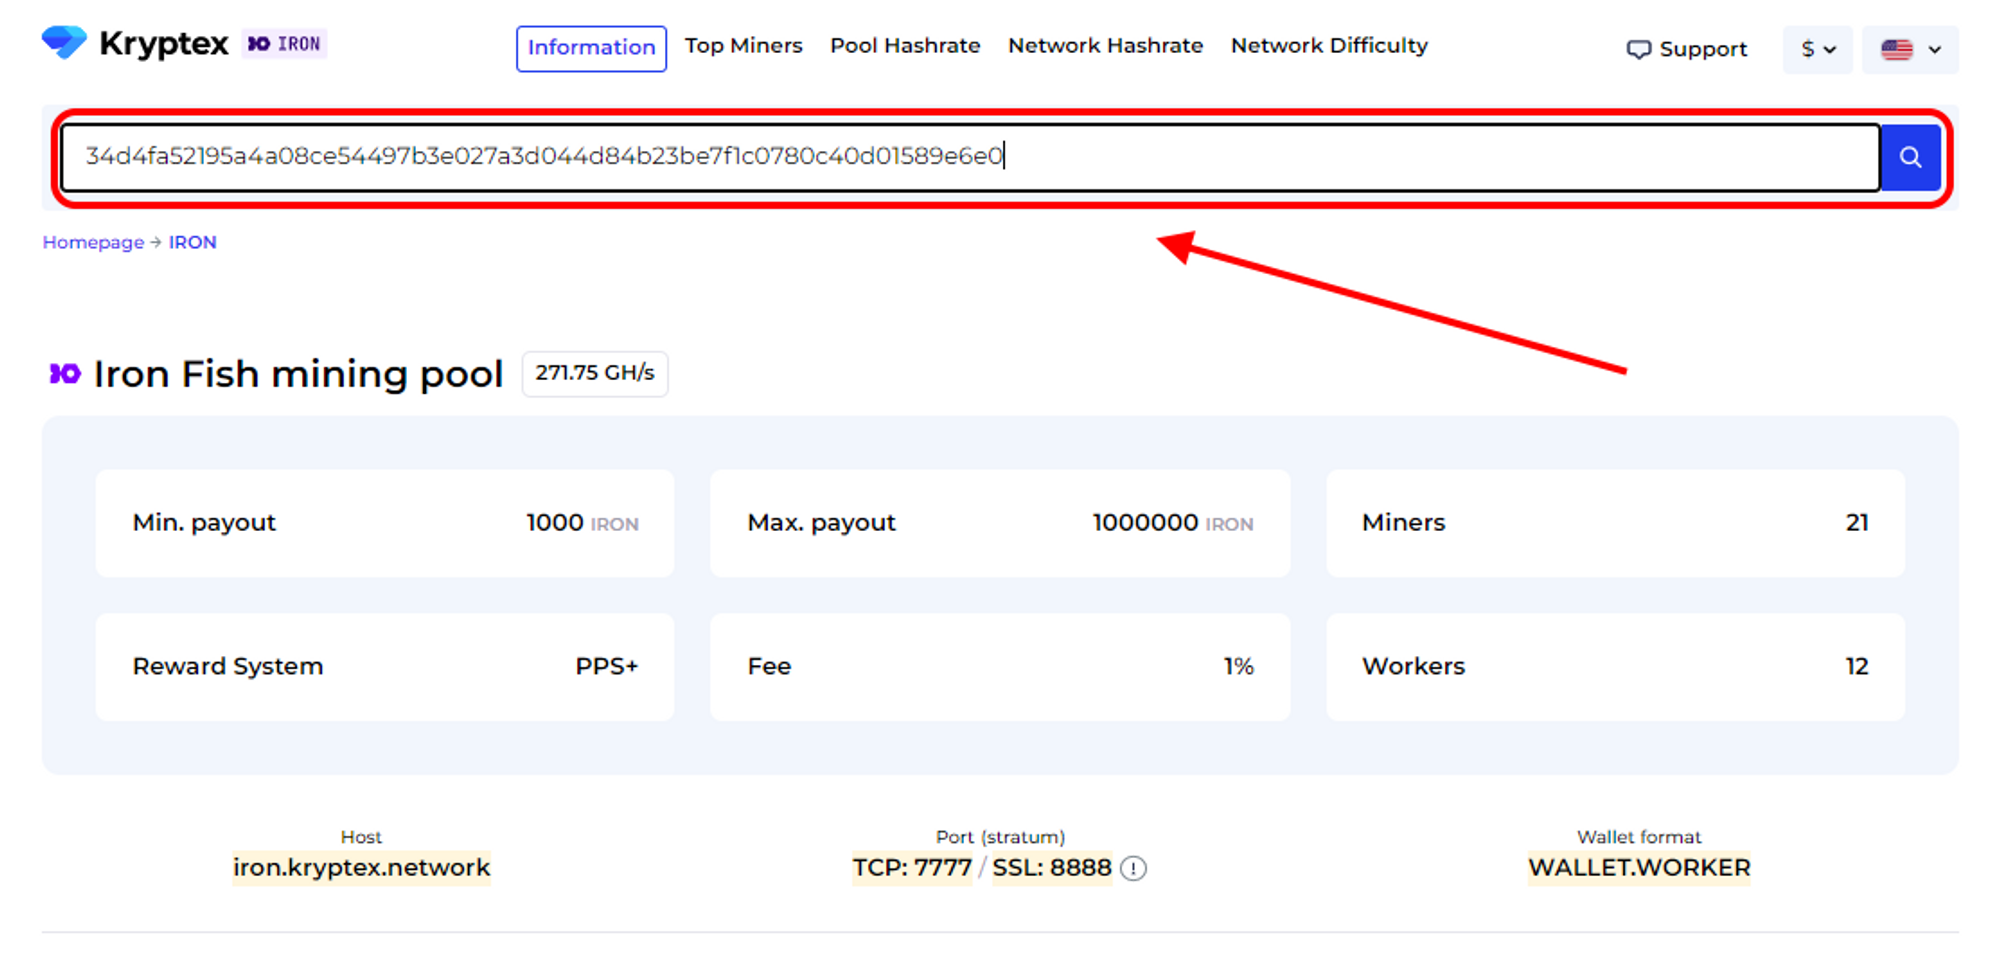
Open IRON pool page https://pool.kryptex.com/iron
Paste your wallet address into the search field, and press Enter.
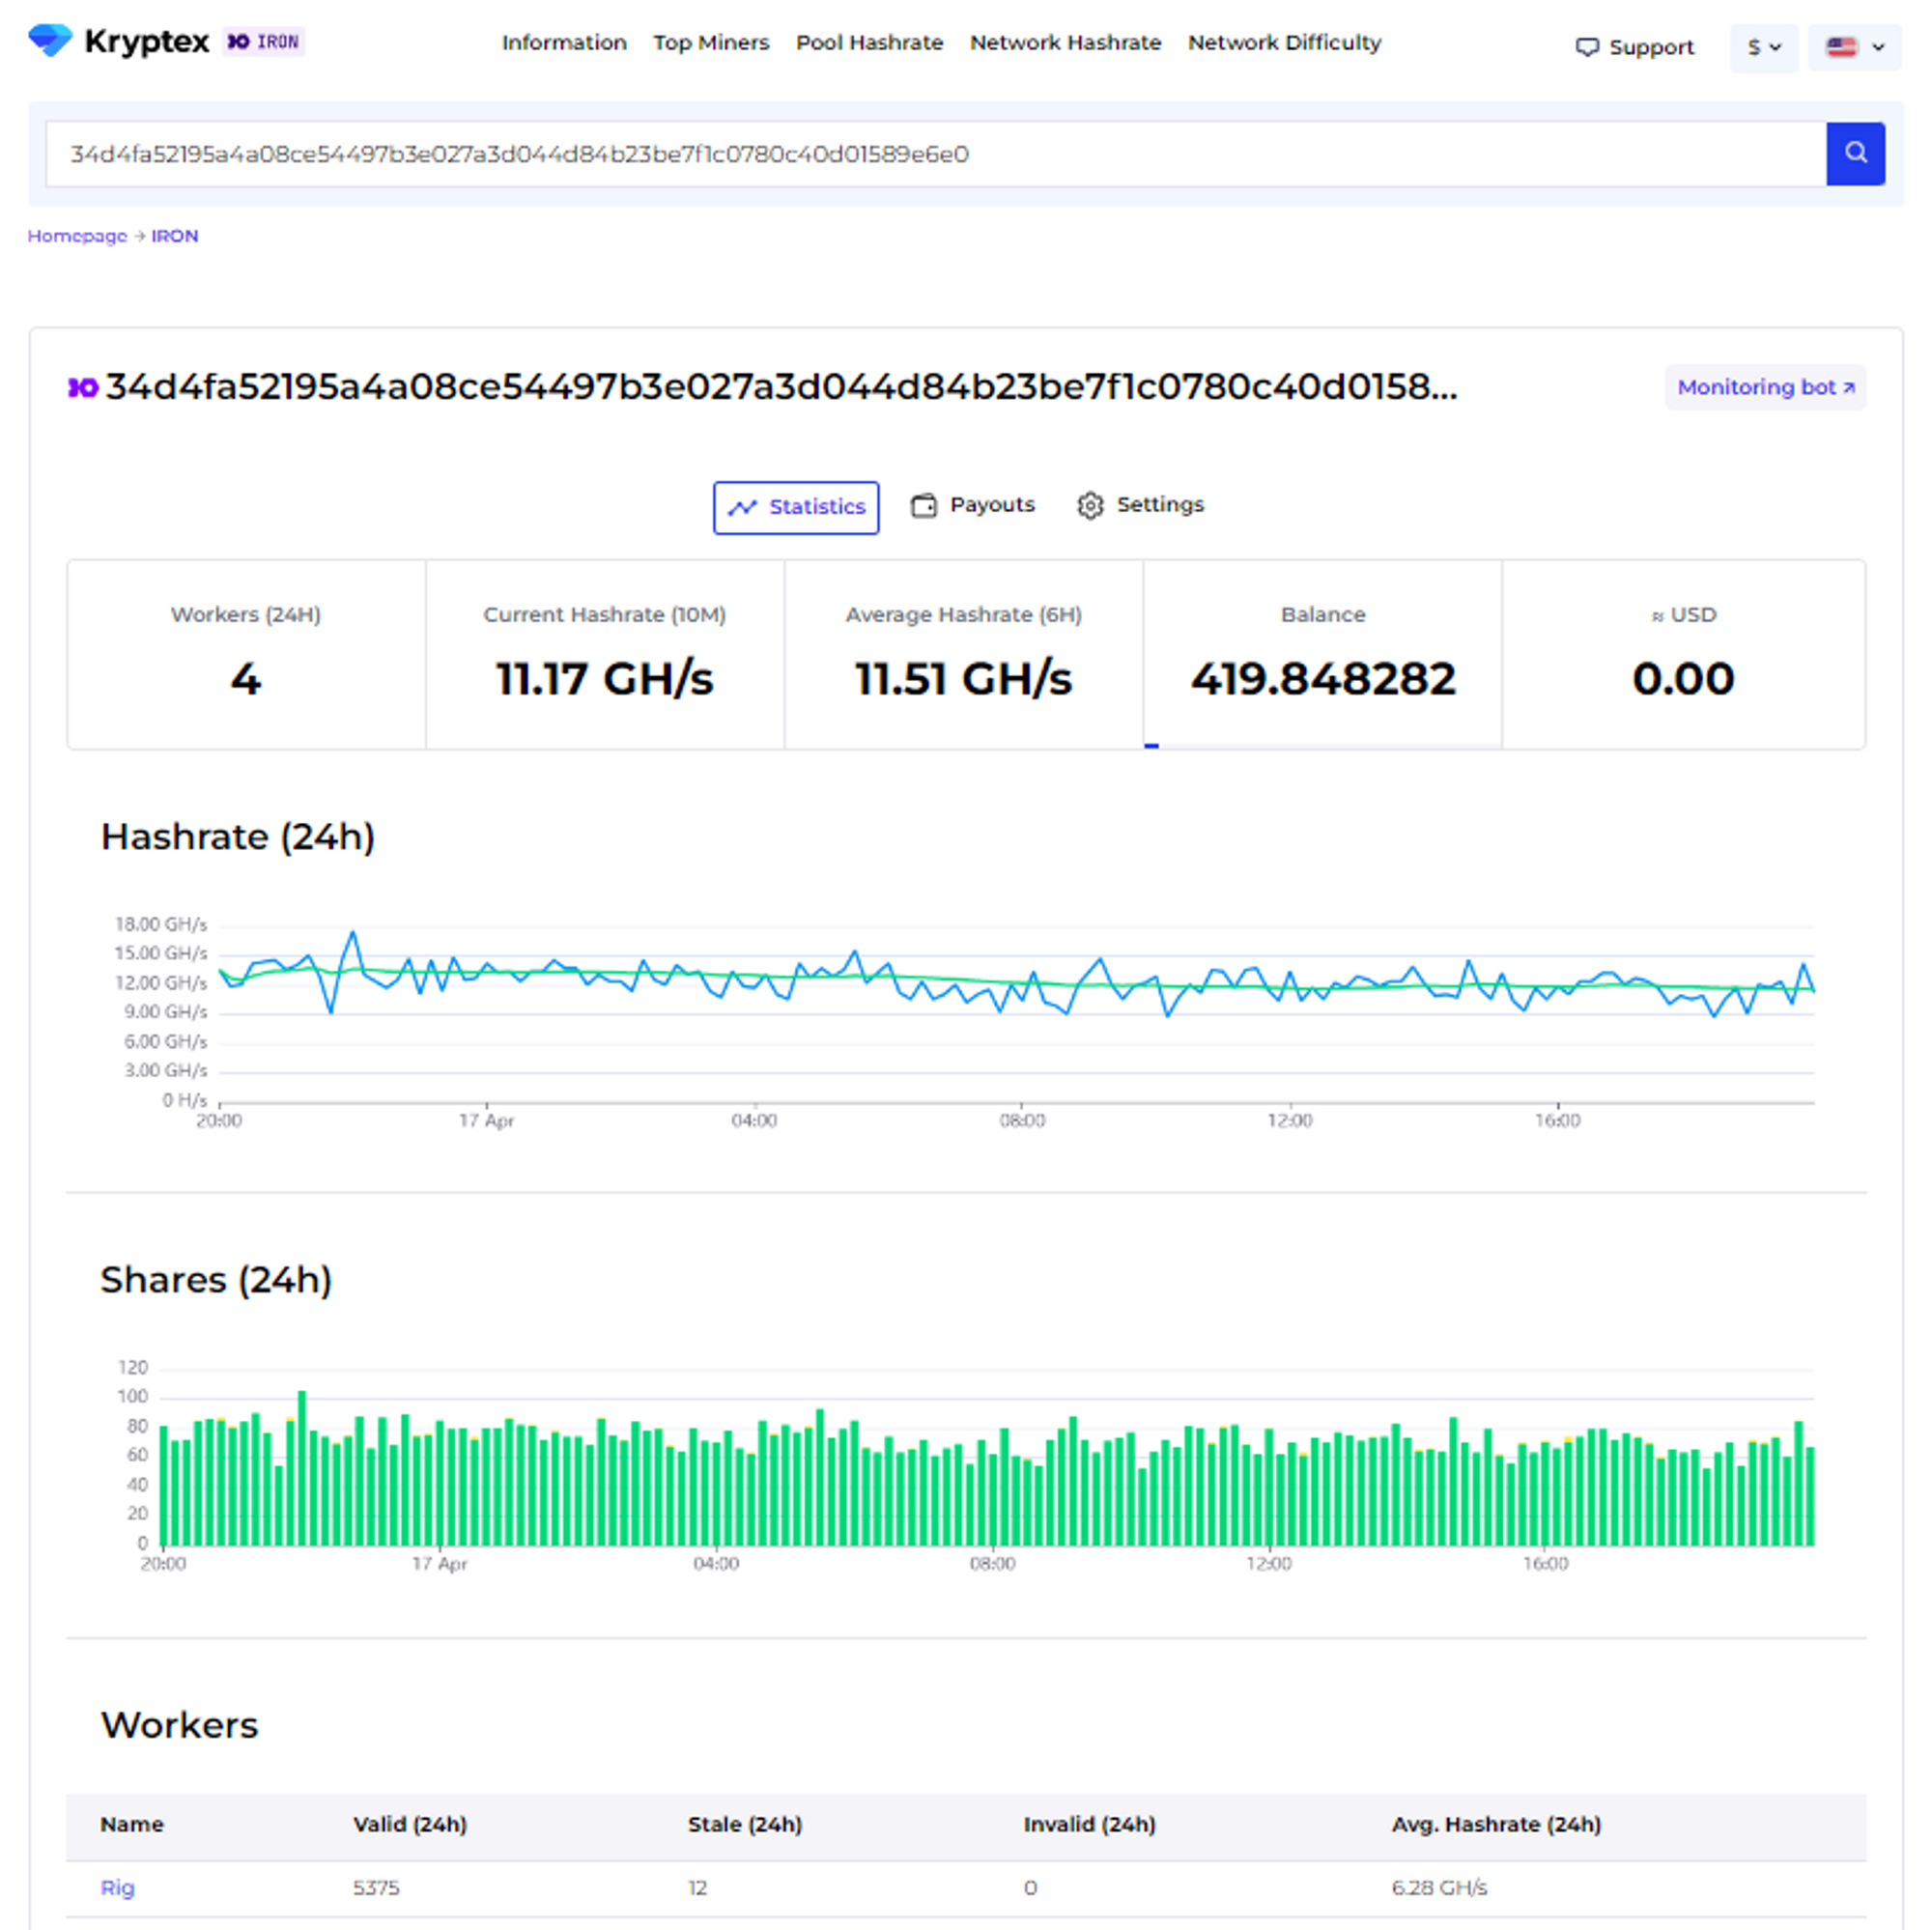
You will see a page with the statistics of your wallet and your mining rigs.
Step Four — payout
Payouts are processed automatically once an hour when they reach the payout threshold.
How to set the payout threshold?
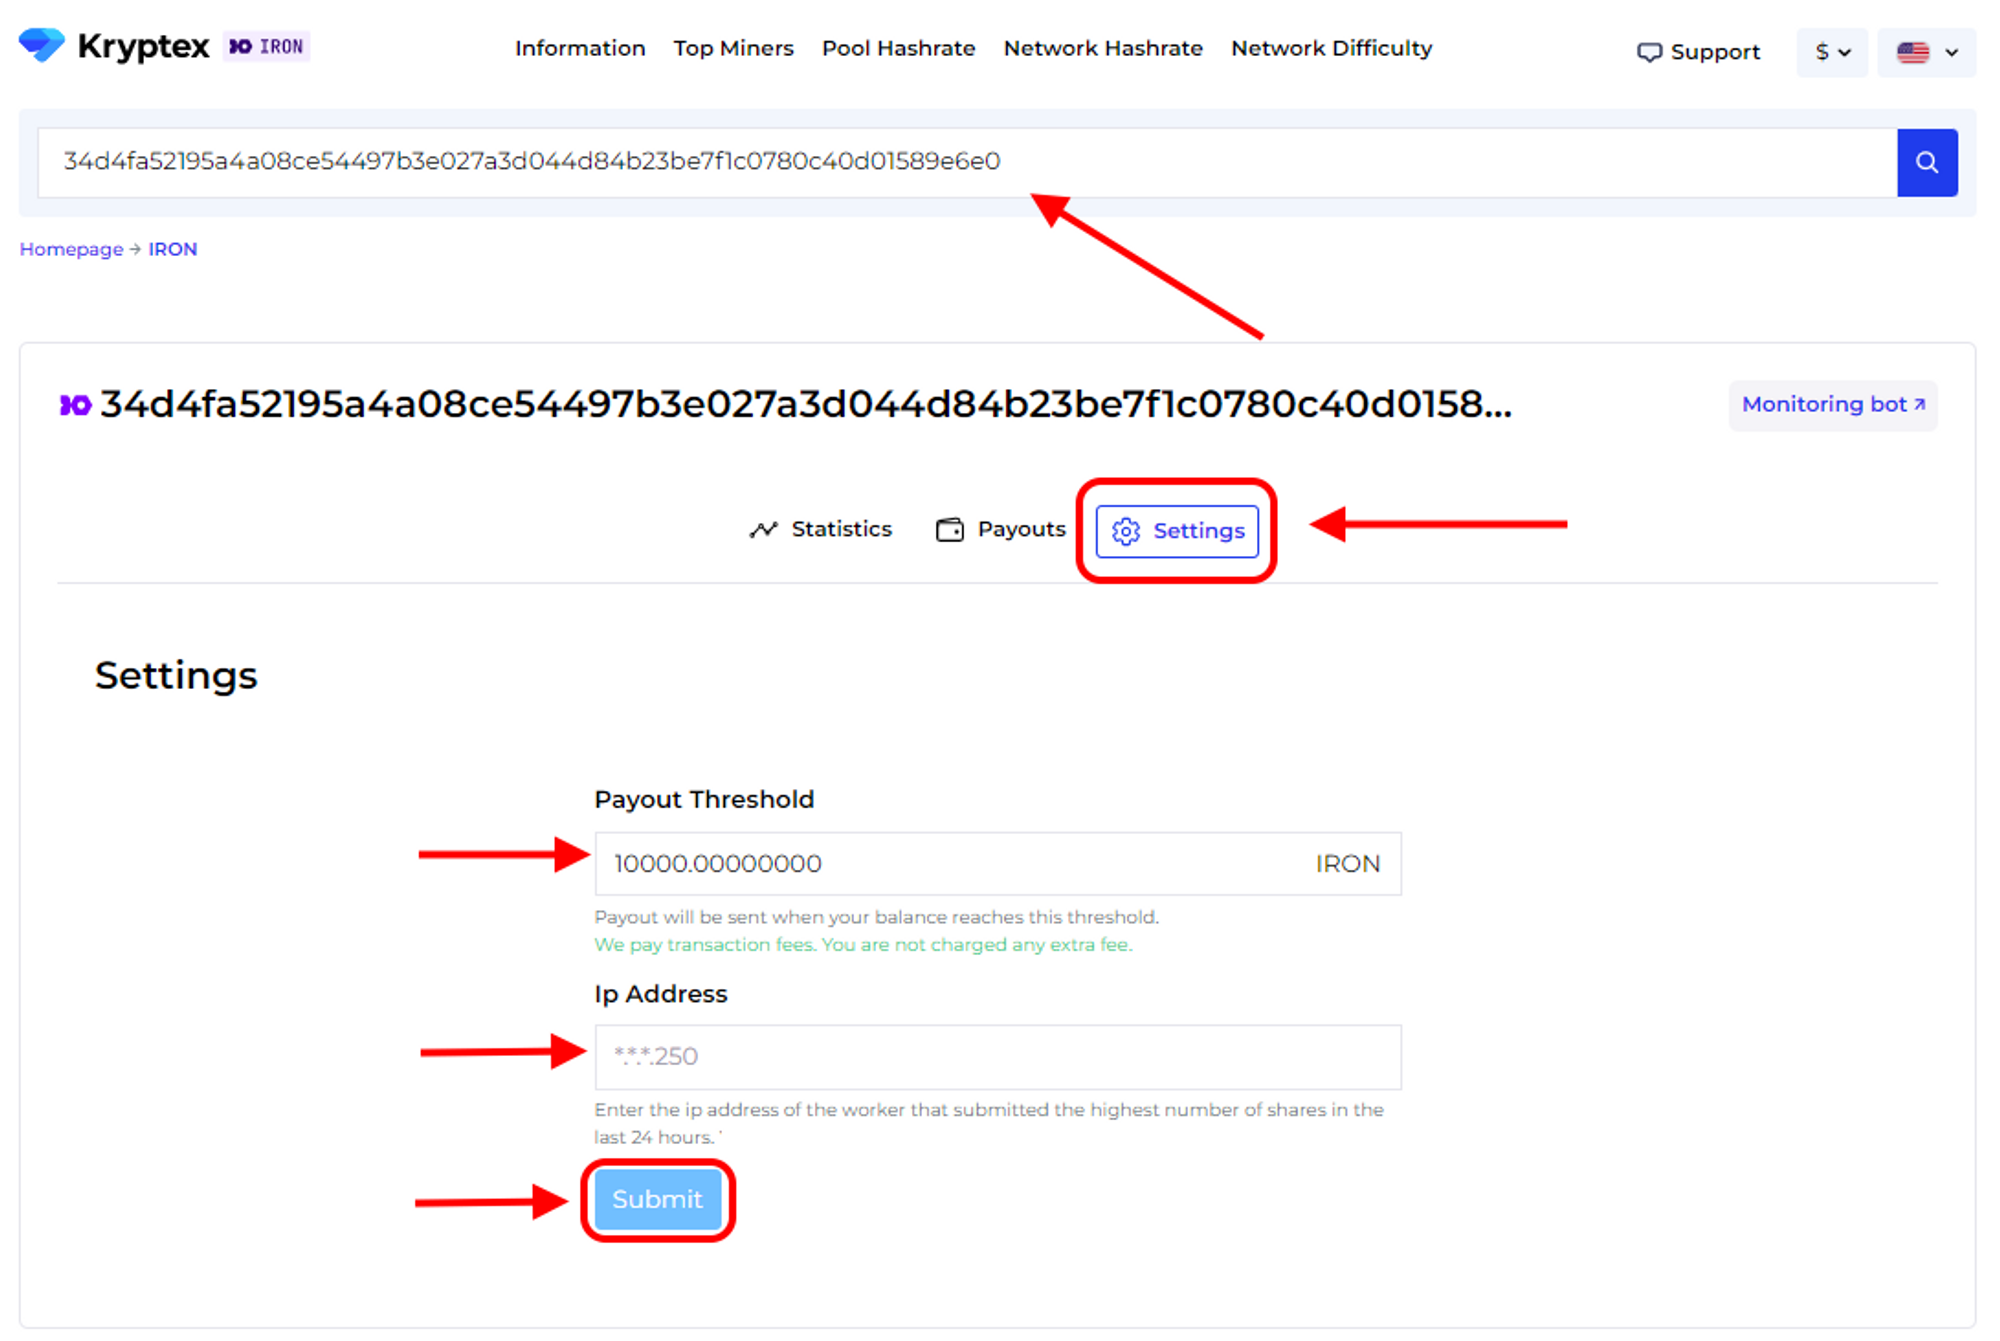
Open the pool page and enter your mining address;
Press the “Settings” button.
Set the desired “Payment Threshold”. Minimum and maximum payment threshold mentioned at the pool home page. There is no payout fee — Kryptex pays it for you 🖤
In the "Ip Address" cell, enter the IP address of the worker whose name the site prompts you. The IP address of your mining rig. The IP address must end the same as indicated in the prompt on the site (see the last digits). Learn your IP here https://ipinfo.io/ip
Press the “Submit” button.
Track the status of your payments in the "Payouts" tab.
🤯Too complicated?
Our useful articles will help you:
