How to mine Conflux CFX
19/05/2026
Check our YouTube Video how to mine Conflux CFX
Step one — register a wallet
- Register the wallet using the Fluent Wallet. Detailed instruction on How to create Conflux CFX wallet.
- You can trade Conflux CFX with on of the following exchangers: Gate.io, Binance, KuCoin, MEXC, Coinex.
We do not recommend mining on exchange. If you choose mining on an exchange, you do so at your own risk. Not your keys — not your crypto!
Quick-start mining settings
CFX Pool — https://pool.kryptex.com/cfx
Pool address: cfx.kryptex.network:7027
Wallet format: WALLET_ADDRESS/WORKER_NAME
For mining Conflux, you will need an NVIDIA or AMD graphics card with at least 10 GB of video memory, e.g. RTX 3060.
Step two — download and set up the miner
If you are an experienced miner, use our guide on “How to start mining on Kryptex pools”. Don't waste a second of your time. If you are a beginner and have never set up mining on your own, this guide is for you!
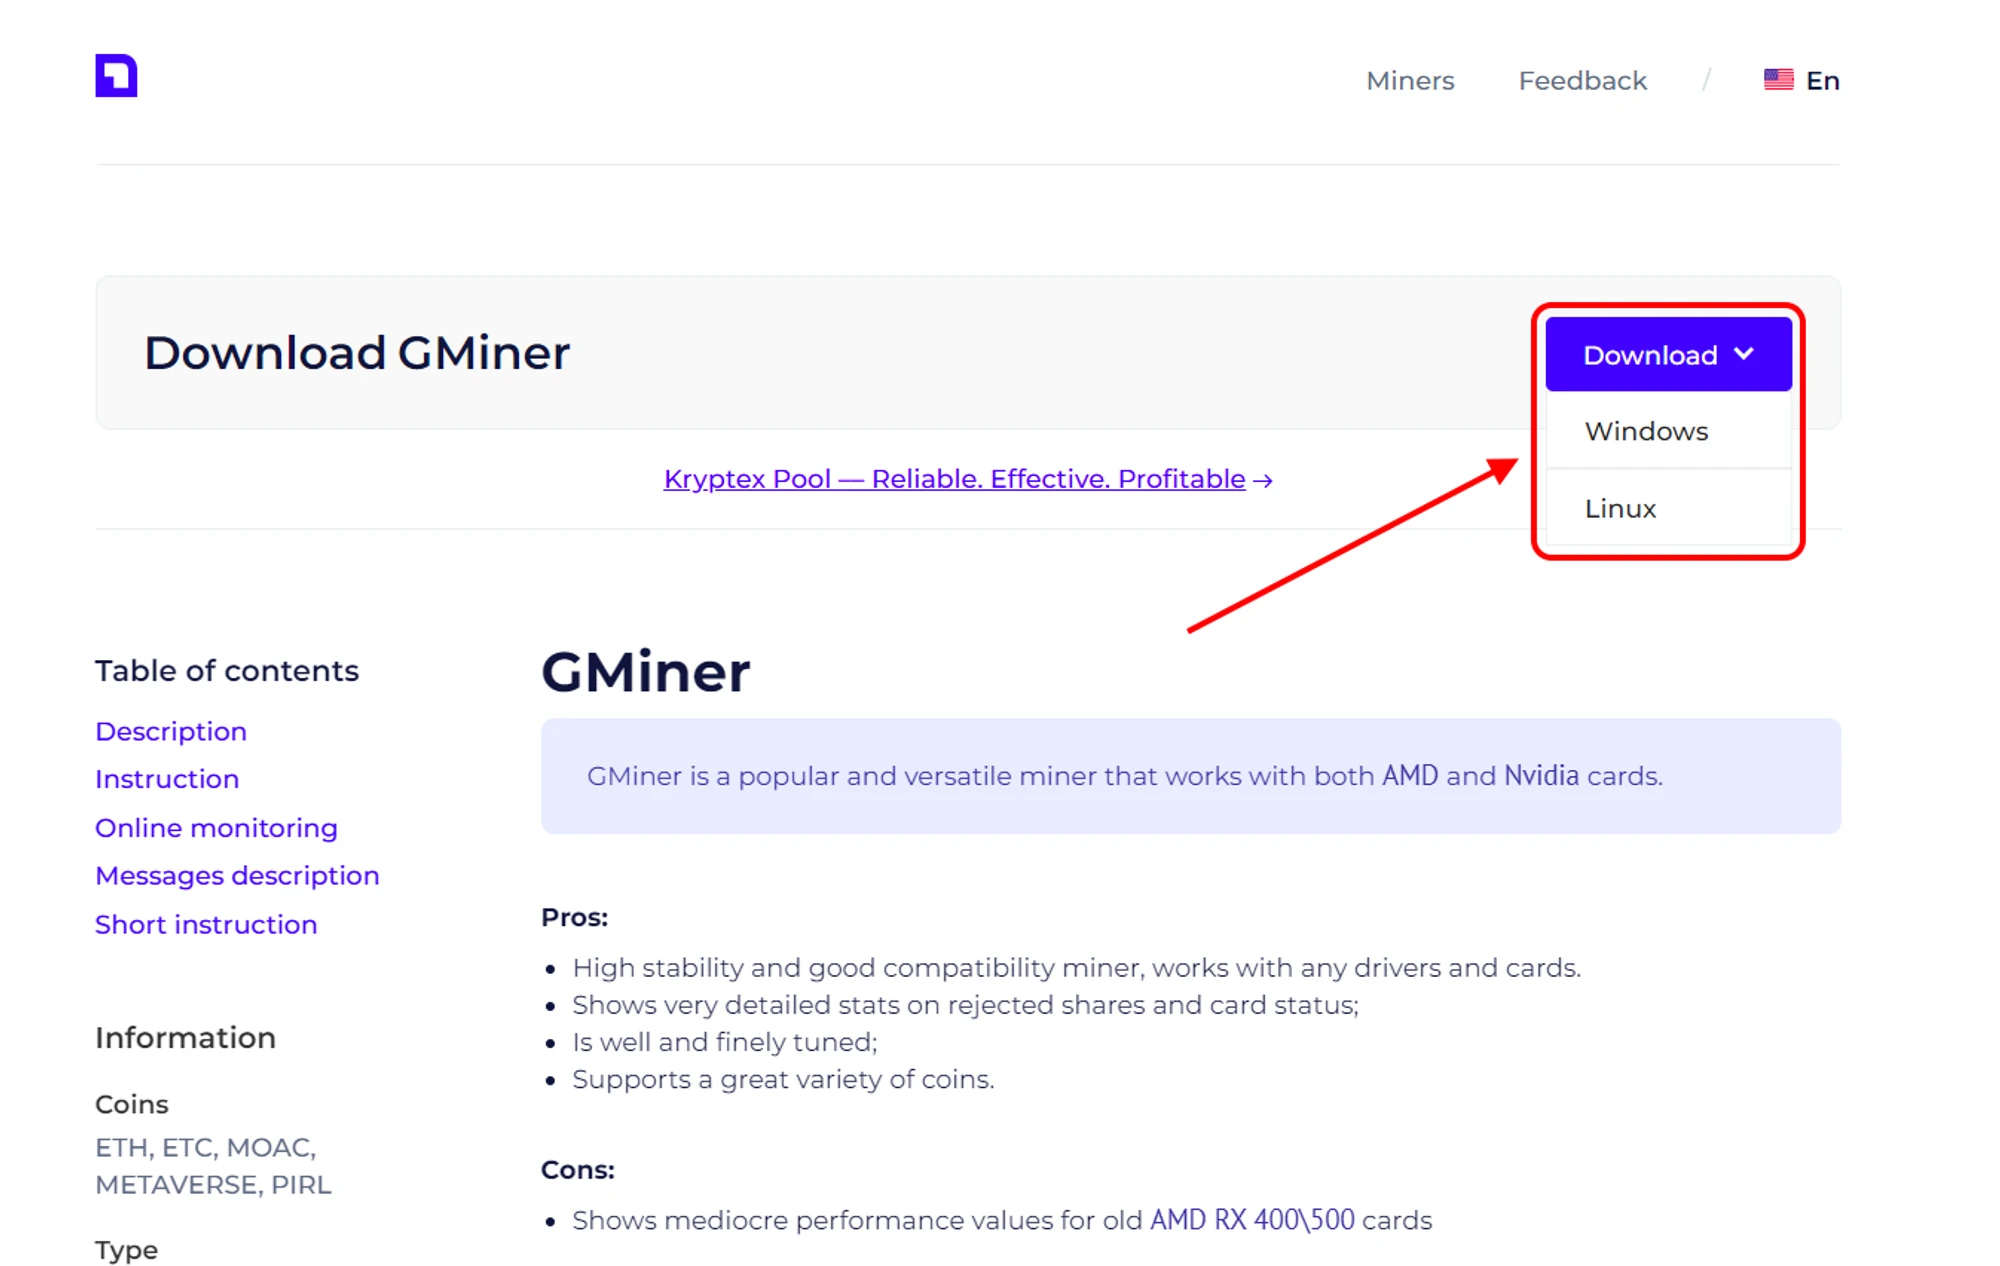
Download a miner for Conflux coin. We recommend Gminer, Rigel or lolminer. We will use Gminer as an example.
Antiviruses don't like miners. During the download, your antivirus or firewall may warn of danger - they try to play it safe because they do not know if you are downloading the miner consciously or not. Allow the download of the file, or pause the antivirus while the file is downloading.
Extract the miner’s archive to a folder convenient for you, for example, to your desktop.
- Add miner files to your antivirus exclusion list if, for some reason, it decides to block or delete them. Disable PUA protection. Do not add the entire miner folder, but only specific files. Otherwise, if an actual virus gets into the miner folder, the antivirus will not be able to protect you.
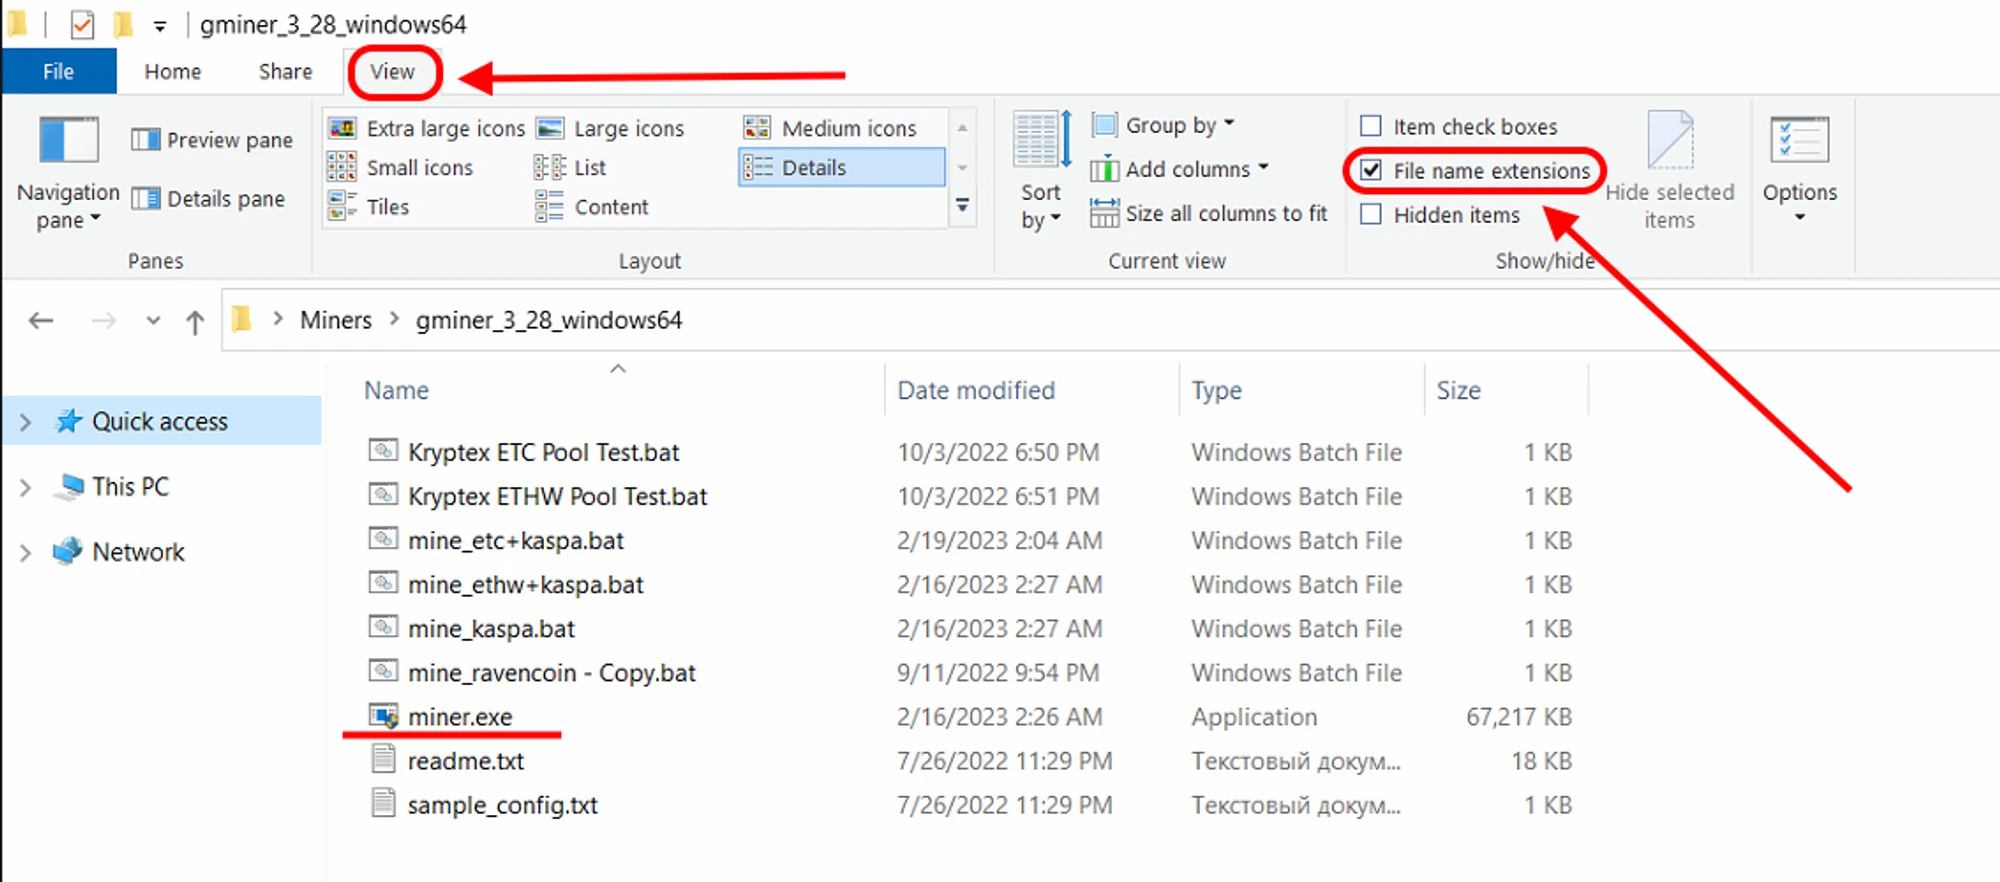
Open the folder with the miner, and turn on the display of file extensions:
In the explorer window, click "View”;
Tick “File name extensions” option.
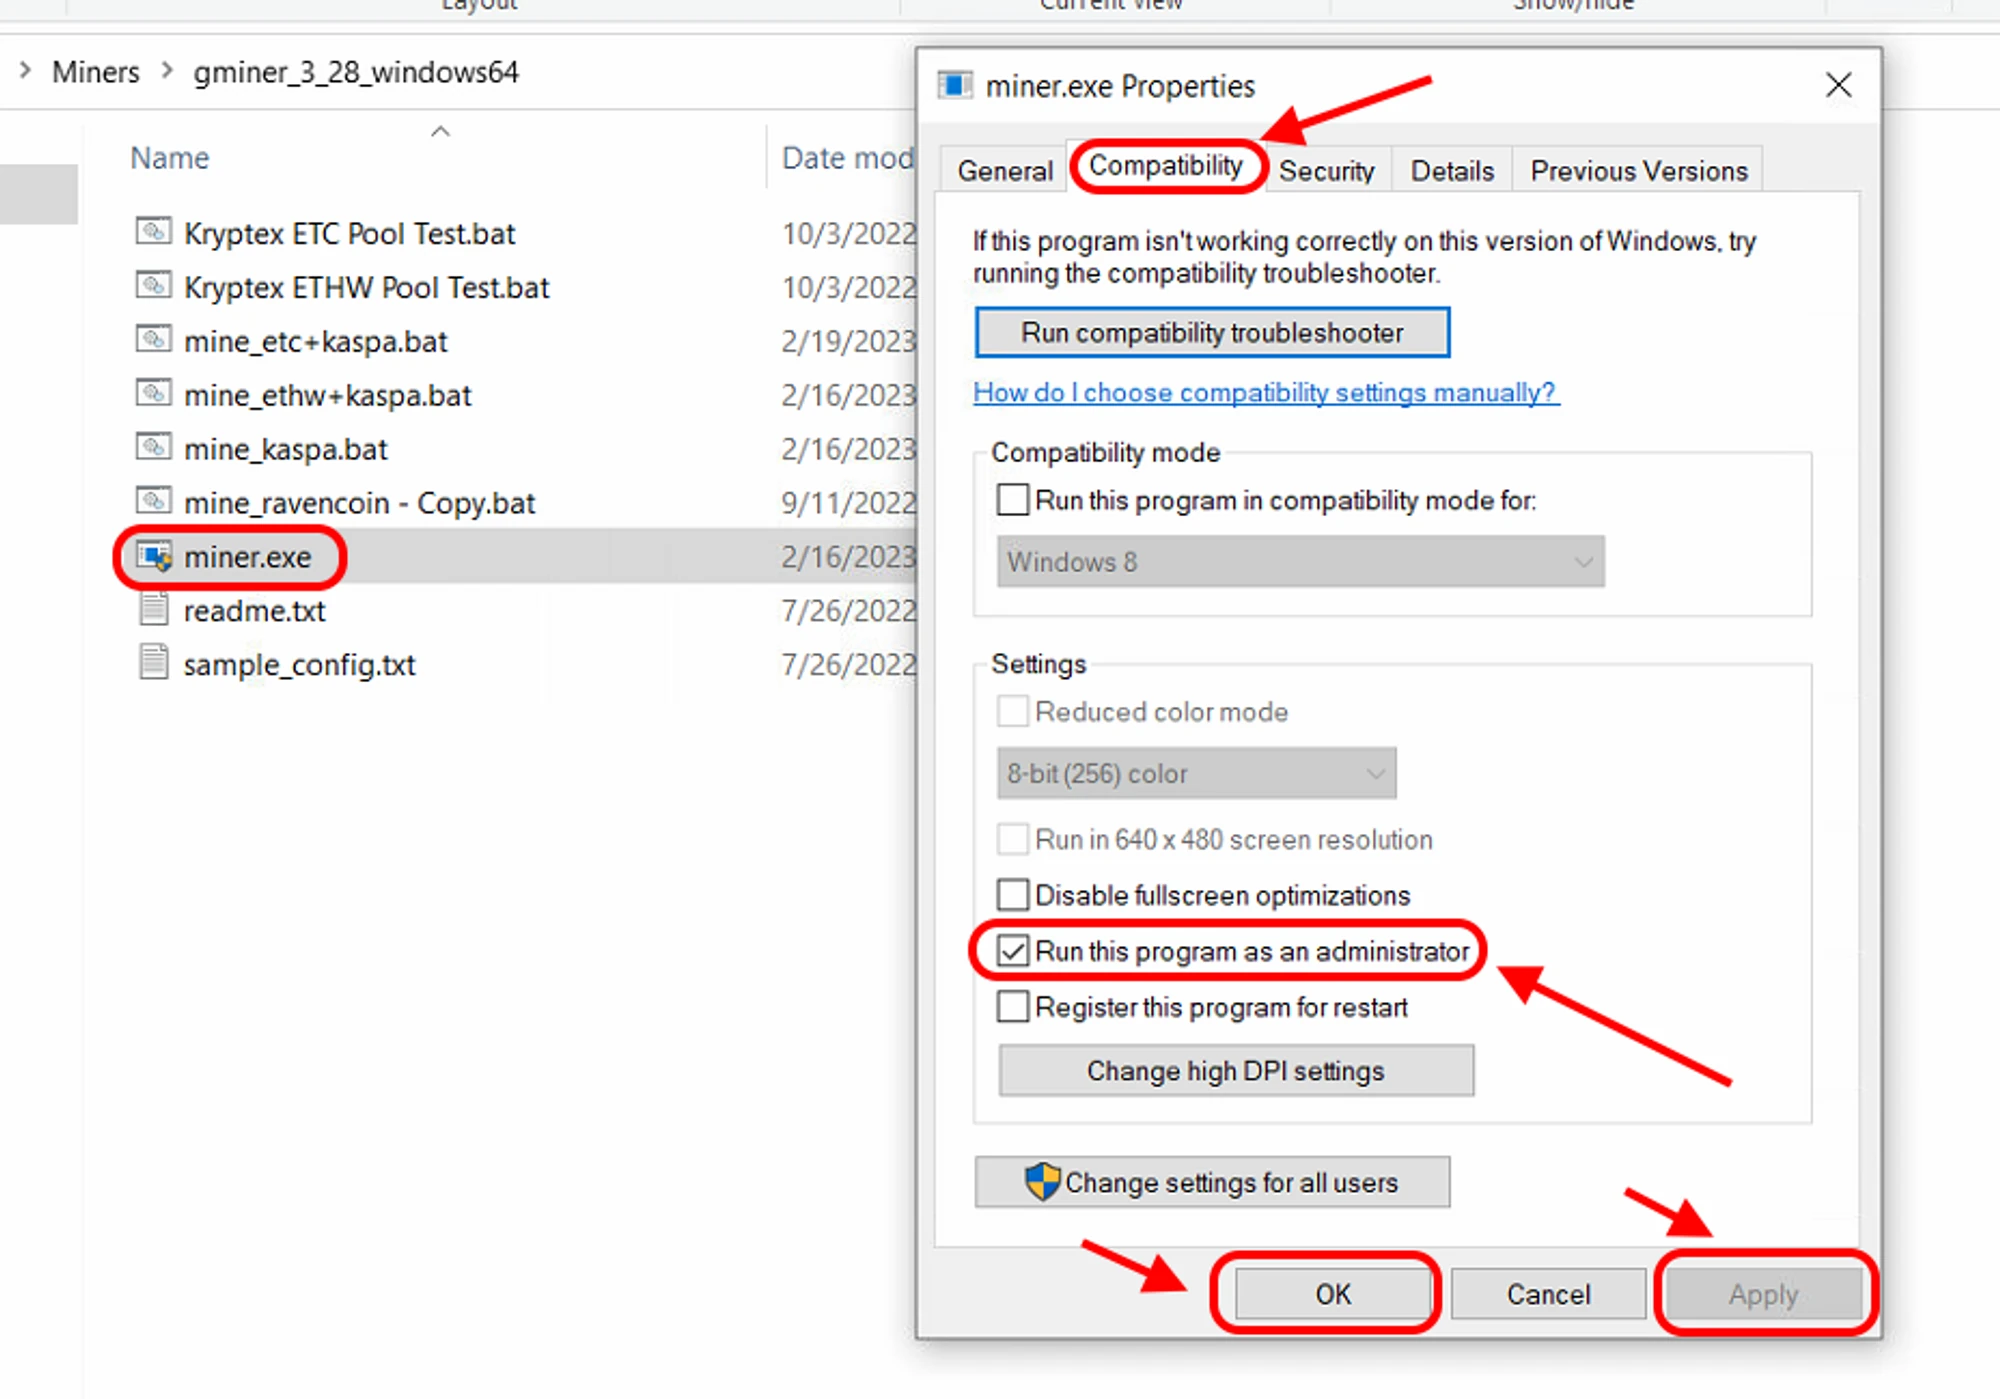
Allow the miner to run with administrative privileges:
Right Mouse Click
miner.exefileChoose “Properties”
Choose “Compatibility” tab
Tick “Run this program as an administrator”
Press “Apply” and “OK”
Open the Conflux pool page https://pool.kryptex.com/cfx
In the “Wallet address” field, enter the wallet address that you registered earlier. Wallet address example:
cfx:aam765nc6av00fmu2fhybc326v23aacaye0f9s8ttzIn the “Worker name” field, enter the name of the mining rig that will mine on the pool, for example,
MyRig. Please note that the name is entered only in Latin letters, or numbers, without spaces.Copy the complete command from the field “BAT file example”
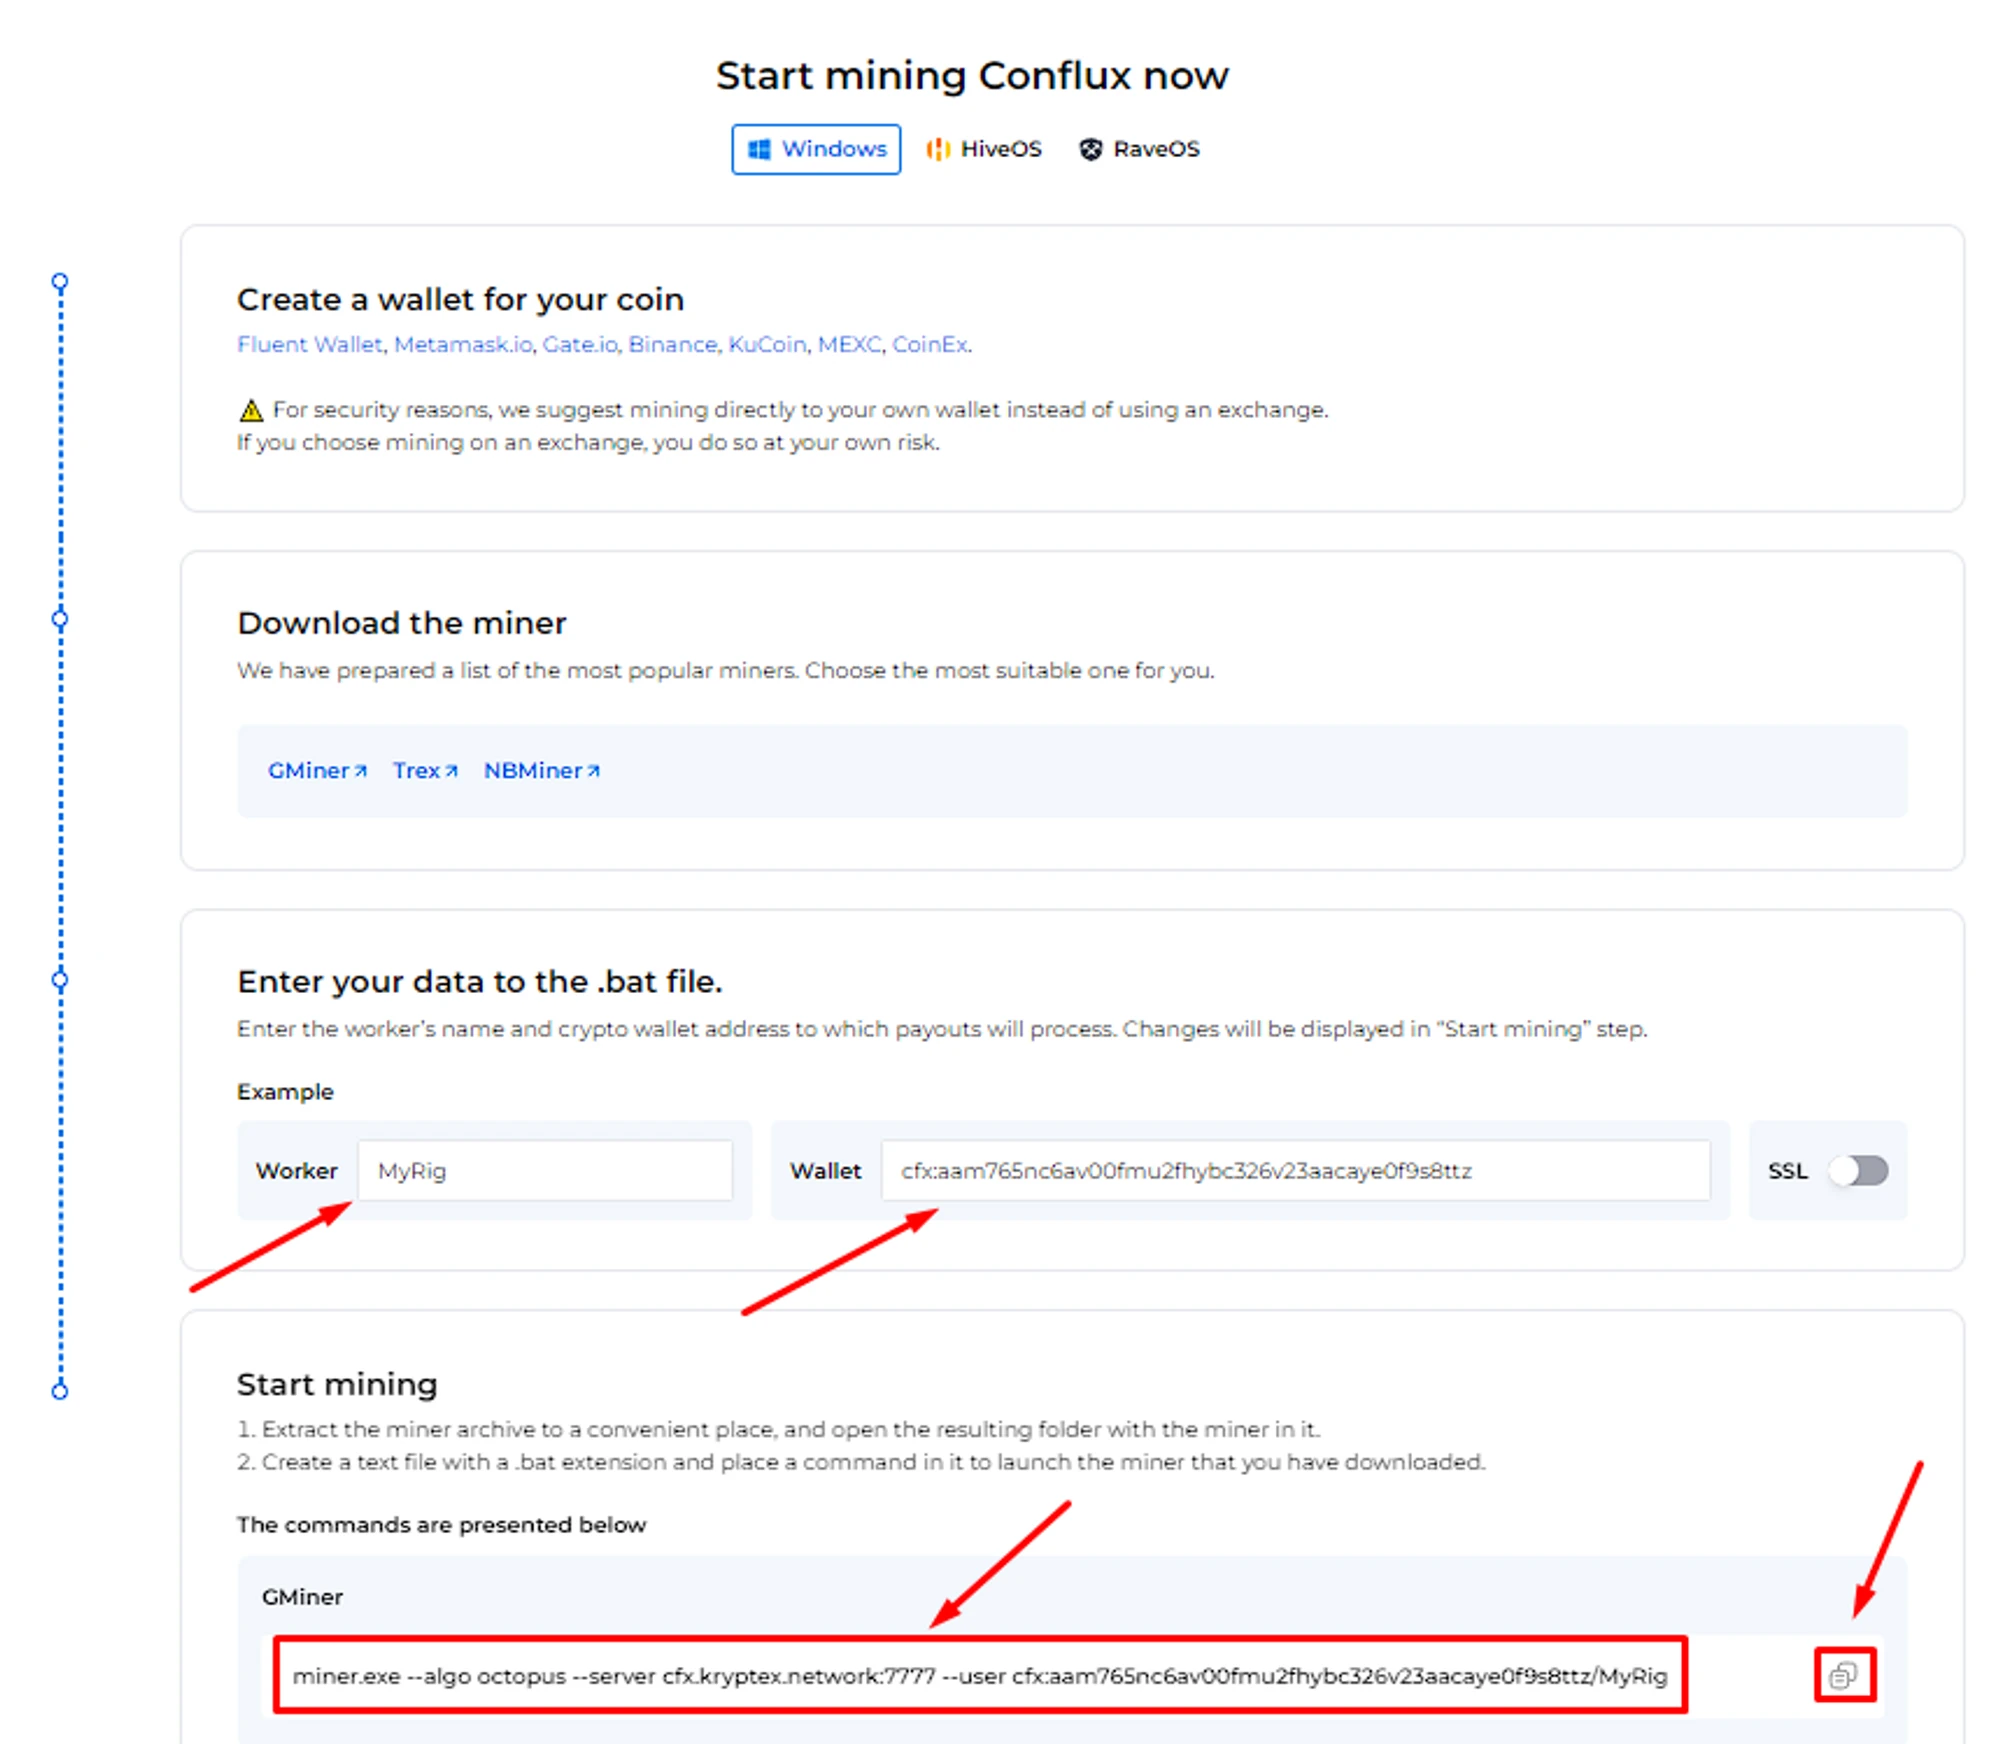
In the folder with the miner, create a plain text document
.txtwith the Notepad application. Let's call itKryptex Conflux Pool. Then, open the file, and paste the copied sample BAT file into the document.
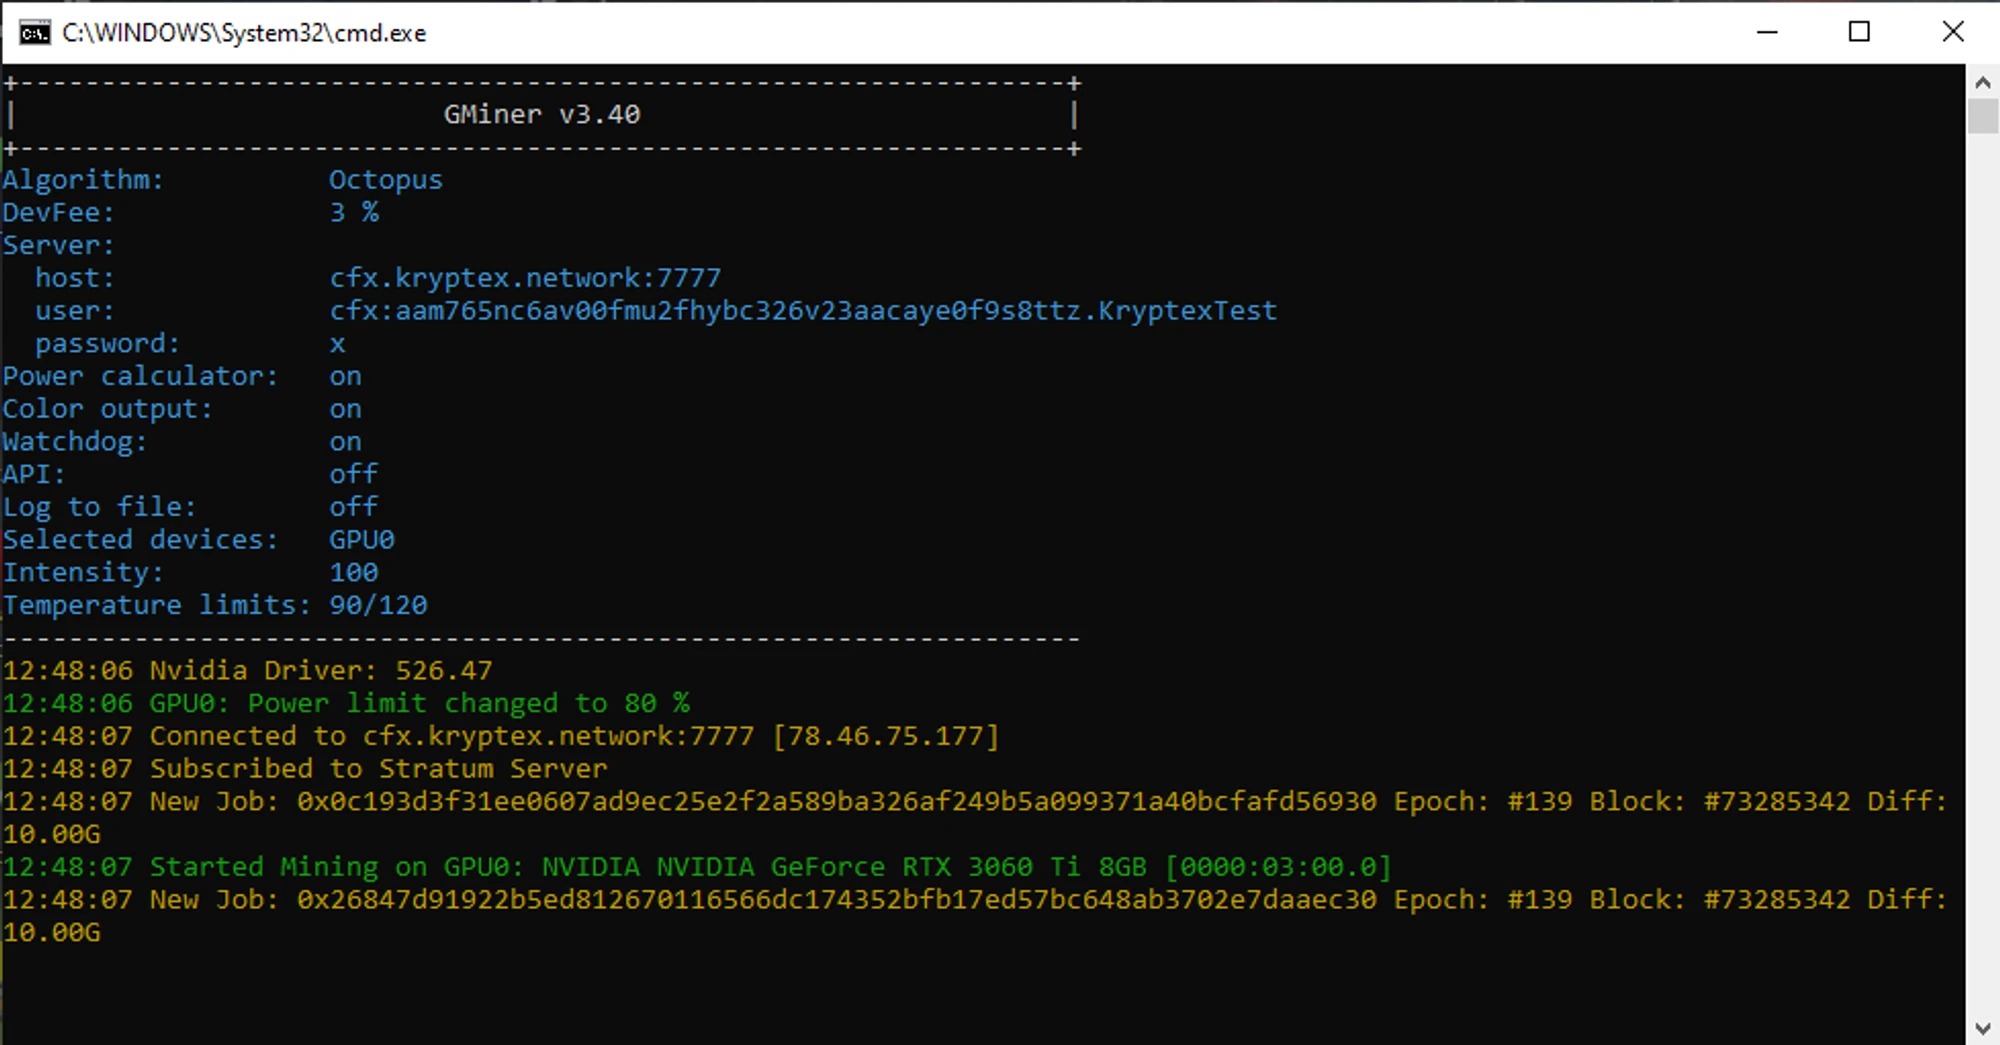
Save the file, and make it a BAT file. Rename your file’s
.txtextension into.batRun the BAT file and mining will start!
If, at the time of launch, your antivirus or firewall may display a message about a suspicious file or a request to provide access to the Internet — allow the access and add the miner's files to the exceptions.
Step three — monitor the work of your miner on the pool
Open Conflux pool page https://pool.kryptex.com/cfx
Paste your wallet address into the search field, and press Enter.
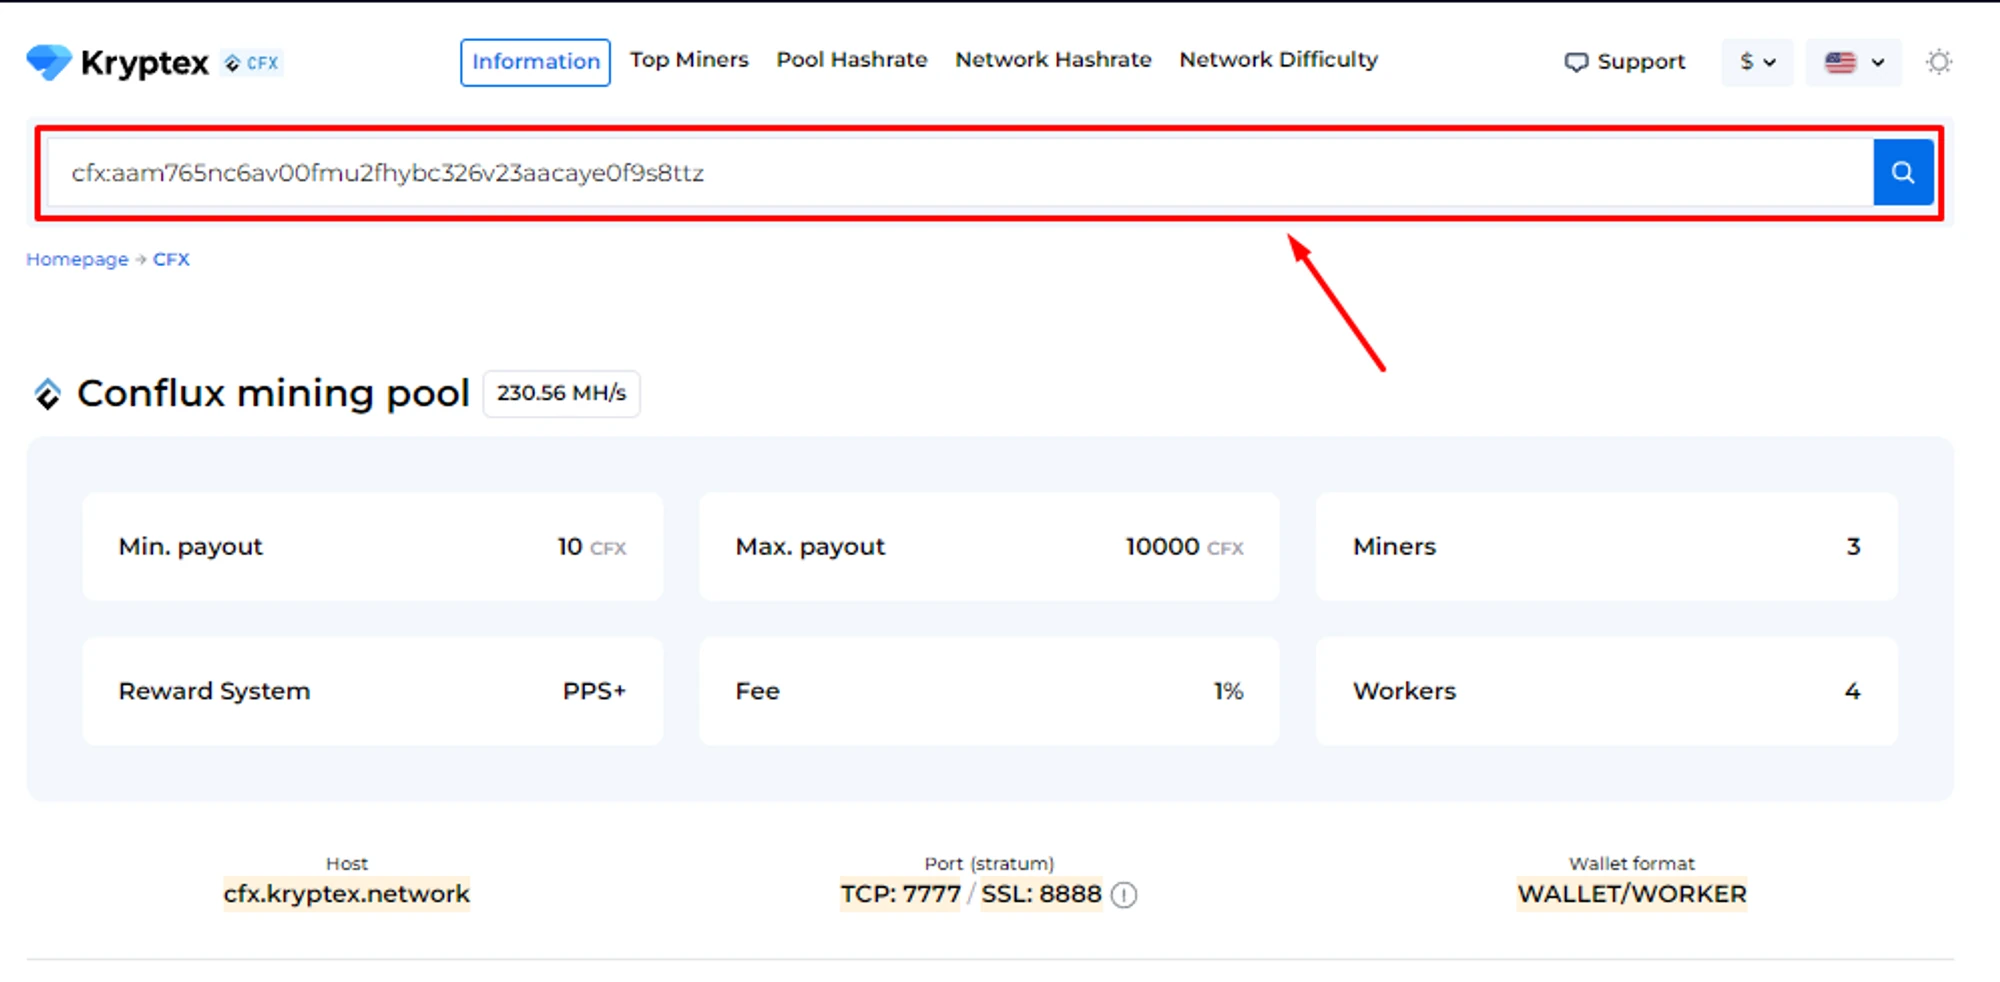
You will see a page with the statistics of your wallet and your mining rigs. Statistics refreshes every 10-15 minutes.

Step Four — payout
Payouts are processed automatically once an hour when they reach the payout threshold.
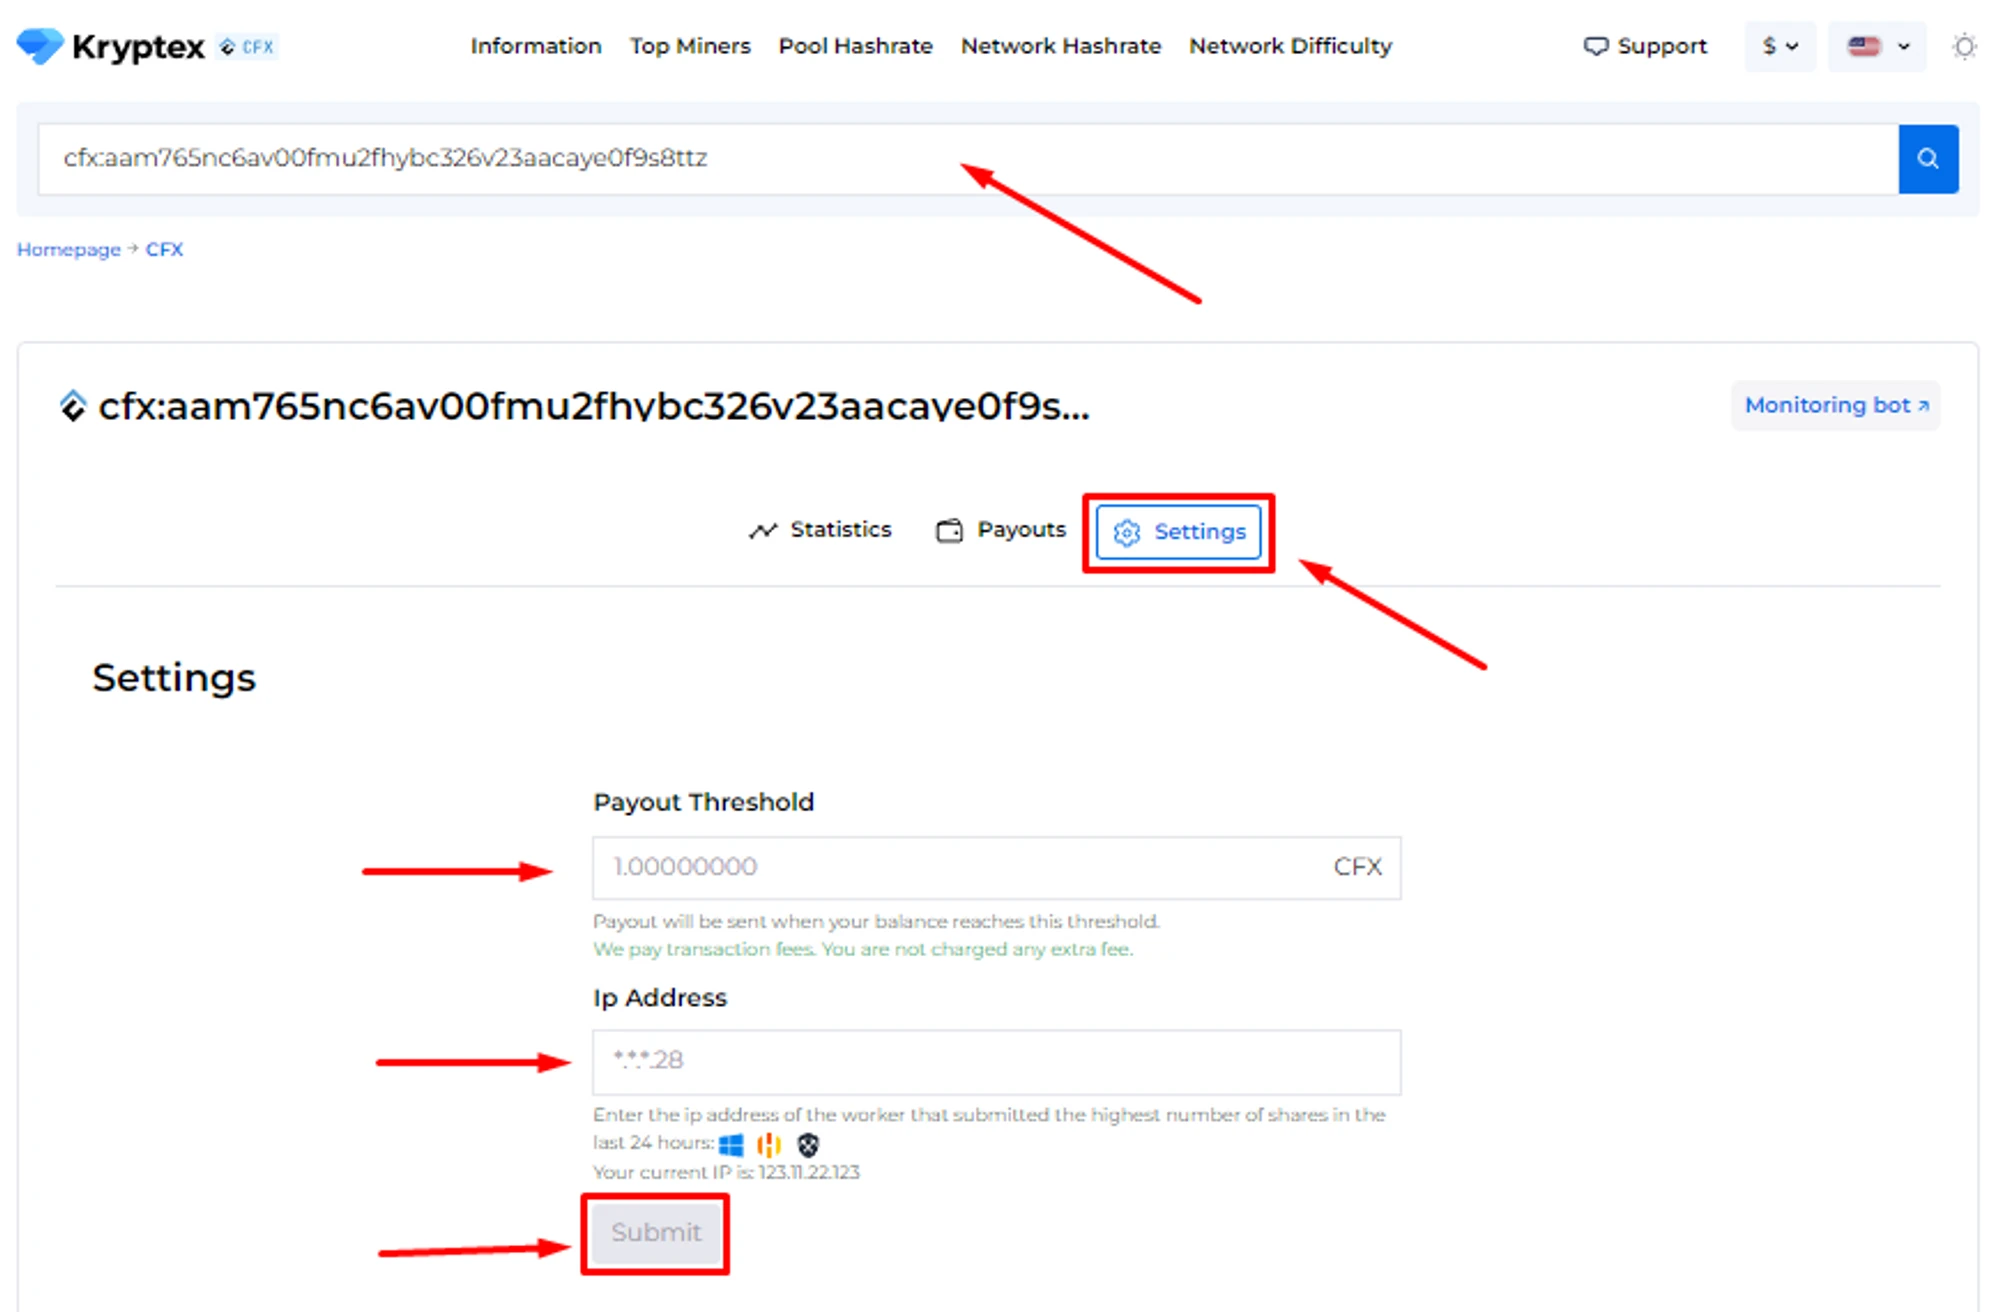
How to set the payout threshold?
Open the pool page and enter your mining address;
Press the “Settings” button.
Set the desired “Payment Threshold”. Minimum and maximum payment threshold mentioned at the pool home page. There is no payout fee — Kryptex pays it for you 🖤
In the "Ip Address" field, enter the IP address of the worker whose name the site prompts you. The IP address of your mining rig. The IP address must end the same as indicated in the prompt on the site (see the last digits). Learn your IP here https://ipinfo.io/ip
Press the “Submit” button.
Track the status of your payments in the "Payouts" tab.
🤯Too complicated?
Our useful articles will help you:
- How to create a cryptocurrency wallet
- How to start mining on Kryptex pools
- BAT file for mining
- Main miners’ settings
- Pool mining security
Something does not work? Consult!
Our friendly community and professional support will be happy to help you!
Contact us via website support, the private message on Telegram, or ask for help at our Discord.