IceRiver KS0 Firmware Update and Overclocking
13/05/2026
Please be aware that any actions based on these instructions are undertaken at your own risk and responsibility. Kryptex will not be held liable for any damage to your ASIC device resulting from the flashing process.
- Make sure to go through the disclaimer before proceeding.
- Carefully read the technical recommendations and firmware instructions to ensure proper understanding before taking any further steps.
- To work with ASIC, your PC must be connected to the same network (to the same router) as the ASIC.
Original instructions firmware with OC provided by KASPA community members:
https://github.com/incidrthreat/iceriver_oc/tree/main
Special thanks to members of the KASPA community, without whom overclocking IceRiver ASICs would have been impossible: https://github.com/incidrthreat/iceriver_oc/blob/main/CONTRIBUTORS.md
Technical Recommendations
After the OC update, the ASIC's power consumption will increase in proportion to the rise in hashrate. It's crucial to arrange additional cooling for your KS0 and invest in a new power supply (please note that the original 90-watt one won't suffice). If it is possible for you, consider replacing the thermal interfaces for optimal performance.
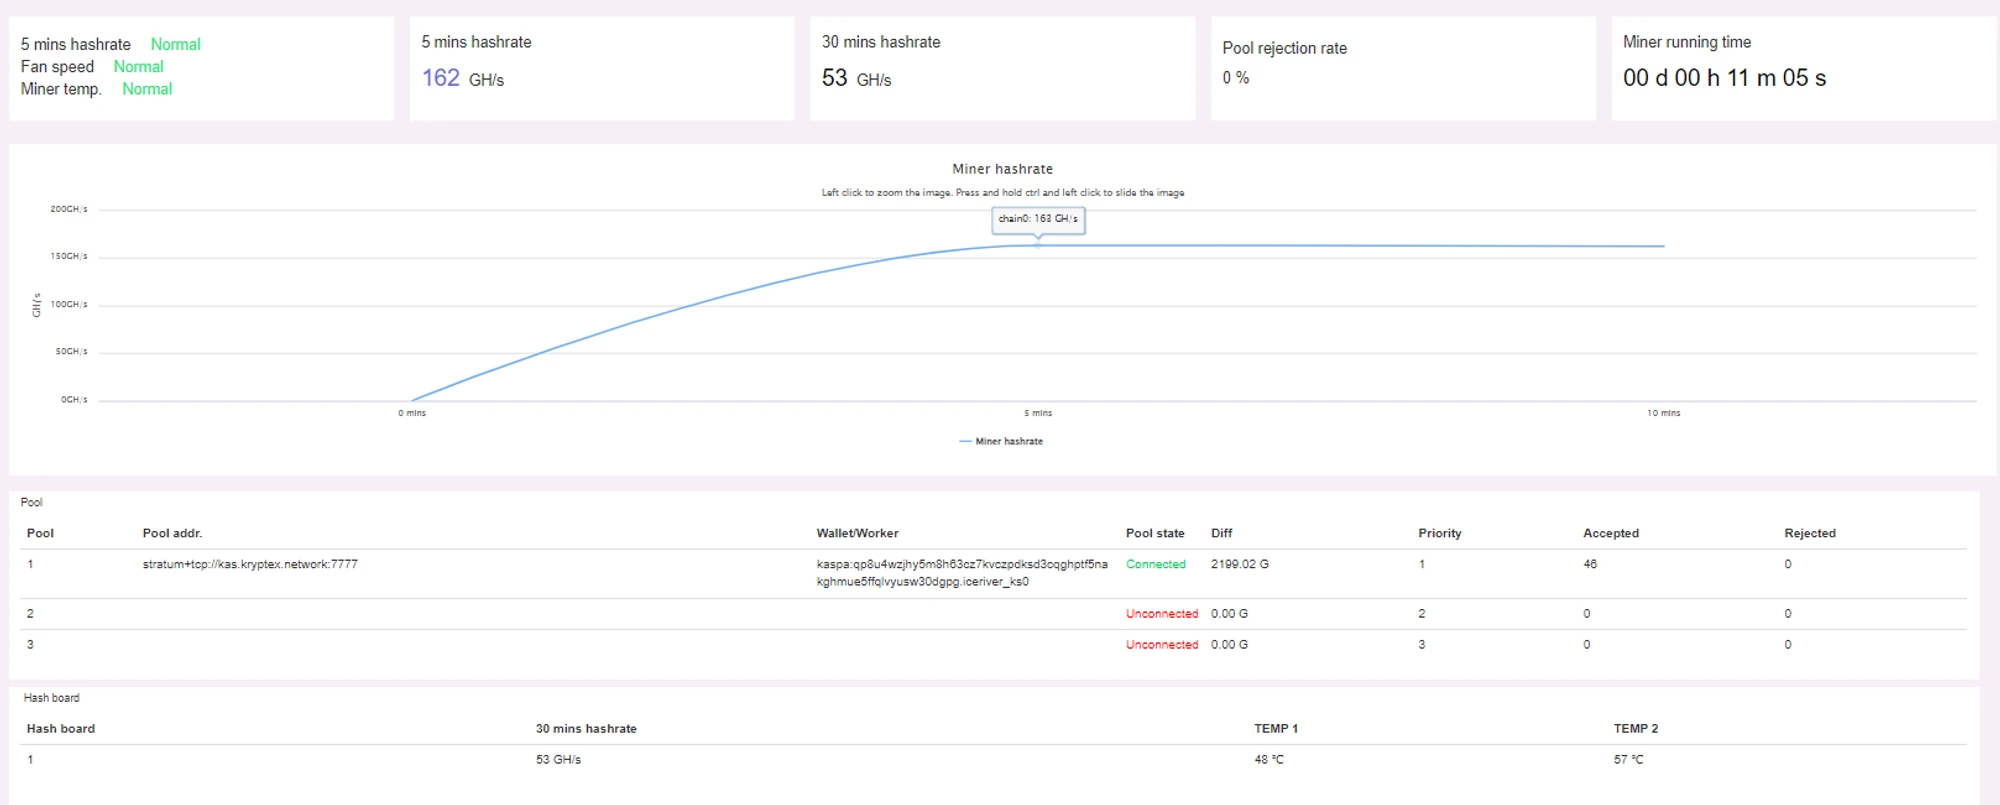
- After the OC update, the hashrate will boost to 140-170 Ghs, contingent on your chips' quality.
- The recommended power supply specifications: 19 V, 9.5 A, 180 Watt, plug size 5.5x2.5.
- KS0 consumption will escalate to 110-125 Watts.
- Integrate an extra 120 mm fan for top cooling. These fans can draw power from the ASIC's USB connector, although speed control won't be possible. The fan will operate at the minimum speed.
- Install an additional 120 mm fan for bottom cooling or elevate the ASIC at least 5-10 cm above the surface.
- Ensure the ASIC doesn't exceed 60 degrees Celsius to prevent a drop in hashrate.
Preparations — IceRiver KS0 Firmware Update
Refer to the manufacturer's instructions and update your ASIC firmware to the latest version available on the official website: https://www.iceriver.io/firmware-download/
After the update, confirm that the ASIC is functioning correctly. Connect a new power supply, add extra cooling, and then proceed with overclocking the ASIC.
IceRiver KS0 Firmware Update with Overclocking
You have 4 firmware options to choose from:
- 120 Ghs
SHA256:505B260AAC0D2C8ADB2A8EDE92951A5D7C1383DBD2D690568A09E41855FA6F37 - 140 Ghs
SHA256:5142206B6AD5706C0D9D7BEFCA961A3C4B711ED6D12F0C2BDF8344EF8187C785 - 150 Ghs
SHA256:71B361F90C9587FB3655DA9D4CBBDC5FC47F3F1050902917D0FC5FE032064959 - 160 Ghs
SHA256:69557167DC490588A363989E2AF72C99686A4F459A535B2AAAE5D96D8C607924
Select and download the firmware file that suits you.
There are occasions where, even after upgrading your ASIC to 160 Ghs, it might not be able to mine at that hashrate. In such situations, opt for a file with a lower hashrate. The hashrate your ASIC can handle is contingent on luck and the "silicon lottery" — essentially, the quality of the chips in your ASIC.
Download the updated file, for instance update160.bgz.
SHA256:
69557167DC490588A363989E2AF72C99686A4F459A535B2AAAE5D96D8C607924
Navigate to ASIC’s webgui “
Firmware Upgrade” page.Click “
Select File”, select the downloadedupdate160.bgzfile on your PC, and click the “Update” button.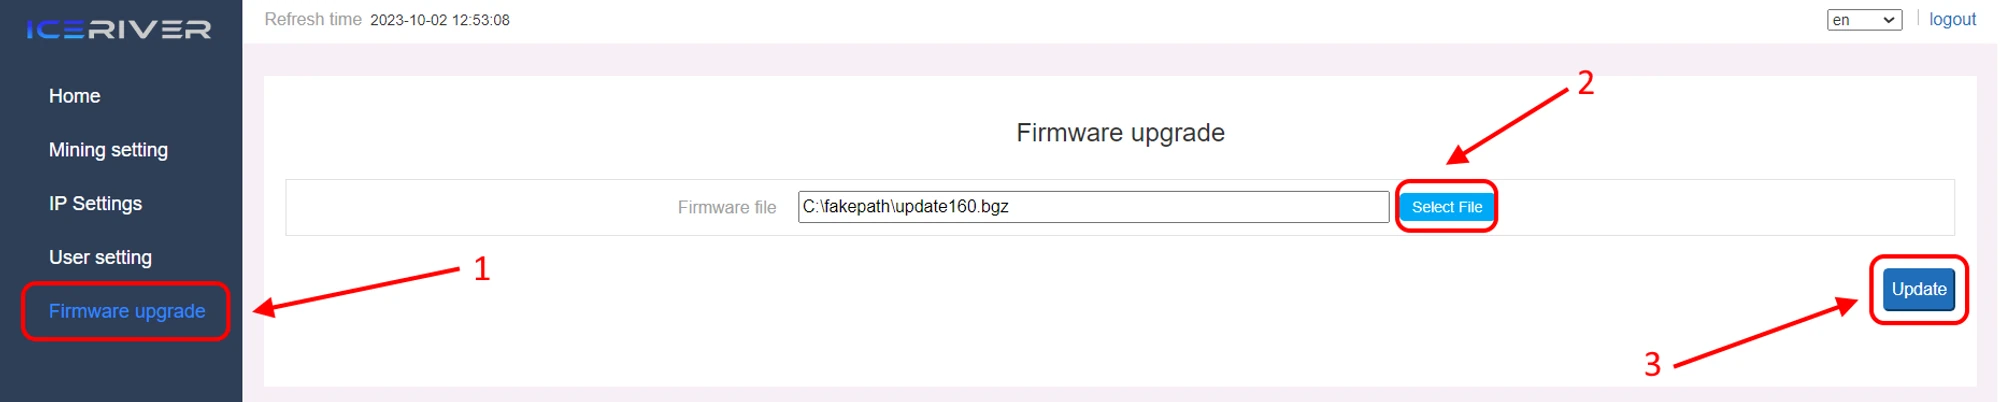
Wait for the pop-up window to show success and then reboot your ASIC.
Wait for the ASIC to reboot (do not power off during the reboot process). The whole process may take up to 2-5 minutes.
Done! Your ASIC overclocked!
Enthusiasts have the option to use an alternative firmware version, which can be installed through the ASIC file system and the Eclipse IDE application. You can find detailed instructions for this process here.
Everything failed!
If something doesn’t go according to plan, or at some stage the ASIC freezes, stops responding, or doesn’t work, you can try resetting it to factory settings. Resetting will also remove overclocking.
- On the side panel, where there are two lights (green and red) press and hold Button for 20 seconds until the red status light starts blinking. Waiting until the red status light stops blinking and wait for the machine to reboot (do not power off the machine during the reboot process).
- After the ASIC reboots, configure the mining to the Kryptex KASPA Pool —
stratum+tcp://kas.kryptex.network:7011, enter your wallet and resume mining!