How to connect HiveOS to Kryptex
2022. 12. 15.
Let's learn how to setup for ETHW pool for example.
In the same way you can set up HiveOS mining for any another coin. Before you start see the page “How to start mining on Kryptex pools”
HiveOS supports all Kryptex pools: ETHW, ETC, UBQ, RVN, ERGO, XMR…
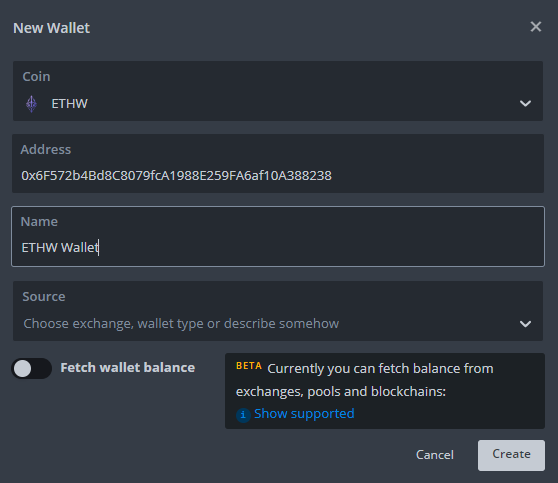
Let's create the wallet
Choose the coin type you are going to mine, for example ETHW.
Enter your own wallet address, from a previously registered wallet. Example:
0x6F572b4Bd8C8079fcA1988E259FA6af10A388238Name the wallet as you wish and apply the settings
Create the Flight Sheet
Choose the
ETHWcoin.Choose already created wallet from the list.
Choose
kryptexpool from the pool list.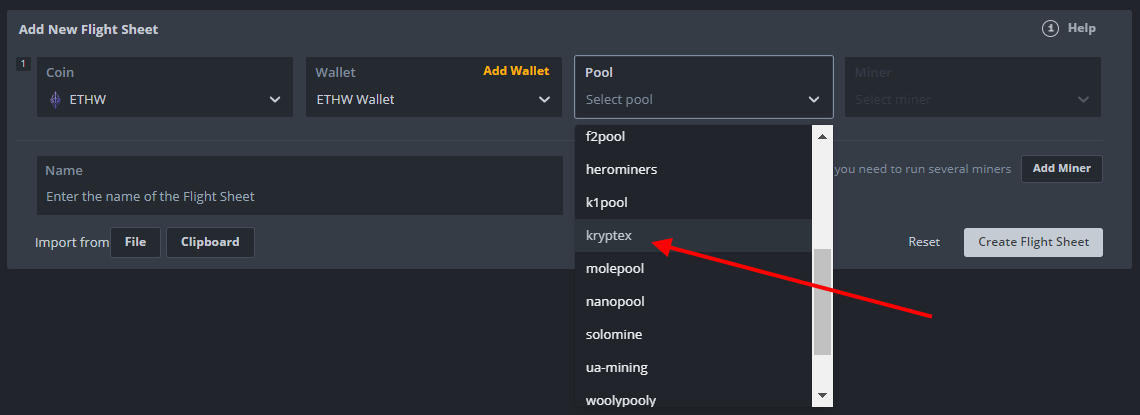
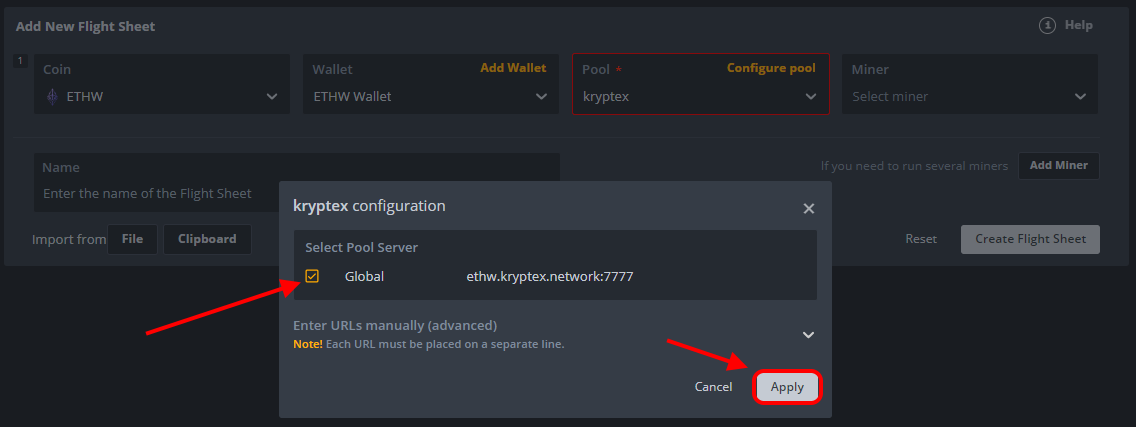
Tick the required pool server and press “Apply”.
Choose the miner you wish from the list.
If the miner you need is not listed, click the “Show all” button and select the miner you need. In this case, you will need to configure it manually.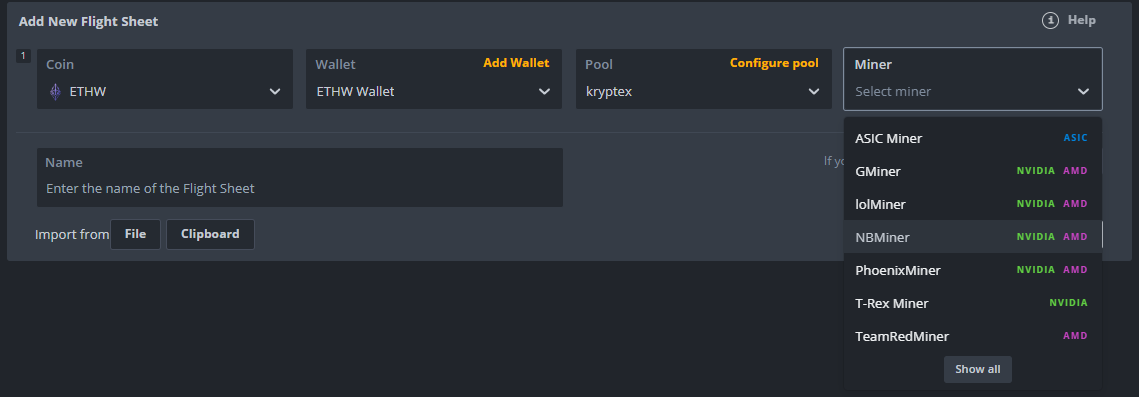
Once you have selected required miner — press “Create Flight Sheet” button. That’s it! You can start mining!

Let's start mining!
Choose your mining rigs;
Choose your newly created Flight Sheet;
Press the “Rocket” button;

If you done everything right, you will see the statistics in your pool cabinet in 15-20 minutes after start.
If you need to setup miner configs manually:
The Kryptex pool automatically selects the settings for the most popular miners. Just choose a miner from the list. If the miner you need is not listed or you want to change the automatic settings, you can manually set up the miner configs.
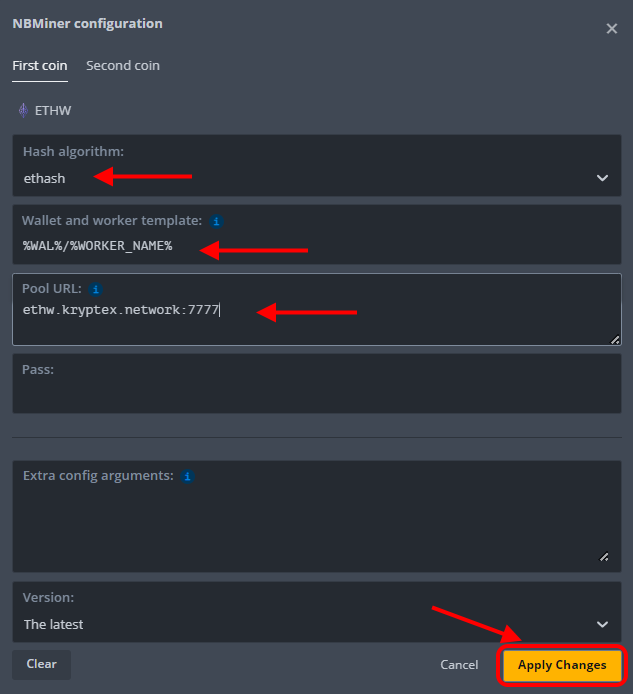
Consider an example of manually setting up the NBMiner for the Ethash algorithm and the ETHW coin:
Choose the miner you need from the list and press “Setup Miner Config”

Choose the hash algorithm
ethash(usually, the algorithm is selected automatically based on the coin you have chosen)ETHW pool address —
ethw.kryptex.network:7034And apply your settings.
