How to create a Pearl (PRL) wallet
۱۴۰۵/۳/۱۳
Pearl (PRL) is a Layer 1 blockchain with a Proof of Useful Work (PoUW) consensus that turns mining into productive AI computation.
Pearl miners run matrix multiplications — the core operation of modern neural networks. The same GPU work earns network rewards and produces results usable for AI training.
Pearl (PRL) can be mined on the Kryptex Pool and exchanged on SafeTrade.
We'll cover two ways to create a wallet for PRL:
- On the SafeTrade exchange.
- In the official Pearl Wallet.
We don't recommend mining to an exchange. If you mine to an exchange, you do so at your own risk. Not your keys — not your crypto!
How to register a PRL wallet on the exchange
This method is convenient — you don't need to install a separate wallet. Coins sit on one exchange and are ready to trade right away.
The downside: every wallet on the exchange is only as safe as your account. Protect your email, safeguard your exchange account, and enable two-factor authentication (2FA).
Keep in mind that exchanges sometimes change deposit addresses. The pool can't update the address you mine to, so any unpaid portion of your coins may be lost.
Sign up on SafeTrade and complete account verification.
Enable two-factor authentication (2FA) in the security settings — without it, withdrawals are usually disabled.
In the top menu, open the Assets section, select Deposit, and find PRL (Pearl) in the list of coins.
The exchange will generate a deposit address. If asked to pick a network, choose Pearl.
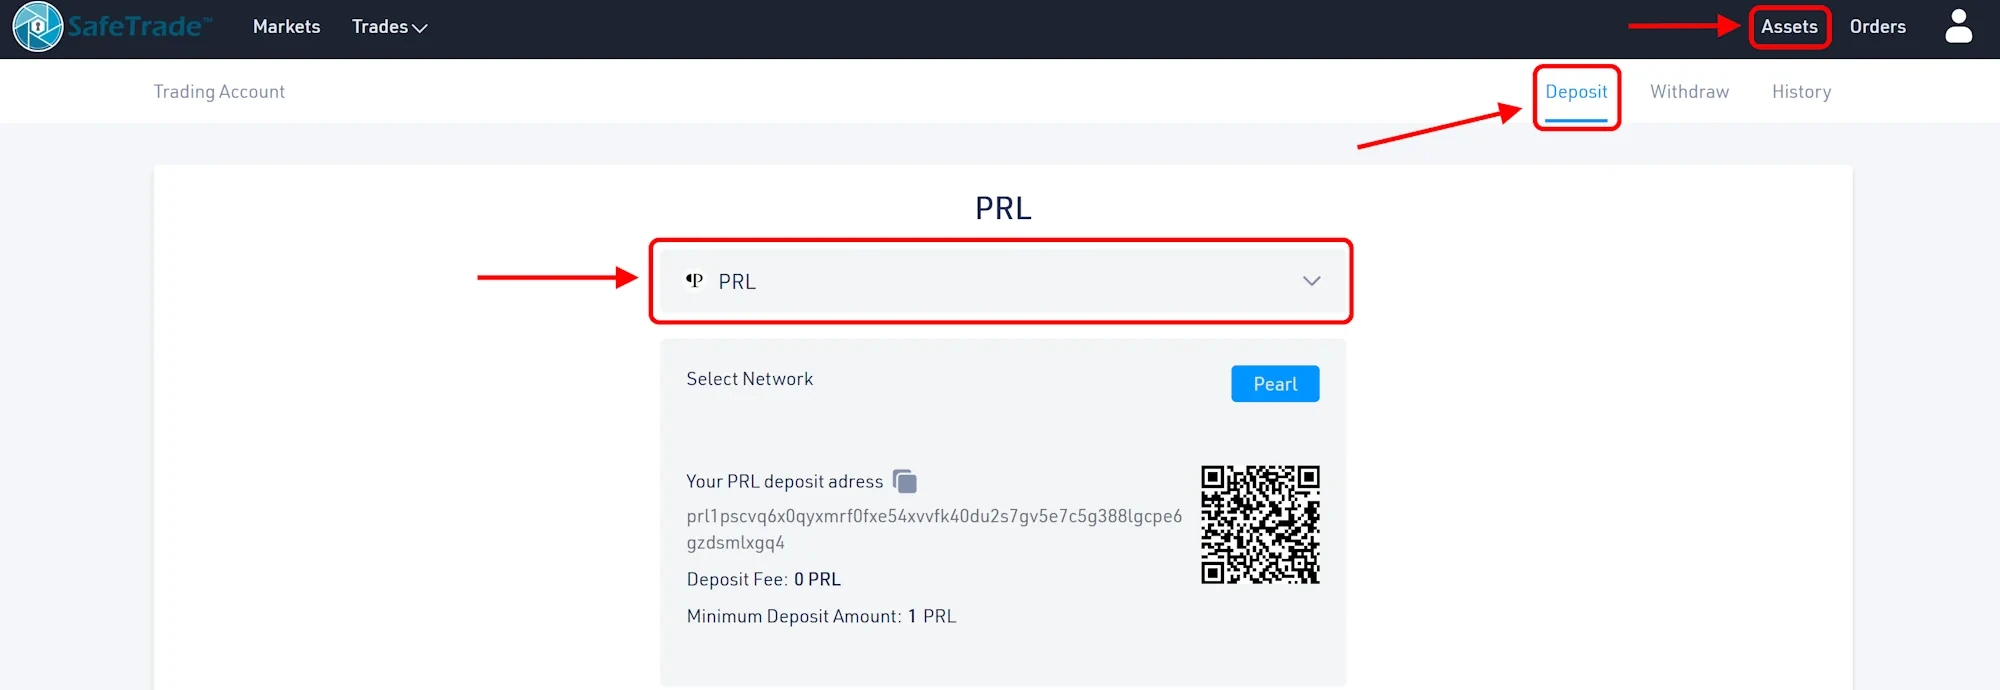
That's it! You now have a wallet address for deposits to the exchange. Click the icon next to the address to copy it. Use this address for mining or for receiving coins to your account.
How to create a PRL wallet in Pearl Wallet
Pearl Wallet is the official open-source desktop app from the Pearl Research Labs team. Builds are available for Windows, macOS, and Linux.
The step-by-step guide below uses Windows as an example.
Open the releases page on GitHub — https://github.com/pearl-research-labs/pearl/releases
In the Assets section of the latest release, download the Windows installer — the
.exefile (for example,Pearl-Wallet-Setup-1.0.0.exe).🛡 Pause your antivirus before installing. Pearl Wallet stores crypto keys, and antivirus software often reacts aggressively to crypto wallets — it can block the installer or delete files. After installing, add the Pearl Wallet folder to your antivirus exclusions.
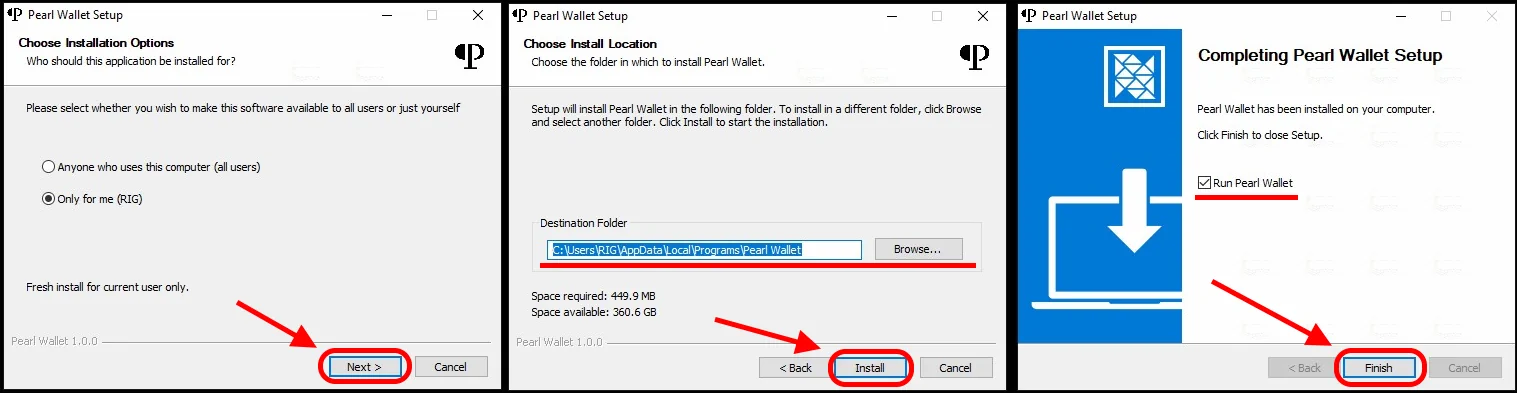
Run the installer, choose the scope — current user only or all users — and click Next. Then confirm the destination folder with Install and complete setup with Finish. Keep Run Pearl Wallet checked so the app opens automatically.
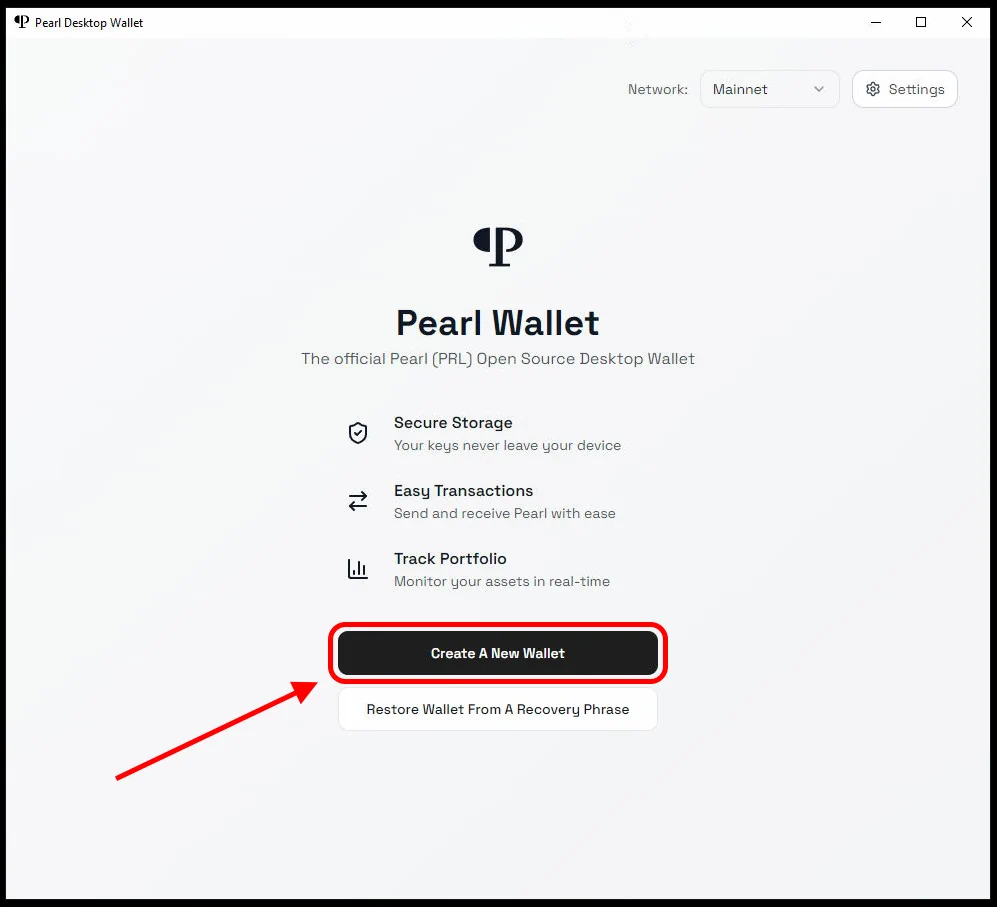
On the wallet's welcome screen, click Create A New Wallet.
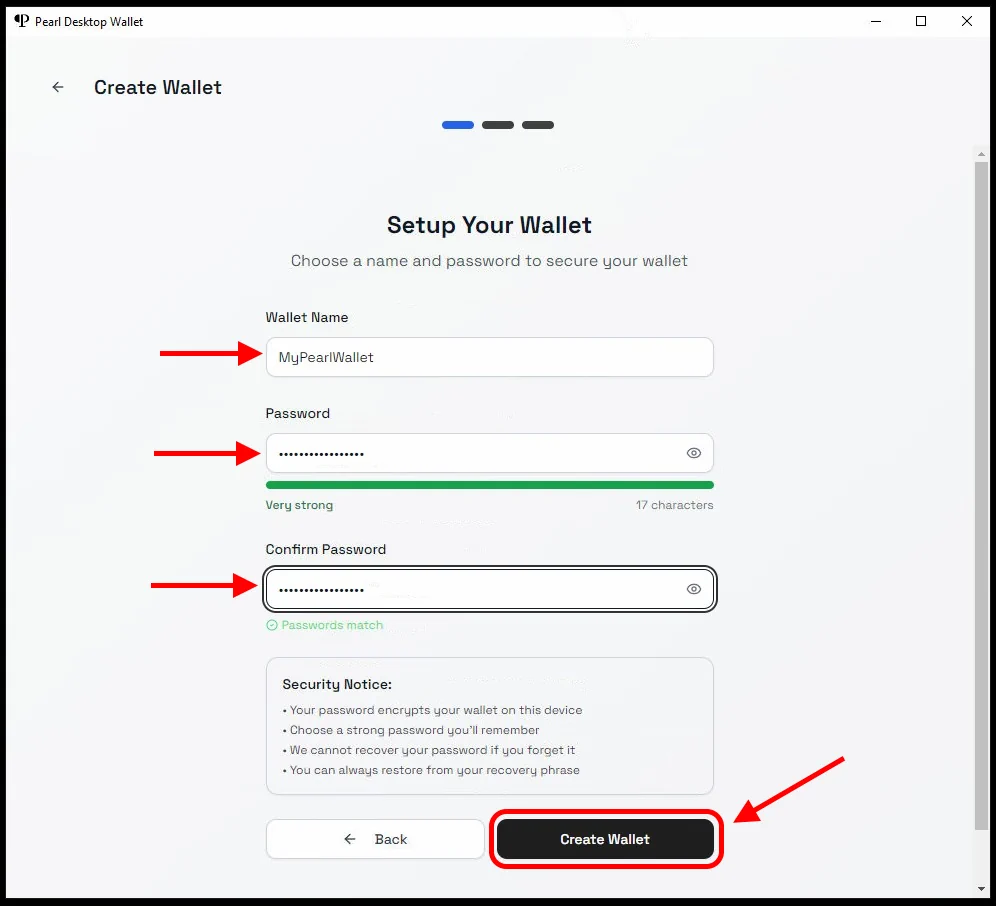
Enter a wallet name, a strong password, and confirm it. Then click Create Wallet. Store the password somewhere safe — without it, you'll lose access to the wallet.
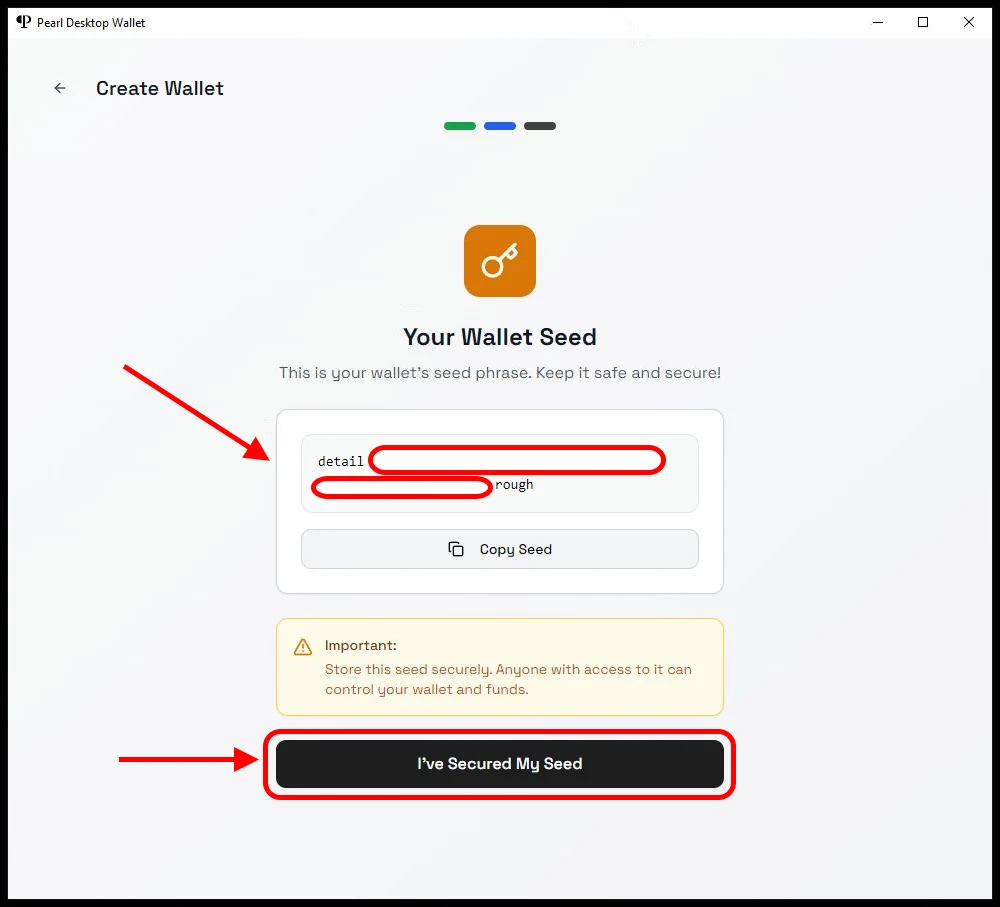
The wallet will display a recovery seed phrase. Write it down on paper and keep it in a safe place — whoever holds the seed phrase controls your coins. Once saved, click I've Secured My Seed.
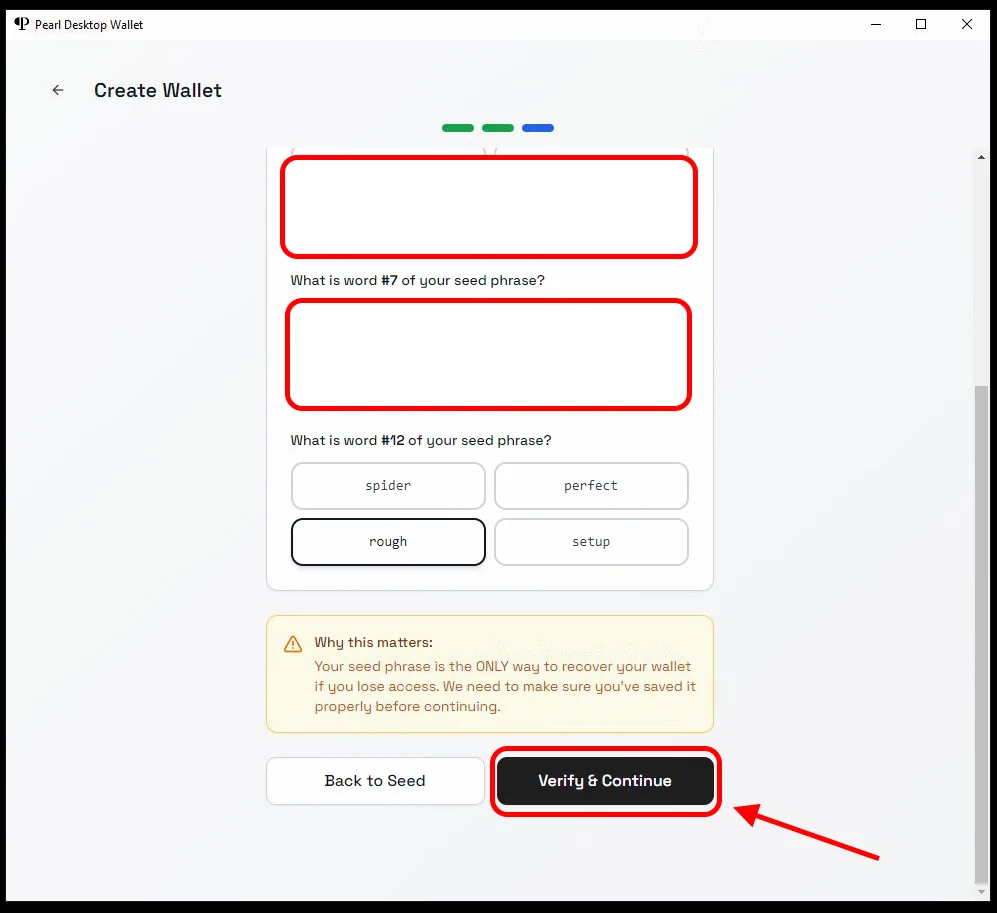
The wallet will ask you to confirm that you saved the seed phrase: enter the requested words and click Verify & Continue.
After verification, the main wallet window opens. Click Receive to get your wallet address.
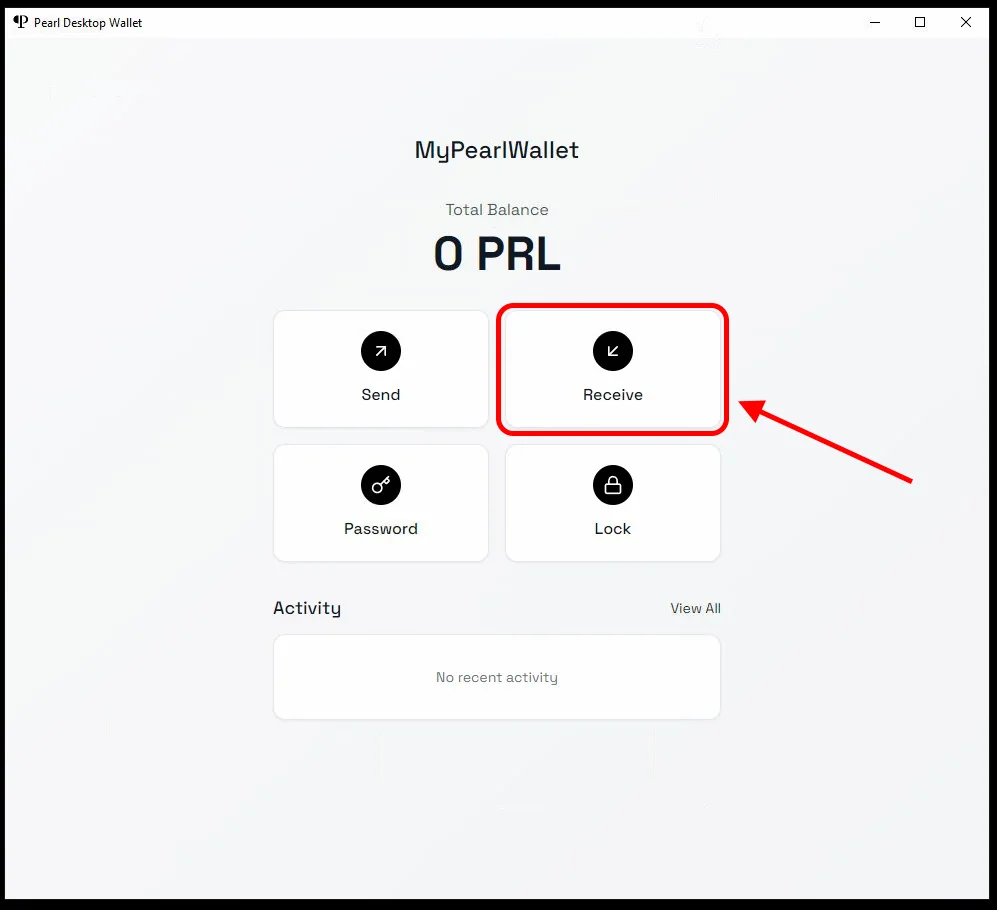
Copy the address from the Your Receive Address field — it starts with
prl1…. Use it for mining or for receiving coins.
Need Help?
Have any questions, something unclear, or trouble connecting?
Contact support — we're happy to assist!
- Support Ticket.
- Telegram Support.
- Discord Support.
- Email support at support@kryptex.com.