HiveOS dual mining
25.02.2023
Earlier, we provided instructions on how to connect HiveOS to Kryptex pools, which means we won't delve into the details of that process here.
Instead, let's discuss dual mining, which can be set up in just a few minutes.
When selecting coins for dual mining, it's important to consider the compatibility of their algorithms and your personal preferences. For instance, we'll explore the process of dual mining ERGO and KASPA.
You can also try dual mining ETC + KASPA, ETHW + KASPA, ETC + IRON, ETHW + IRON, ERG + IRON, CFX + IRON.
Already using dual-mining? Increase your profit! We will tell you how to distribute the hashrate between algorithms and optimize dual-mining.
Create a flight sheet
First, select your primary coin. In our example, we've chosen ERGO, but feel free to choose another coin like ETC if you prefer. Here's how to fill out the flight sheet template:
Select the coin you want to mine, in this case, ERGO.
Specify the wallet address for that coin. If you haven't added it yet, simply click the "Add Wallet" button.
Choose a Kryptex pool from the list.
Select a miner to use. In our case, we're using Gminer for our Nvidia graphics card.
Click the "Setup Miner Config" button located next to the miner.

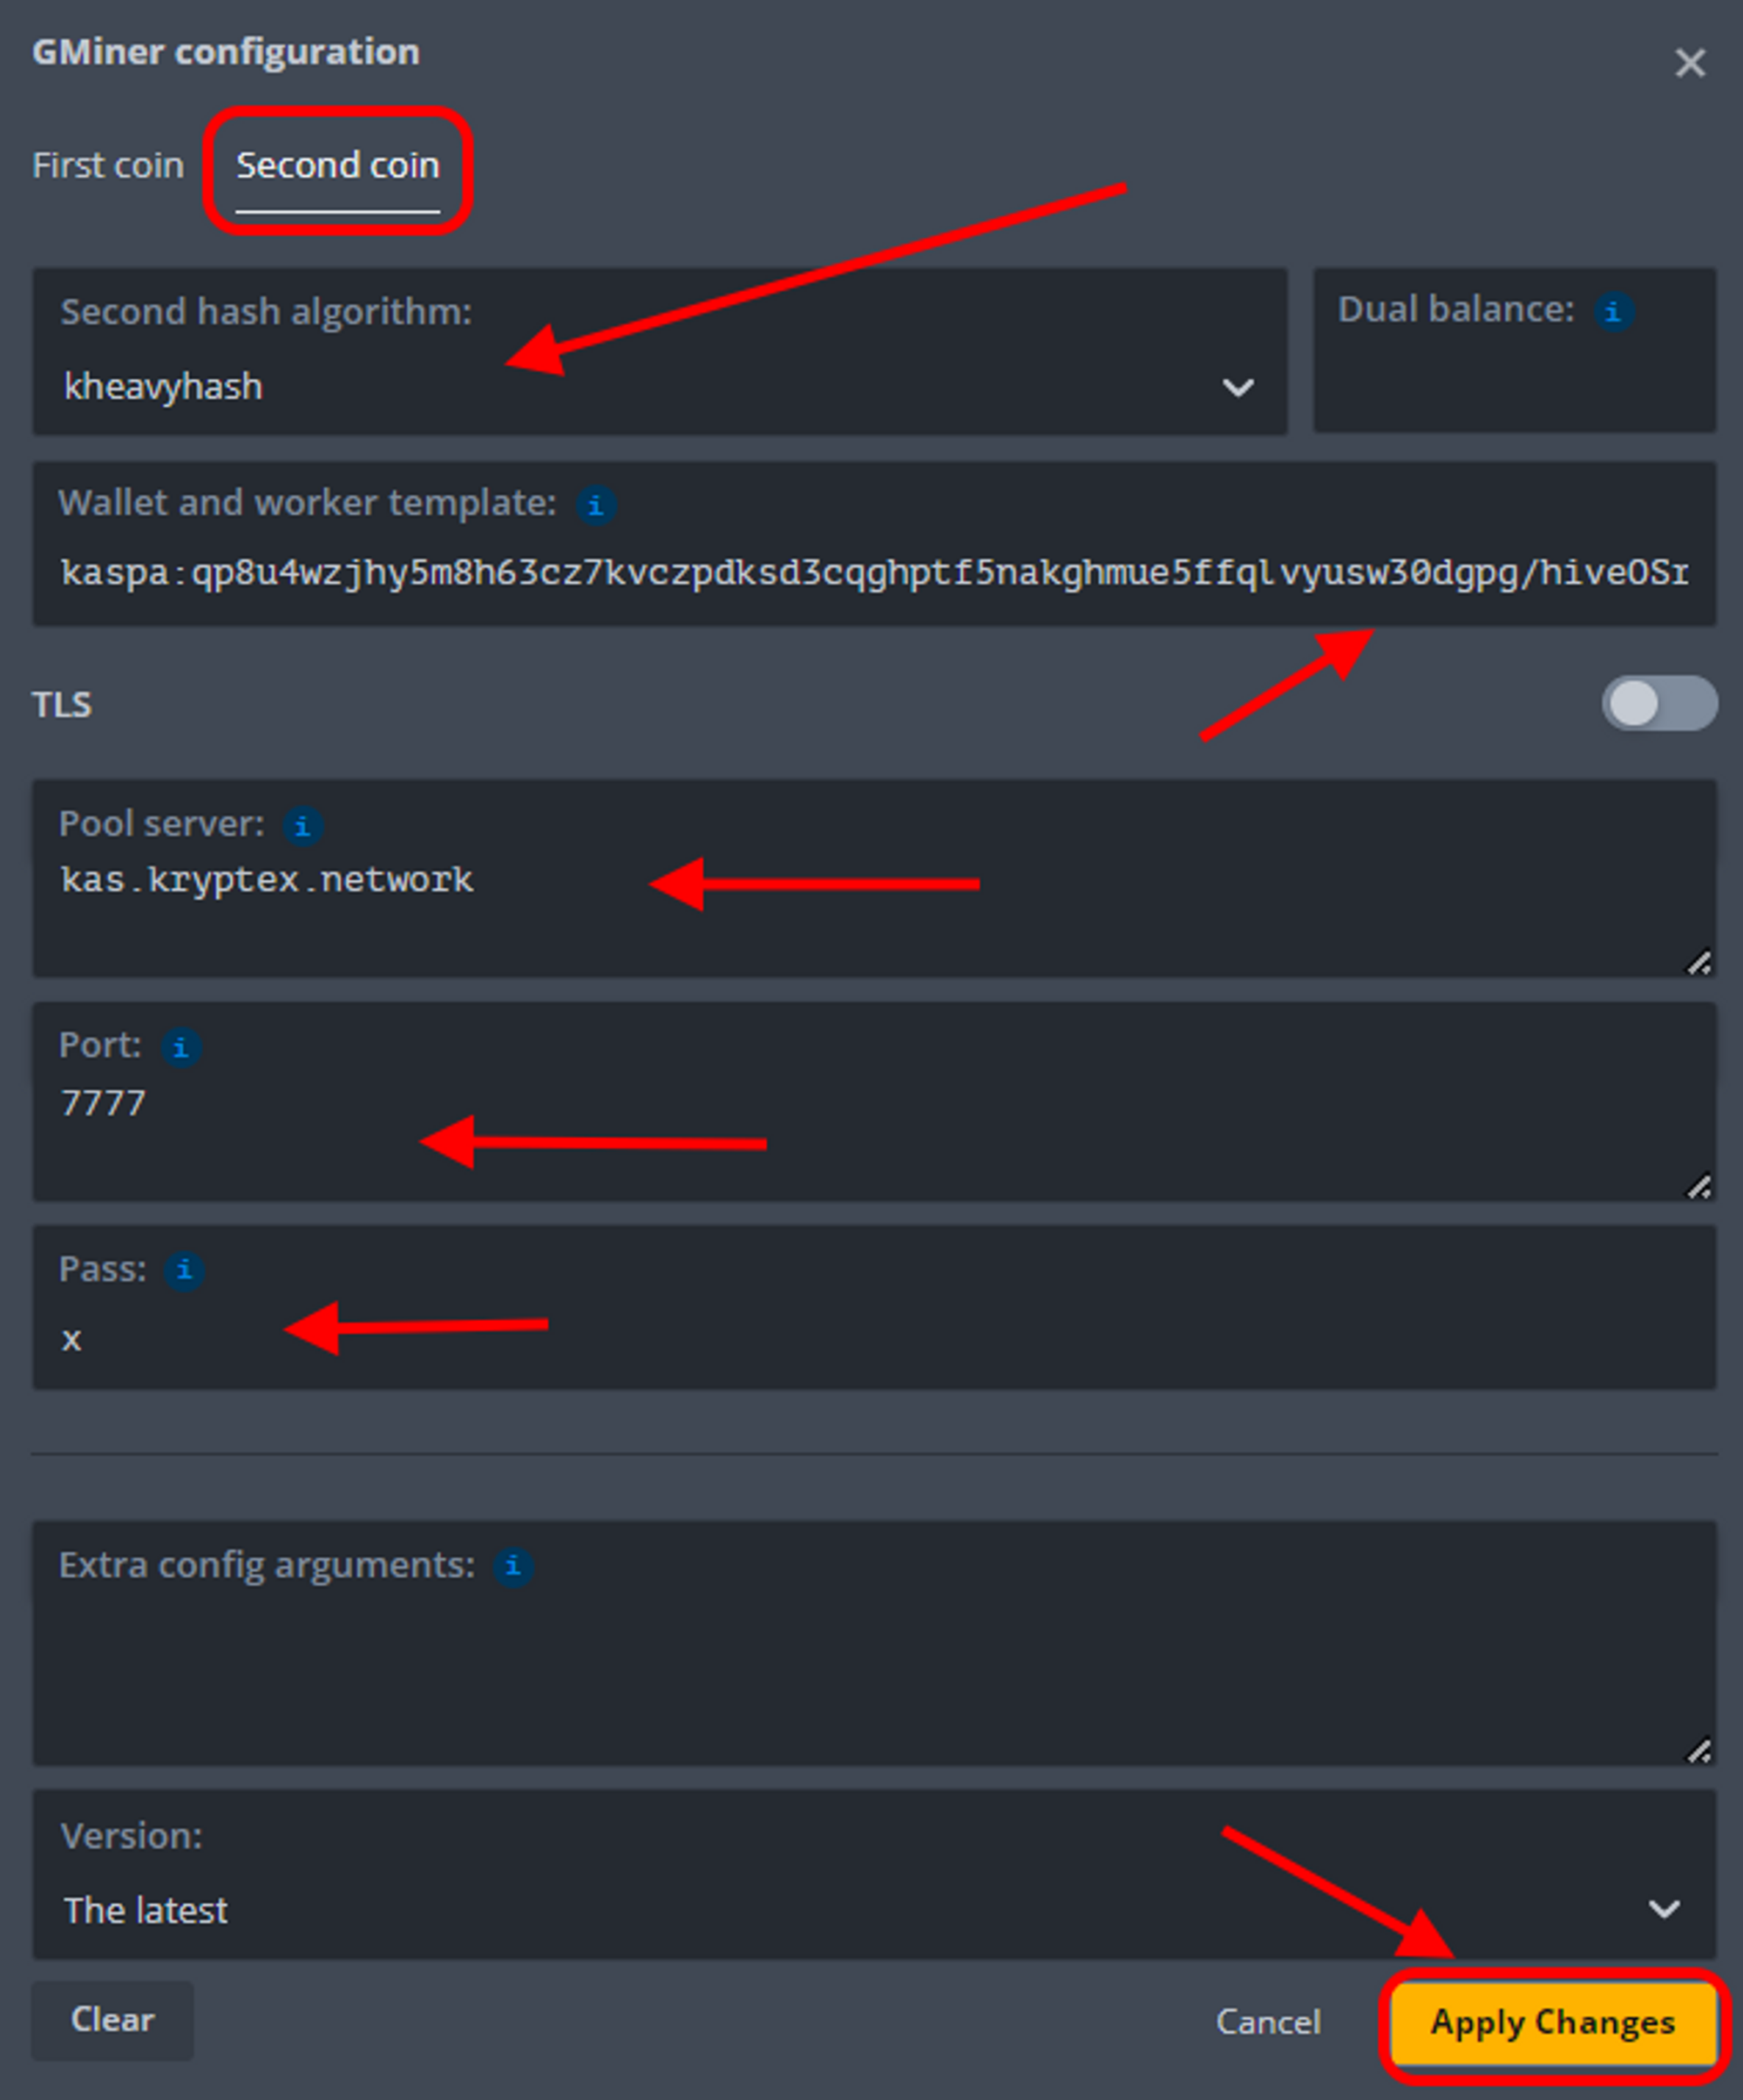
Next, click on the "Second coin" button and enter the following information in the provided fields:
Second hash algorithm — select
kheavyhashfor KASPA.Wallet and template worker — input your wallet address for KASPA and specify the worker's name separated with
/. Note that the KASPA wallet should begin withkaspa:. Here's an example:kaspa:qp8u4wzjhy5m8h63cz7kvczpdksd3cqghptf5nakghmue5ffqlvyusw30dgpg/hiveOSrigPool server — enter the pool address, which is
kas.kryptex.networkPort — input
7011Password — input
xFinally, click the "Apply changes" button.

Name the flight sheet and save it.

Then, everything is as usual:
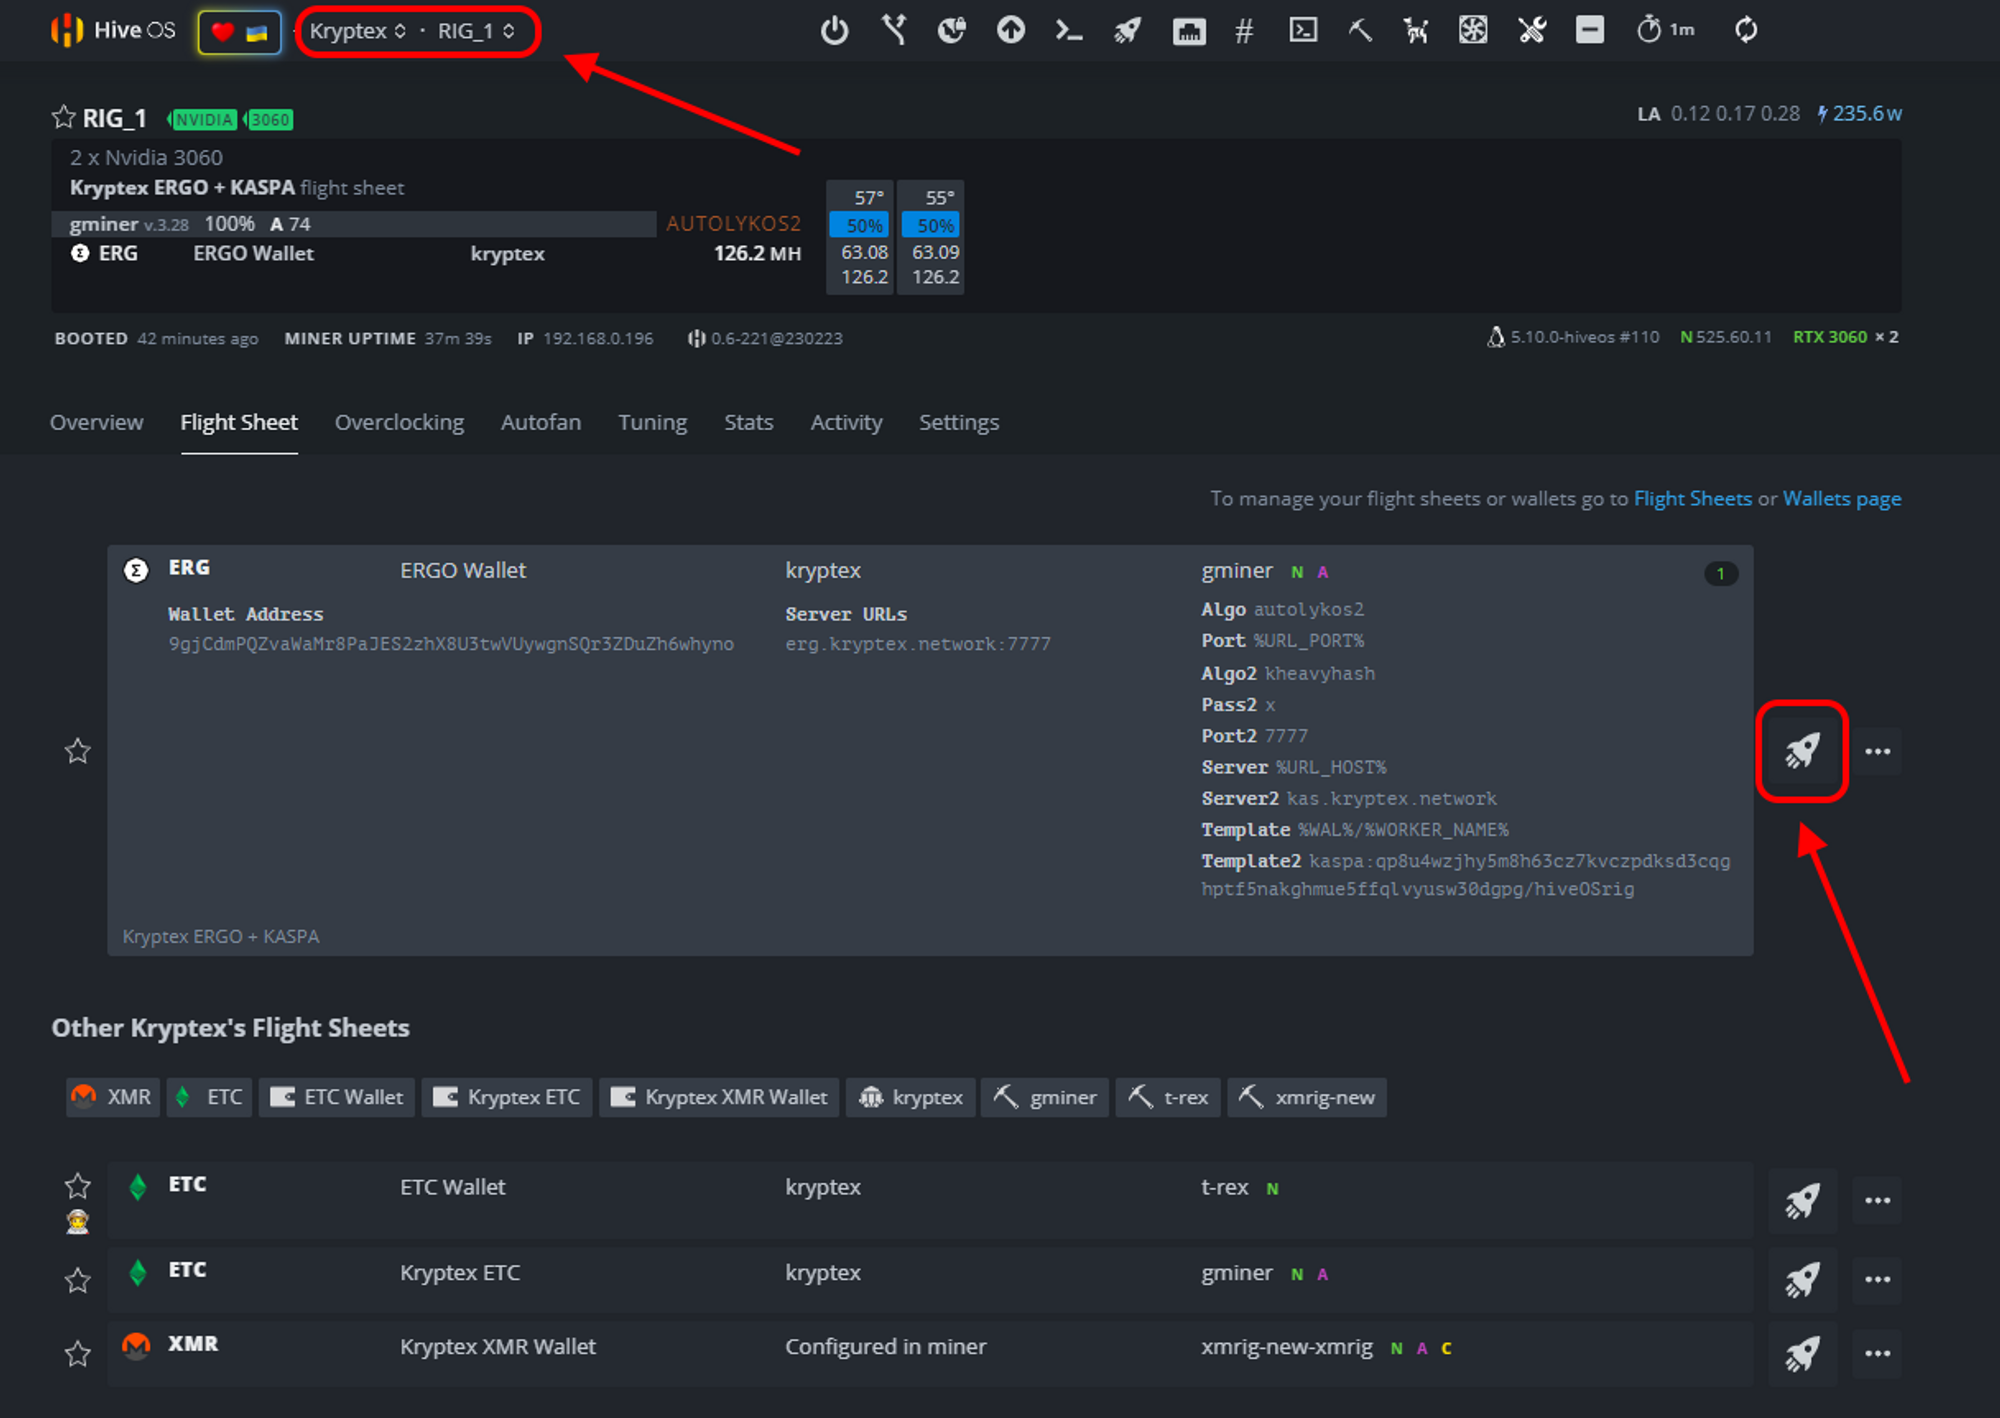
Choose the mining rig and the worker.
Select the created flight sheet.
Click on the rocket icon to finish.

Any questions left?
Articles that may be helpful to you: