How To Connect ASIC To The Pool? Step-By-Step Guide
30/3/2026
ASIC: The Best Way to Profit from Mining. How do you launch and configure an ASIC Miner?
Unlike traditional mining rigs, an ASIC miner is designed to work with a single algorithm, making its setup incredibly straightforward and quick — it takes no more than 30 minutes. This simplicity makes it one of the most convenient solutions for stable passive income.
This article will explain how to mine using an ASIC through the Kryptex Pool, even if you are a novice. You will learn how to prepare your ASIC for its first launch, turn it on, and configure it for pool mining.
What coins can be mined on ASICs?
Depending on the ASIC model, you can mine certain algorithms and coins. Here is a list of the most popular options available on the Kryptex Pool:
- SHA256 — a classic algorithm for Bitcoin and its forks:
- Scrypt — algorithm for mining LTC and Merge coins:
- Ethash/ETChash — used for Ethereum Classic and its analogues:
- kHeavyHash — used for Kaspa and Kaspa-based coins:
- Blake3 — used for Alephium:
- SHA512256d — used for Radiant:
- SHA3X — used for Tari SHA3X:
In our example, we will consider setting up Bitmain Antminer L9 on the Kryptex Pool. This ASIC works on the Scrypt algorithm, which means it allows you to mine Litecoin, Dogecoin, Pepecoin and Bellscoin.
If you have a different ASIC model, this instruction will also help you understand how to set up the equipment.
What do you need to prepare? ASIC, software, router…
- Check the Power Supply
- Determine the power consumption of the ASIC (usually indicated on the power supply).
- If the power consumption exceeds 2000 W, ensure your wiring can handle the load.
- Turn off other high-power devices.
- Use an extension cord with a fuse rated at 4 kW or higher.
- Ensure the socket is in good working condition, with no signs of melting or sparking.
- Inspect the ASIC Before Launching
- Make sure the case is dry and undamaged.
- Clean radiators and grilles of any dust.
- Ensure cables are securely fastened and free of burnouts or damage.
- Read the manufacturer's instructions specific to your model.
- Connect the ASIC to the Internet
- Use a functioning Ethernet network cable (RJ45).
- Connect one end to your router and the other to the ASIC.
- The computer/laptop must be connected to the same router for setup. You can use a phone, but it's less convenient.
- Download a Program to Search for the ASIC on the Network
Depending on the manufacturer of your ASIC miner, use the appropriate utility:
- Bitmain Antminer IP Reporter Tool — for Antminer
- WhatsMinerTool — for Whatsminer
- IceRiver Batch Processing Tool — for IceRiver
- Advanced IP Scanner — a universal scanner of devices on the network
- Angry IP Scanner — an alternative for searching for ASIC
How to turn on ASIC
- Connect ASIC to the router with a network cable.
- Insert the plug into the socket and, if there is a power button, press it.
- The indicators will light up, confirming the operation of the device.
- The fans will turn on if the ASIC has air cooling.
- Wait 2-5 minutes for the ASIC to boot.
How to determine the IP address of the ASIC
After loading the ASIC, you need to determine its IP address for configuration and management.
You can find it in the router settings, or using the downloaded utility.
Let's consider several methods.
Defining your network's IP range
An IP range is the potential IP addresses that can be assigned to your ASIC and other devices on your local network. To quickly find out your range, look at the router address:
- If the address is
192.168.0.1, then the range is192.168.0.1-192.168.0.254 - If the address is
192.168.1.1, then the range is192.168.1.1-192.168.1.254 - If the address is
192.168.2.1, then the range is192.168.2.1-192.168.2.254
How to find out the range of IP addresses of a local network?
How to determine the IP address using the utility
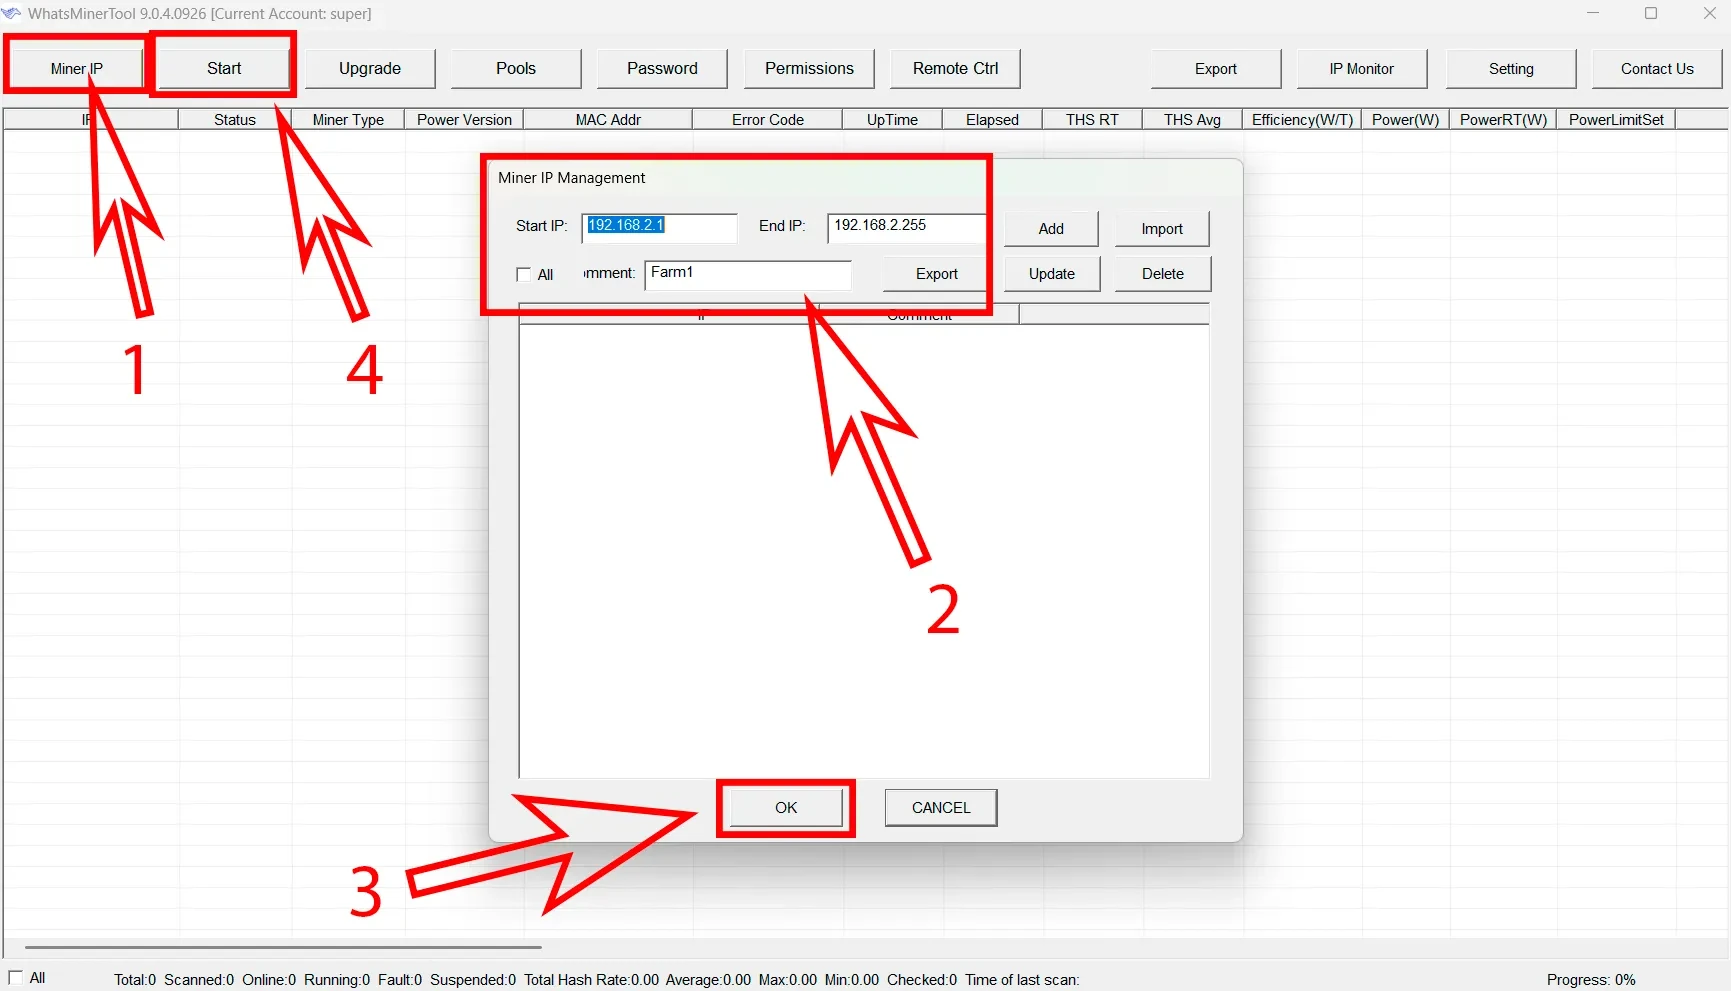
WhatsMinerTool — for MicroBT Whatsminer ASICs
Download and run the program.
Run the utility, click “Miner IP”
Click “Add” and specify the range of IP addresses of your network in the corresponding field.
Click “Update”, then click “OK”.
Click the "Scan/Start" button.
In the list of found devices, find the line corresponding to your ASIC miner — usually the "Type" field will indicate the model name.
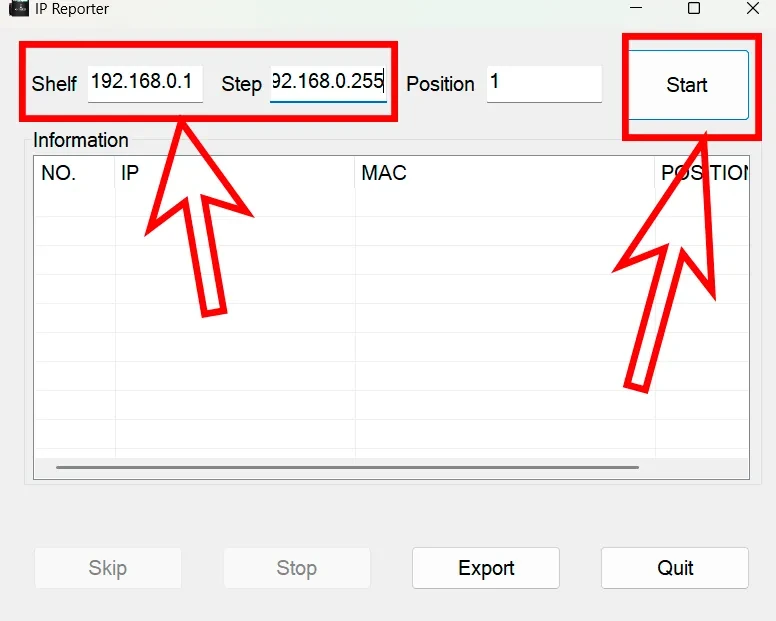
Bitmain Antminer IP Reporter Tool — for Bitmain Antminer ASICs
Download and run the program.
Specify the range of IP addresses of your network in the corresponding field.
Click the "Start" button.
On the ASIC itself, press and hold the "IP Report" button for a few seconds.
The utility will display the IP address of your device.
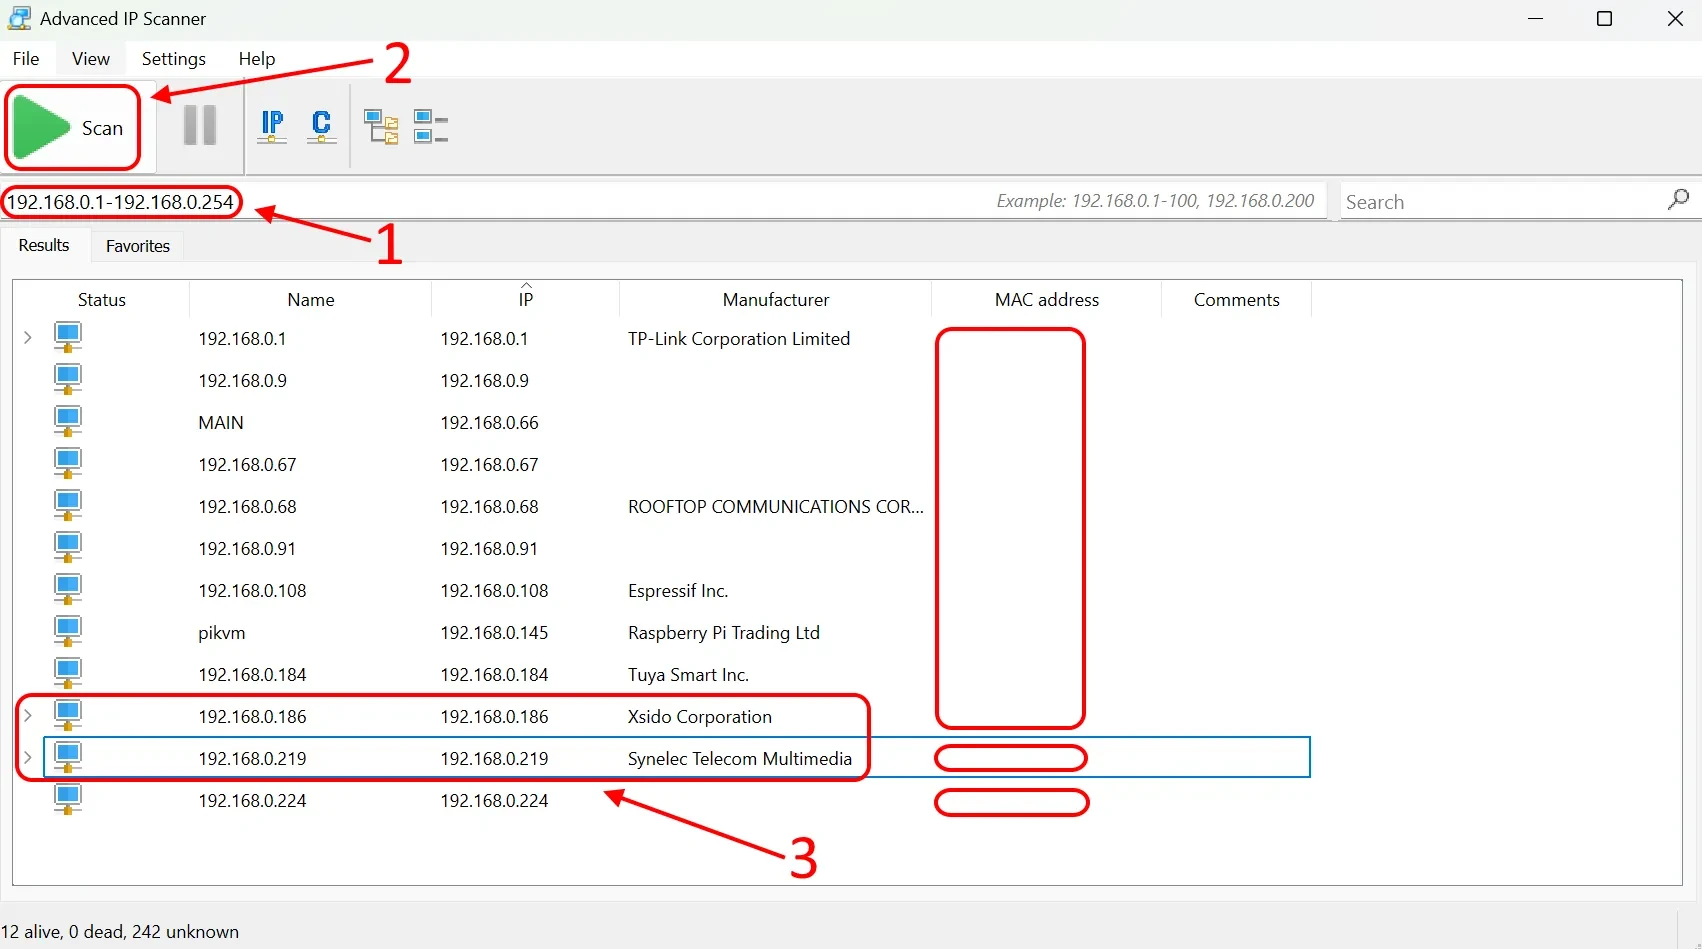
Advanced IP Scanner — a universal utility for searching devices on the network.
Download and run the program.
Enter the range of IP addresses of your network (for example,
192.168.0.1-192.168.0.254).Click "Scan", wait for the scan to complete.
In the list of found devices, look for ASIC — it is usually defined as a device with the manufacturer's name, or an unknown device with open ports.
Angry IP Scanner is another option for searching for devices on the network.
- Download and run the program.
- Enter the range of IP addresses of your network (for example,
192.168.0.1-192.168.0.254). - Click "Start", wait for the scan to complete.
- Find a device with active ports
80or4028— this is most likely your ASIC.
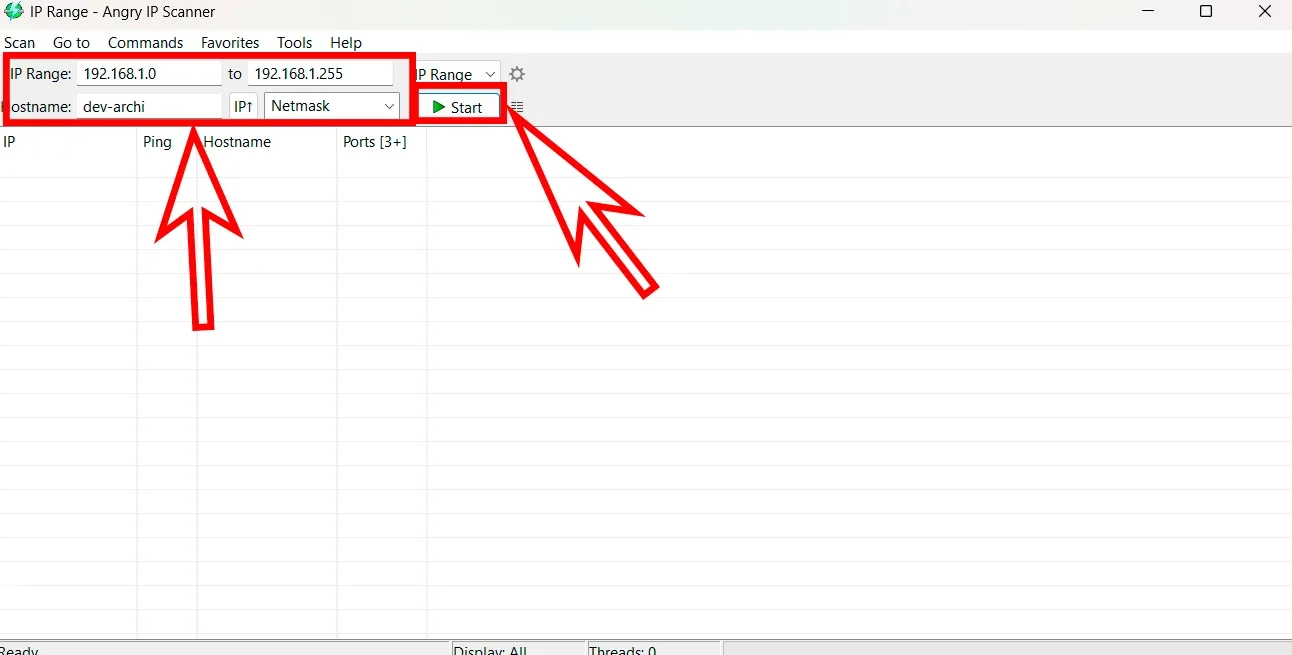
If there are several devices on the network and it is difficult to determine which of them is your miner, try disconnecting all other devices (except ASIC and PC) and repeat the scan.
Settings menu and ASIC web interface
Once you have found your ASIC on the network and determined its IP address, you can access the ASIC interface.
Open any internet browser, enter the ASIC IP address in the address bar, then press Enter.
The web interface will open, prompting you to enter your login and password.
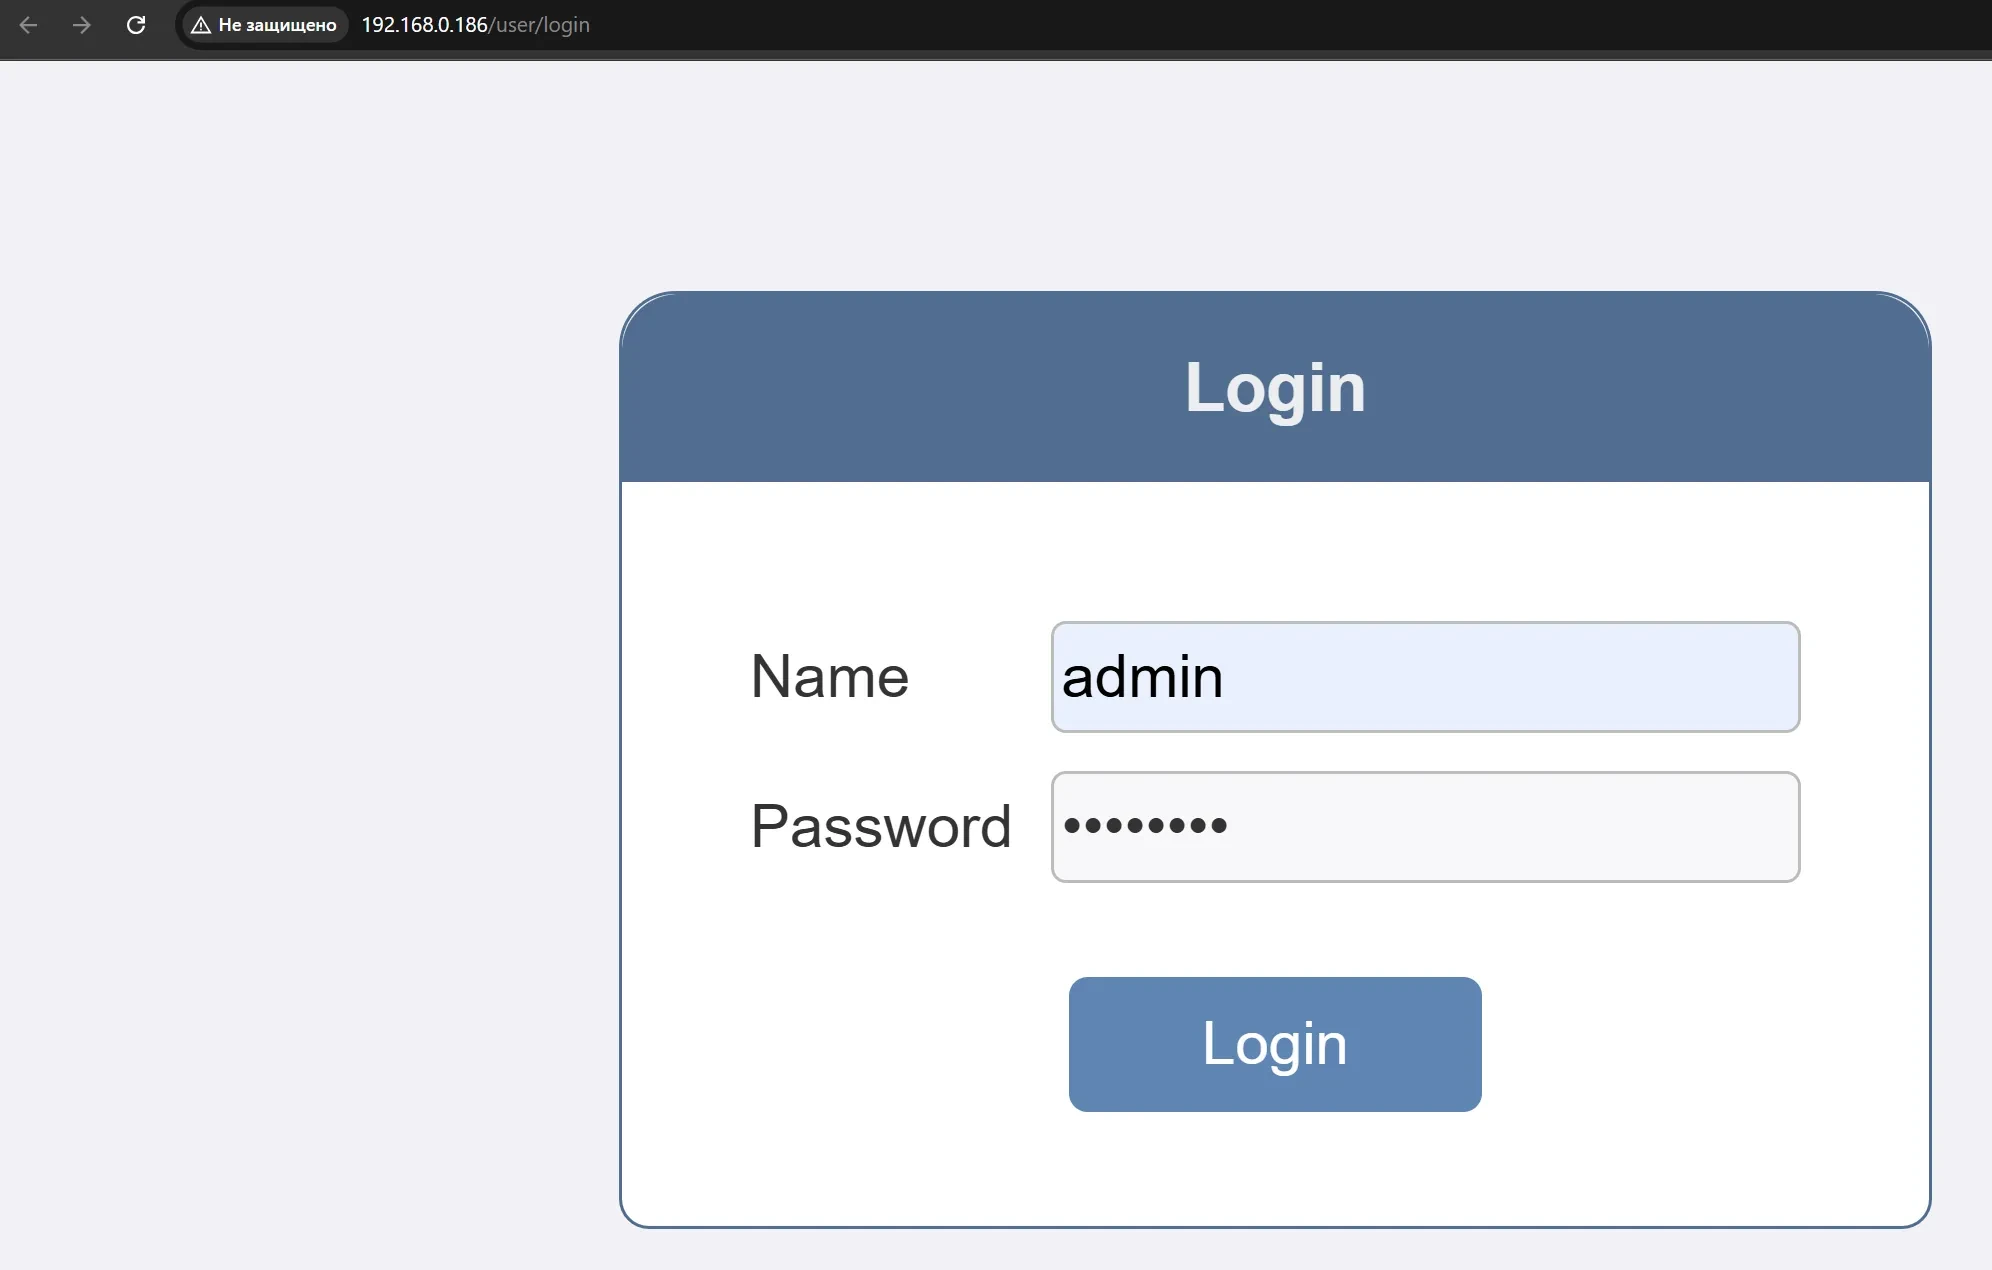
The default login credentials vary by manufacturer:
- For Bitmain Antminer miners, the default login and password are
root. - For MicroBT Whatsminer miners, the default login and password are
admin. - For IceRiver miners, the default login is
admin, and the password is12345678.
After logging into the web interface, the main page will display information about the device.
Here, you can configure the pool and operating parameters.
Description of ASIC settings
Open the mining settings menu.
- It may be called Miner, Settings, Mining settings, Configurations, Miner Configurations.
Enter the data in the corresponding fields:
- Pool Address / URL / Pool URL — pool address.
- Miner Name / Wallet / Worker / Wallet Address — wallet address and worker name.
- Pwd / Password / Pass — password (usually not required, you can leave
x).
Add backup connections.
Most ASICs have 3 lines for entering additional pool addresses.
Several addresses are also available on pools — you can use different ones or duplicate the main one.
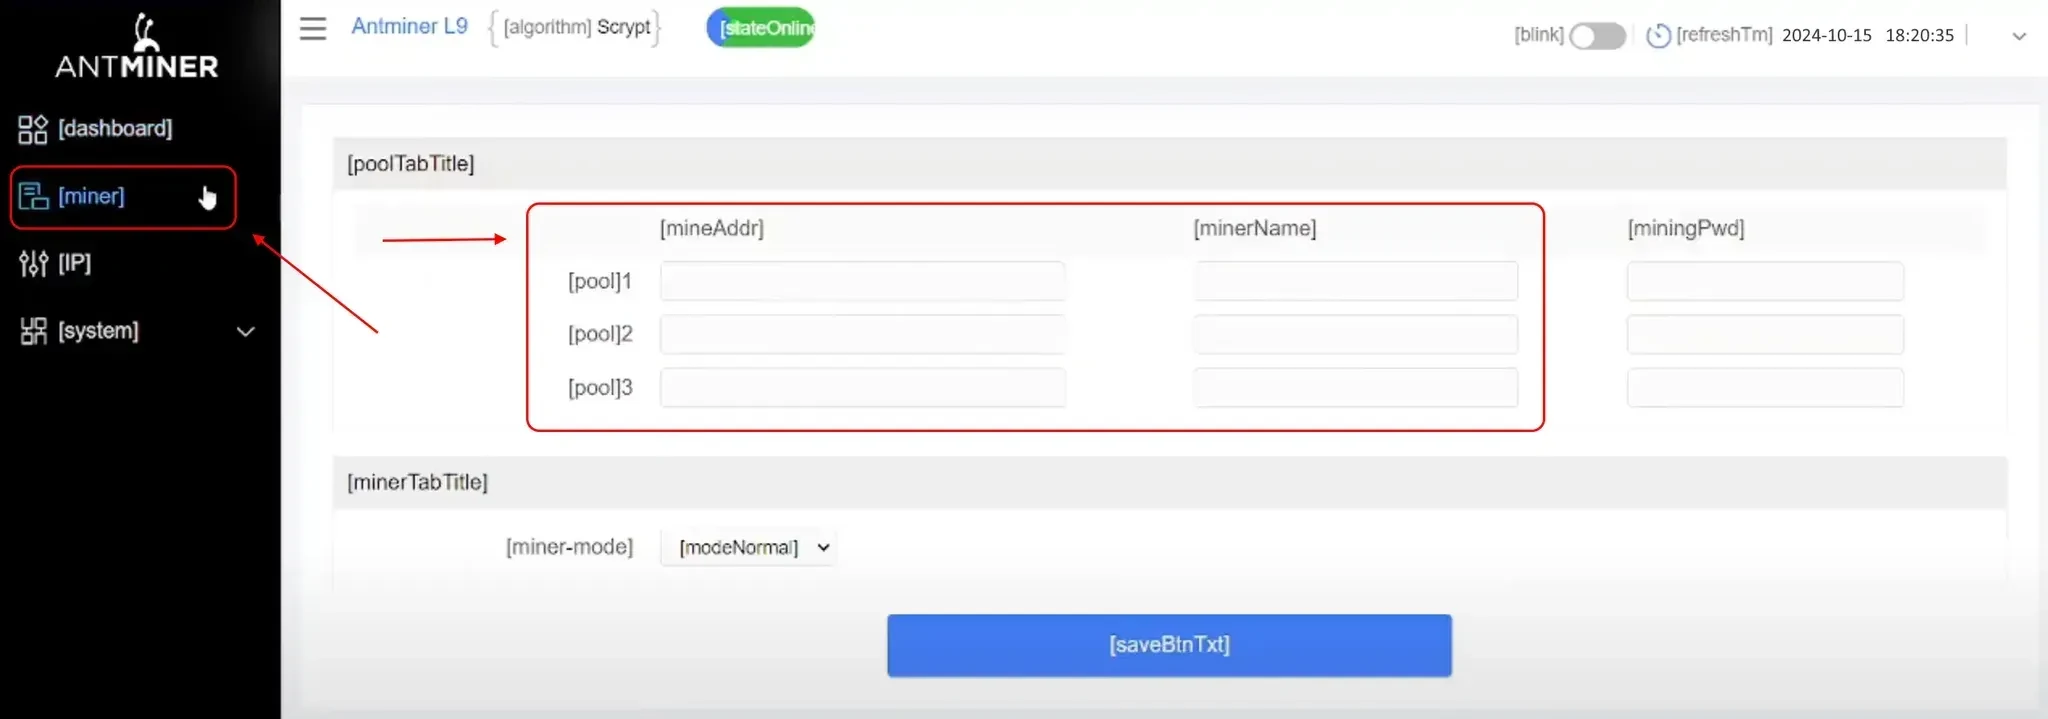
In some models, in the Settings tab, you can select the mode:
- Efficiency — economical
- Normal — standard
- High Performance — maximum performance
If the modes are available, we recommend choosing Normal.
On official firmware, changing the processor frequency is not available.
How to connect ASIC to Kryptex pool
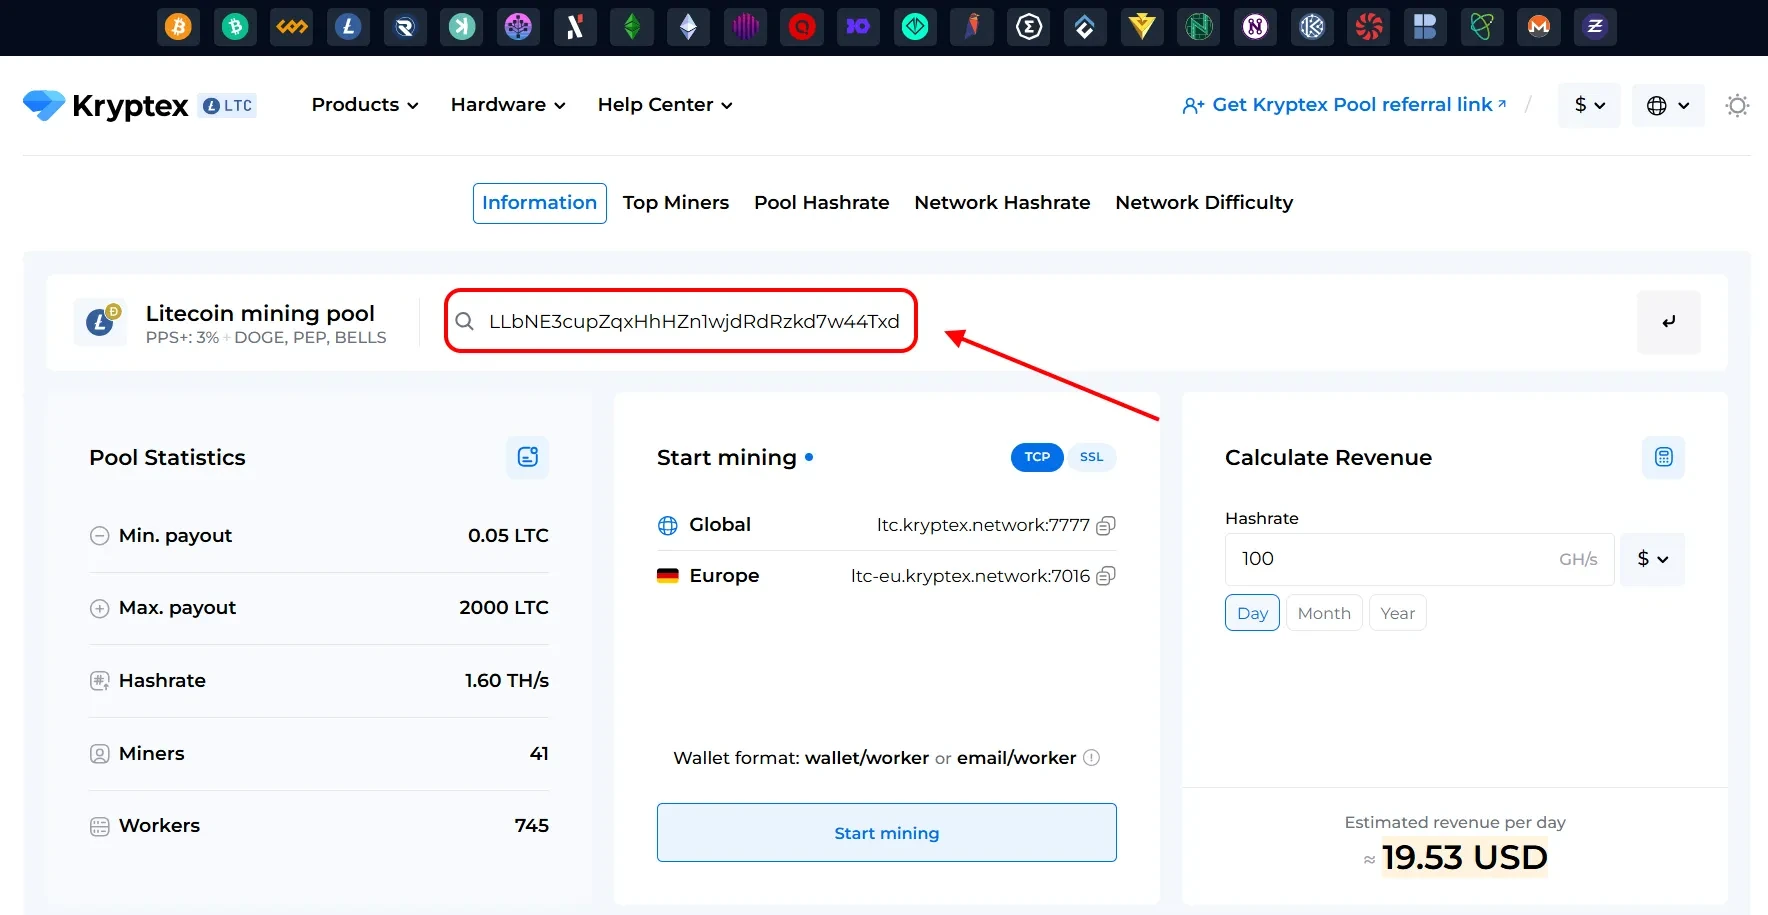
- Get pool address
Go to the main page of Kryptex Pool — https://pool.kryptex.com/
Select the coin you will mine.
Select the pool address in your region (if you are not sure — take the first one on the list).
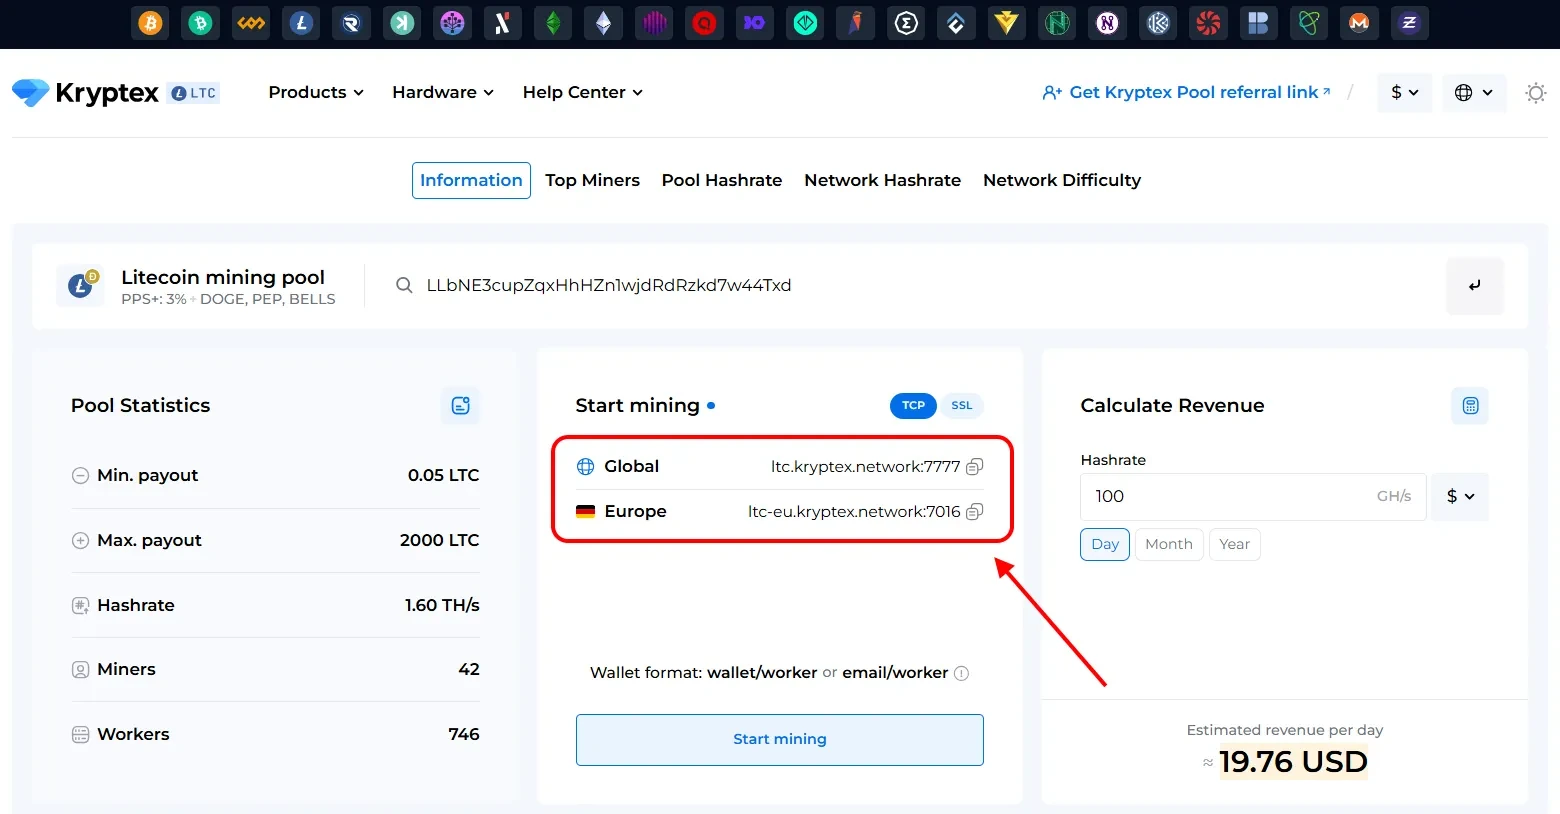
Copy and paste it into the Pool Address field.
- Specify the wallet address and worker name
- Wallet address — payments will be sent here.
- If you don't have a wallet, create one: How to create a crypto wallet.
- If you mine on a Kryptex account, use Mining Username (format
krxXXXXX, you can find it in Profile). - Worker name — any ASIC name (Latin letters, numbers, no spaces or special characters).
- Example for LTC:
- Wallet address:
LgETtY86dfiWsgD3Mmcx1PtzhCdeYUVBaL - Worker name:
ASIC1 - Result:
LgETtY86dfiWsgD3Mmcx1PtzhCdeYUVBaL.ASIC1
- Wallet address:
- Example for LTC:
- Save settings and restart ASIC
Paste data in three lines for the pool.
Click Save.
Reboot ASIC with Reboot button or power cycle.
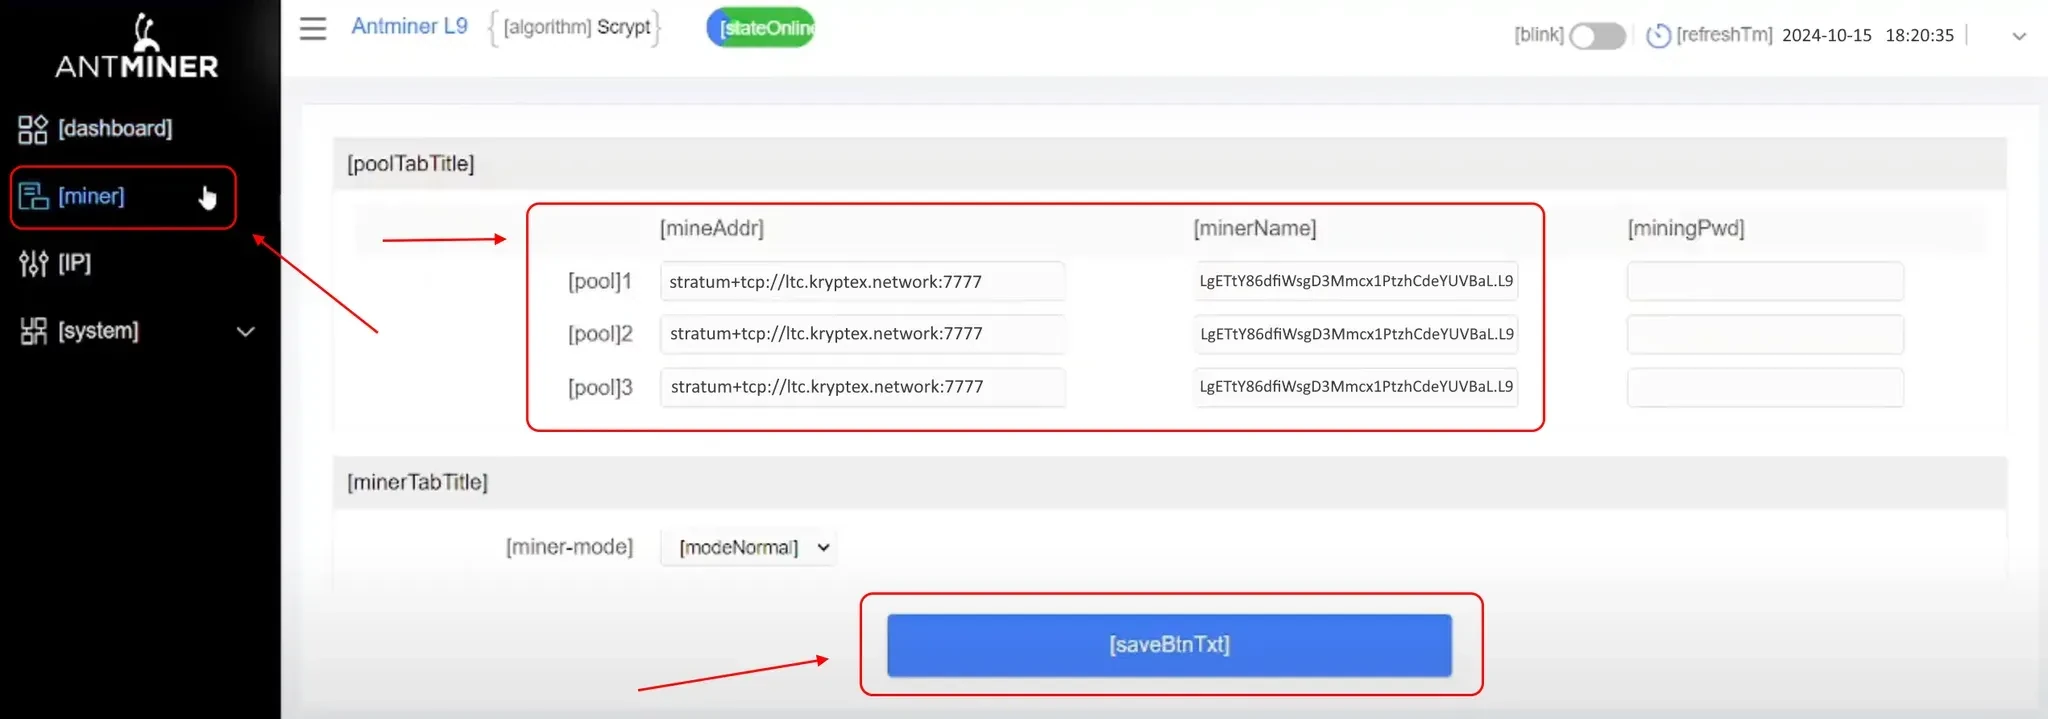
⏳ Loading may take from 5 to 30 minutes.
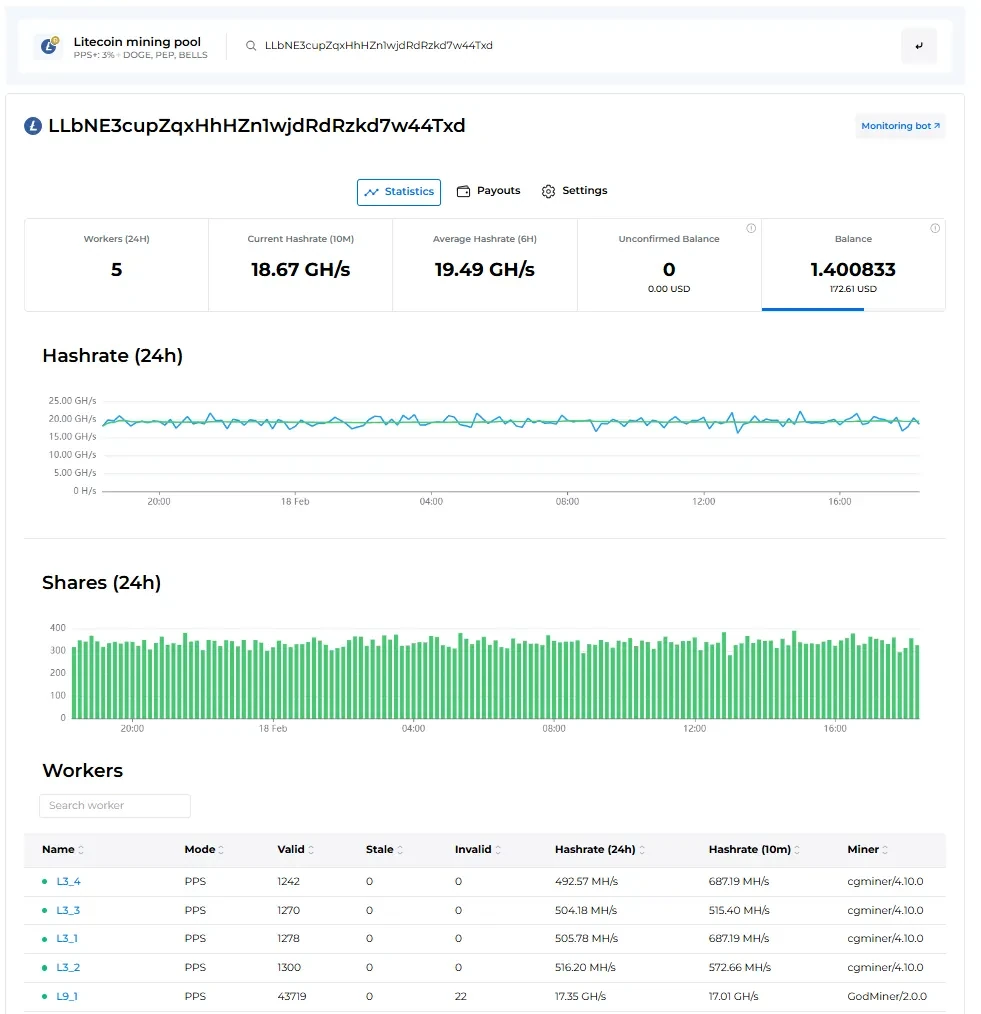
How to check the ASIC working
The ASIC reaches the working hashrate in two hours on average. You can check its working through the Kryptex pool or account.
If you mine to a wallet
Open the Kryptex pool — https://pool.kryptex.com/
Select a coin (for example, LTC).
Enter the wallet address in the search and click “Find”.
On the statistics page you will see:
- List of your ASICs.
- Current hashrate.
- Number of accepted, rejected and invalid shares.
- History of payments and hashrate for 24 hours.
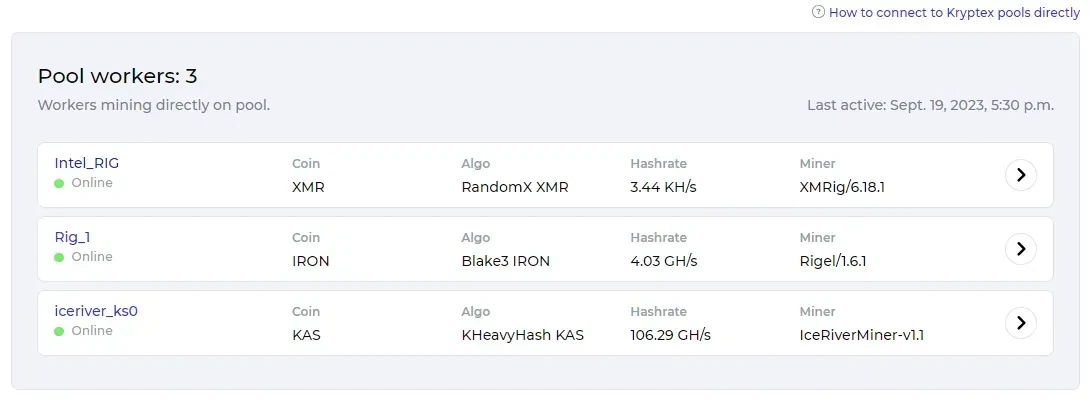
If you mine on a Kryptex account (auto exchange in BTC)
- Go to the Kryptex website — https://www.kryptex.com/
- Log in to your account.
- Open the “Hardware” tab.
- Find your ASIC and check:
Online status.
Current hashrate.
Number of sent and rejected shares.
Balance of accruals.
🚑 Need help?
Have any questions, something is unclear, or you can’t connect?
Contact support — we are happy to assist!
Email support at support@kryptex.com.