How to Replace Thermal Paste in an ASIC?
31/03/2025
Over time, factory-applied thermal paste loses its properties and becomes less effective at transferring heat from the chips to the radiator. This can lead to overheating, reduced performance, a higher risk of device failure, and a drop in ASIC profitability.
It's recommended that the thermal paste be replaced every 6–12 months. This simple yet essential step maintains the performance of your device. Dust cleaning should be done every 3-6 months.
Timely maintenance and thermal paste replacement:
- Reduces heat generation.
- Maintains stable operation.
- Extends the lifespan.
- Prevents problems under heavy loads.
- Ensures maximum profitability.
Preparation
Tools for ASIC Maintenance:
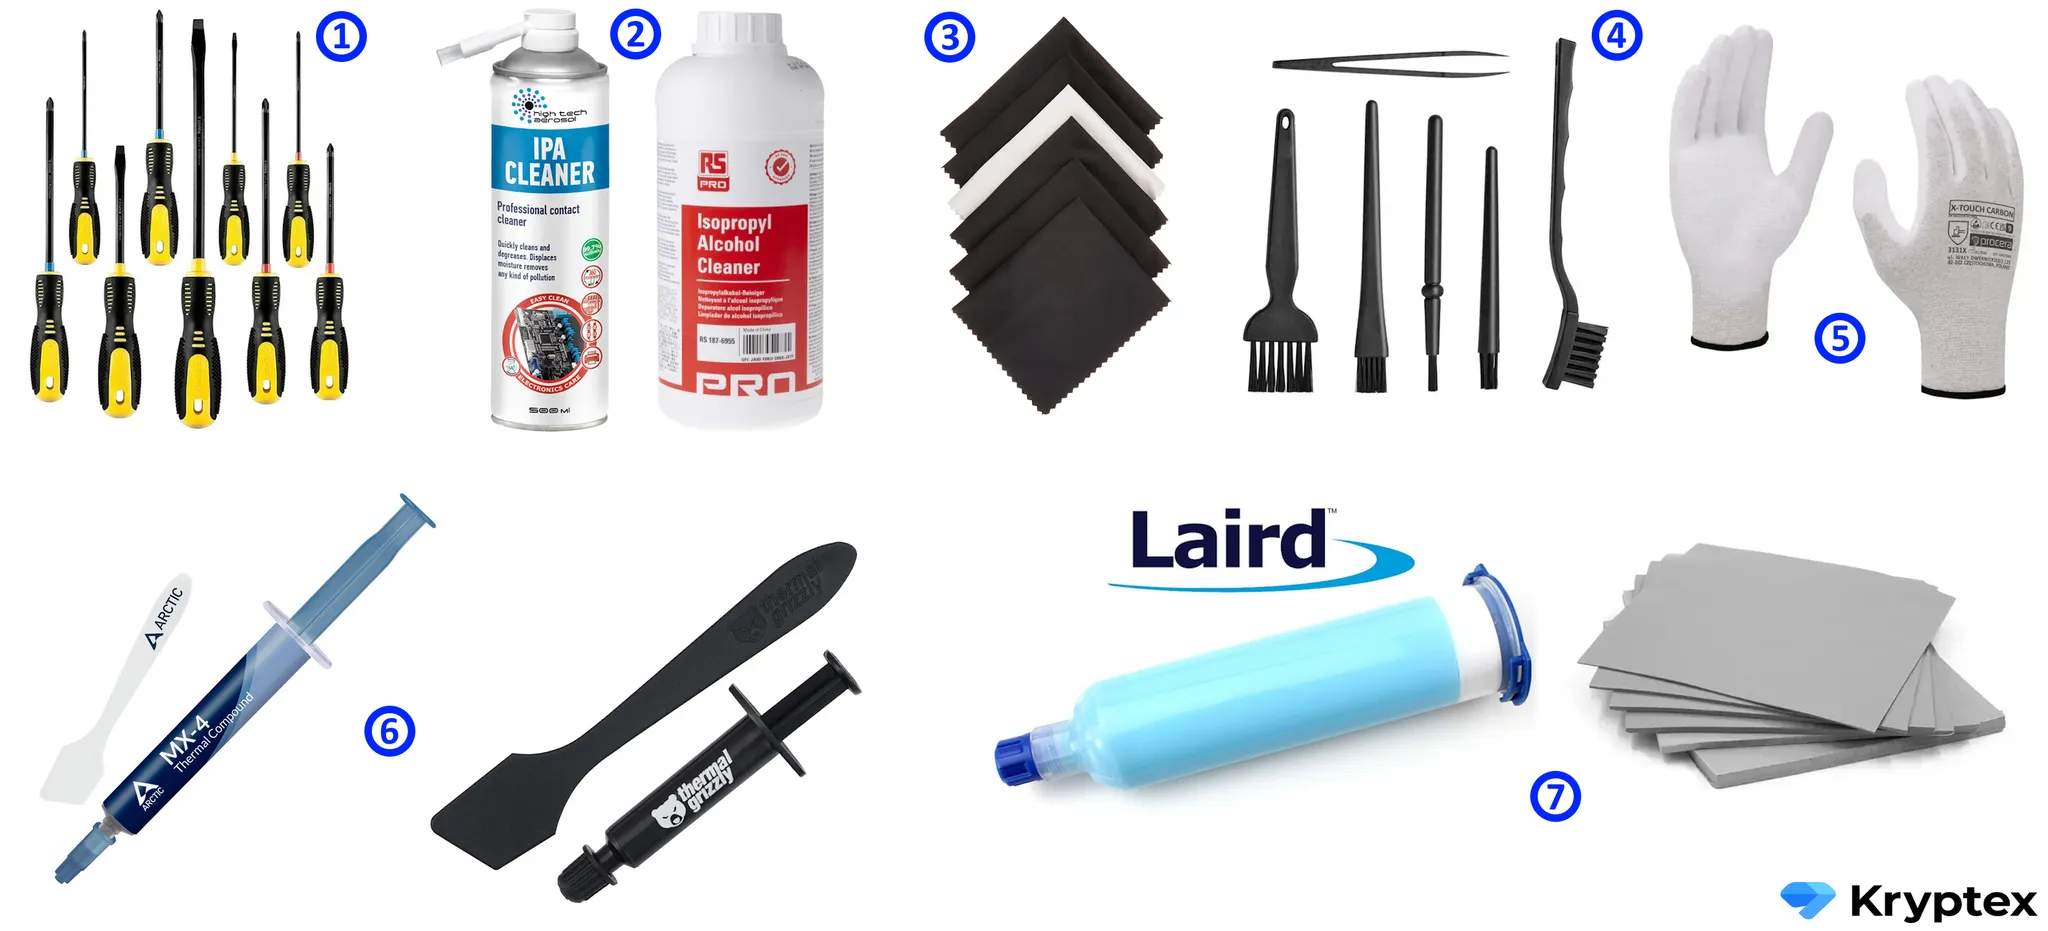
- A screwdriver set or a drill with interchangeable bits is needed.
- Isopropyl alcohol at least 90% concentration.
- Soft cloth or cotton swabs.
- Soft brush for dust removal.
- Antistatic gloves (recommended).
- New thermal paste (e.g., Arctic MX4/MX6 or Thermal Grizzly Kryonaut with high thermal conductivity).
- Thermal pads (liquid Laird 607 for universal use, or denser ones if the thickness is known). You can measure pad thickness using a caliper or modeling clay.
- A plastic card or plastic spatula (usually included with the thermal paste) is used to remove the old thermal paste and apply the new paste.
Safety Precautions: Disconnect the device from power. Work in a clean, well-lit area. Wear antistatic gloves or an antistatic wristband to prevent static electricity from damaging components.
If you're not confident in your abilities or require professional servicing, visit a service center or electronics repair shop. Specialists can maintain your device quickly and efficiently.
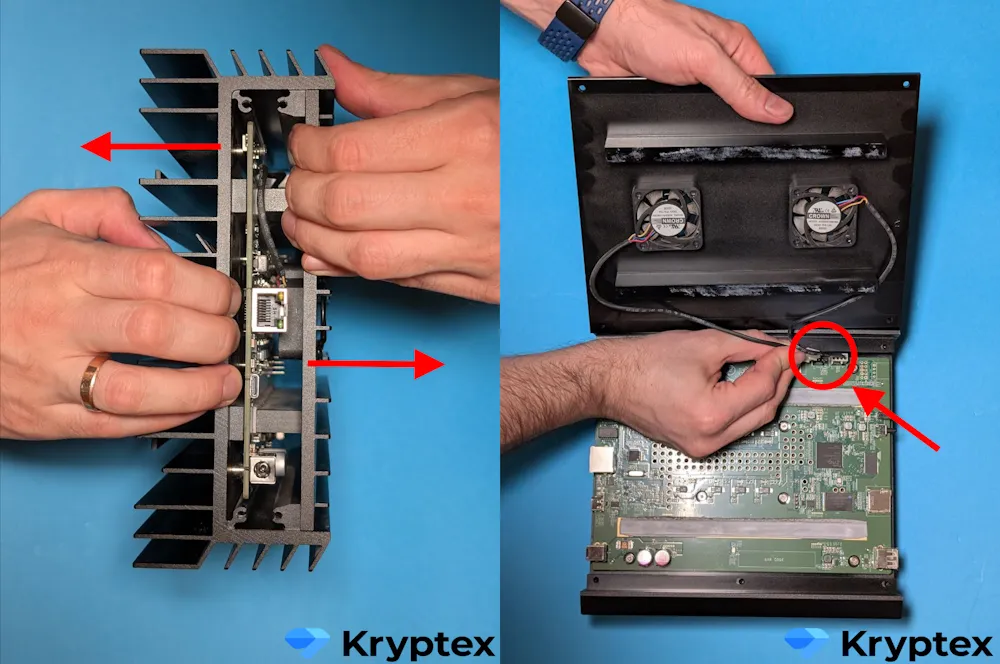
Disassembling the ASIC
Remove the casing cover: It's usually secured with screws.

Access the motherboard and radiator: Carefully disconnect fans, wires, and other components to clear access.
Removing the Radiator
Unscrew the bolts: The radiator is fastened to the chips using mounting screws. Unscrew them in a diagonal (criss-cross) pattern to avoid uneven pressure or damaging the chips.
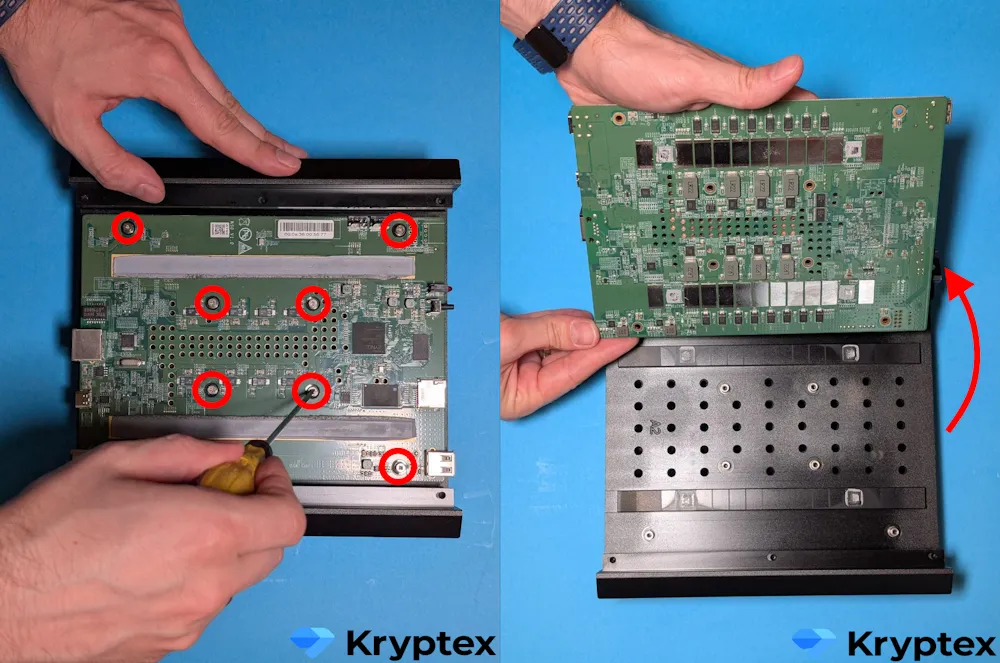
Gently detach the radiator: Don't attempt to force it off if it sticks to the chip. Instead, gently wiggle it from side to side. It may take time, but this method is safer.
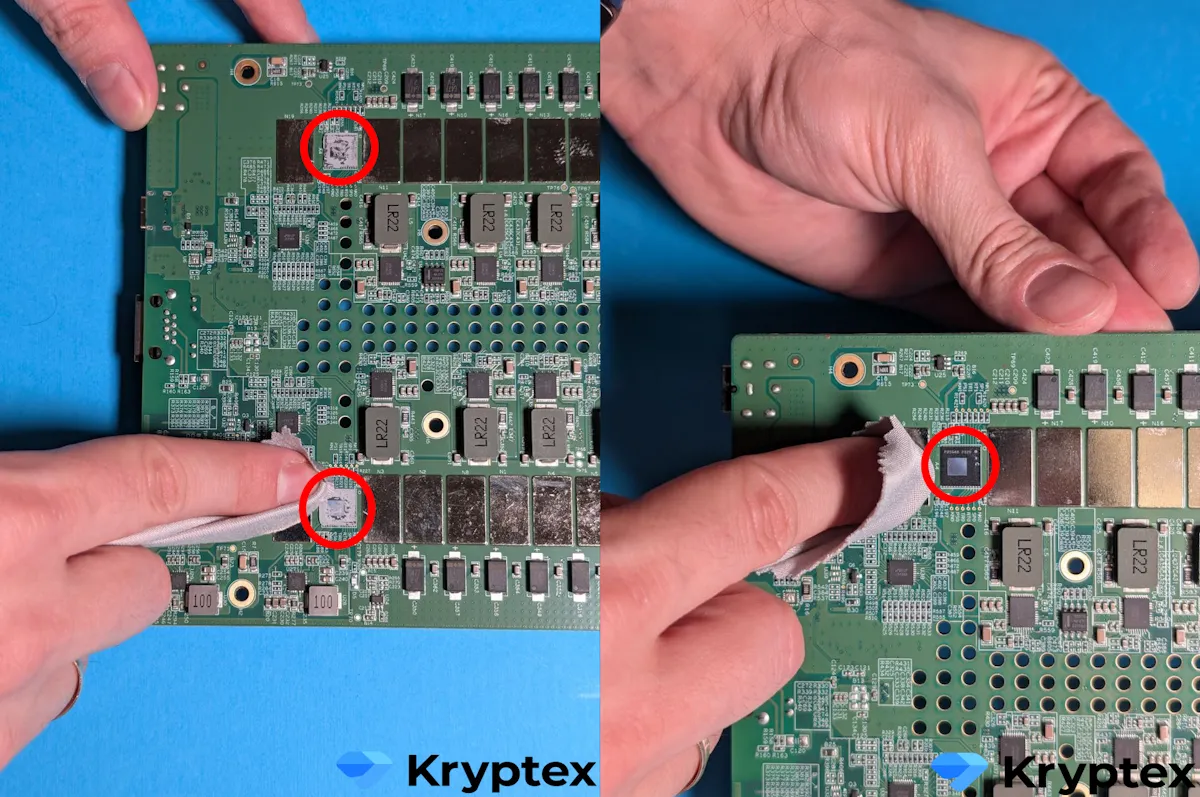
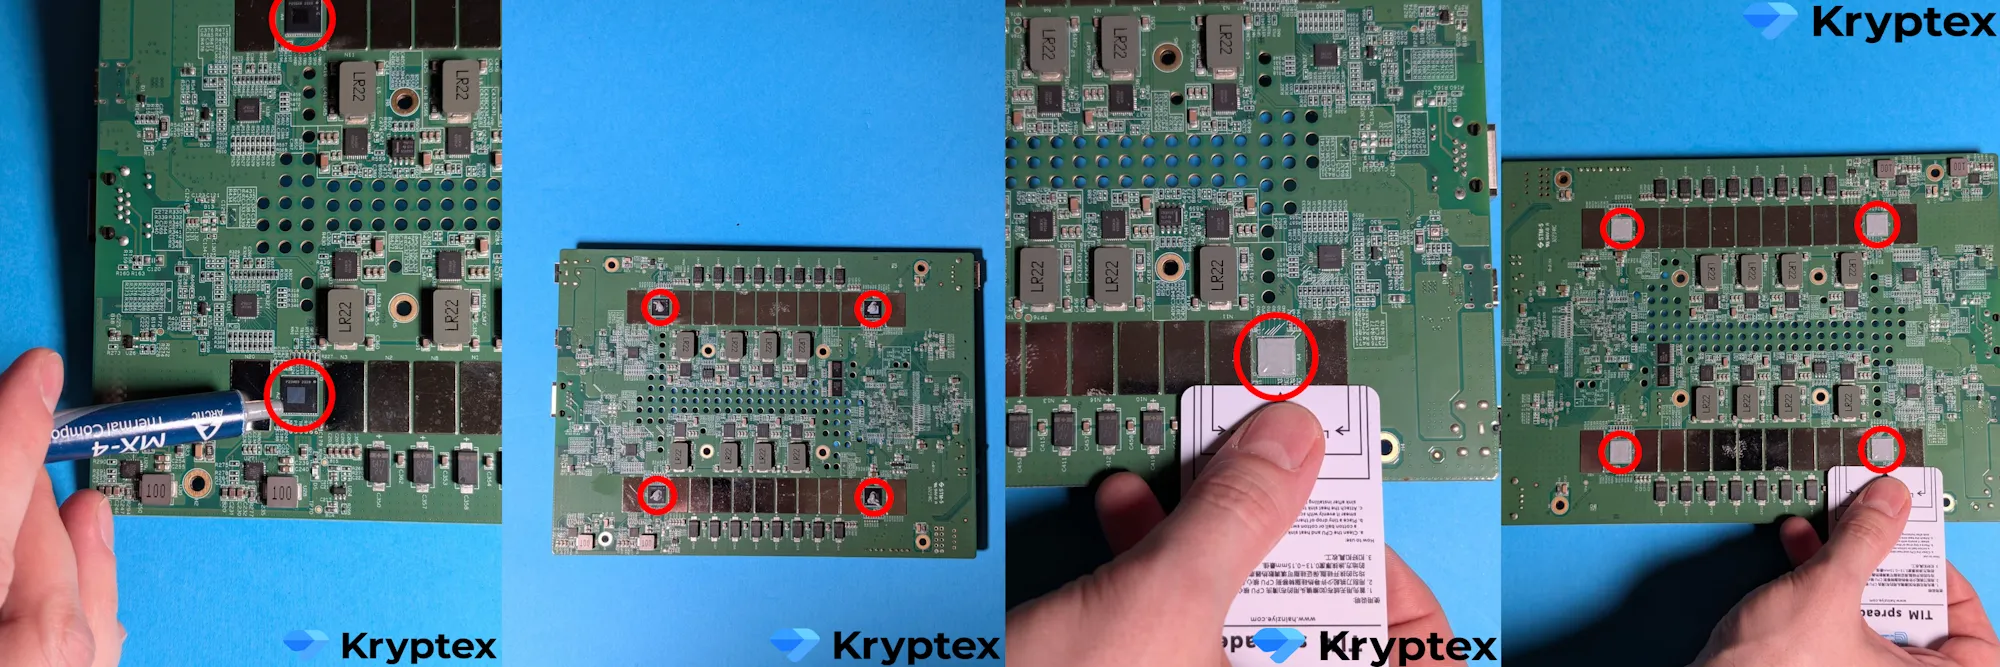
Removing the Old Thermal Paste
Clean the chips and radiator: First, remove the old paste with a plastic spatula or card. Then, use isopropyl alcohol and a soft cloth to clean the surface until it shines. Avoid using sharp, metal, or abrasive tools to prevent damaging fragile parts!
Ensure no residues of old paste remain, as they may affect heat dissipation.
Applying the New Thermal Paste
Amount: A pea-sized drop on each chip will suffice.
Distribution: You can leave the paste centered as the radiator will distribute it evenly upon installation. Alternatively, carefully spread it into a thin layer with a plastic spatula.
Installing the Radiator
- Attach the radiator: Place the radiator back and gently tighten the screws diagonally to ensure firm contact with the chips.
- Reconnect everything: Make sure all fans and wires are correctly connected.
Reassembling the Device
- Close the ASIC casing, tighten the screws, and verify all connections.
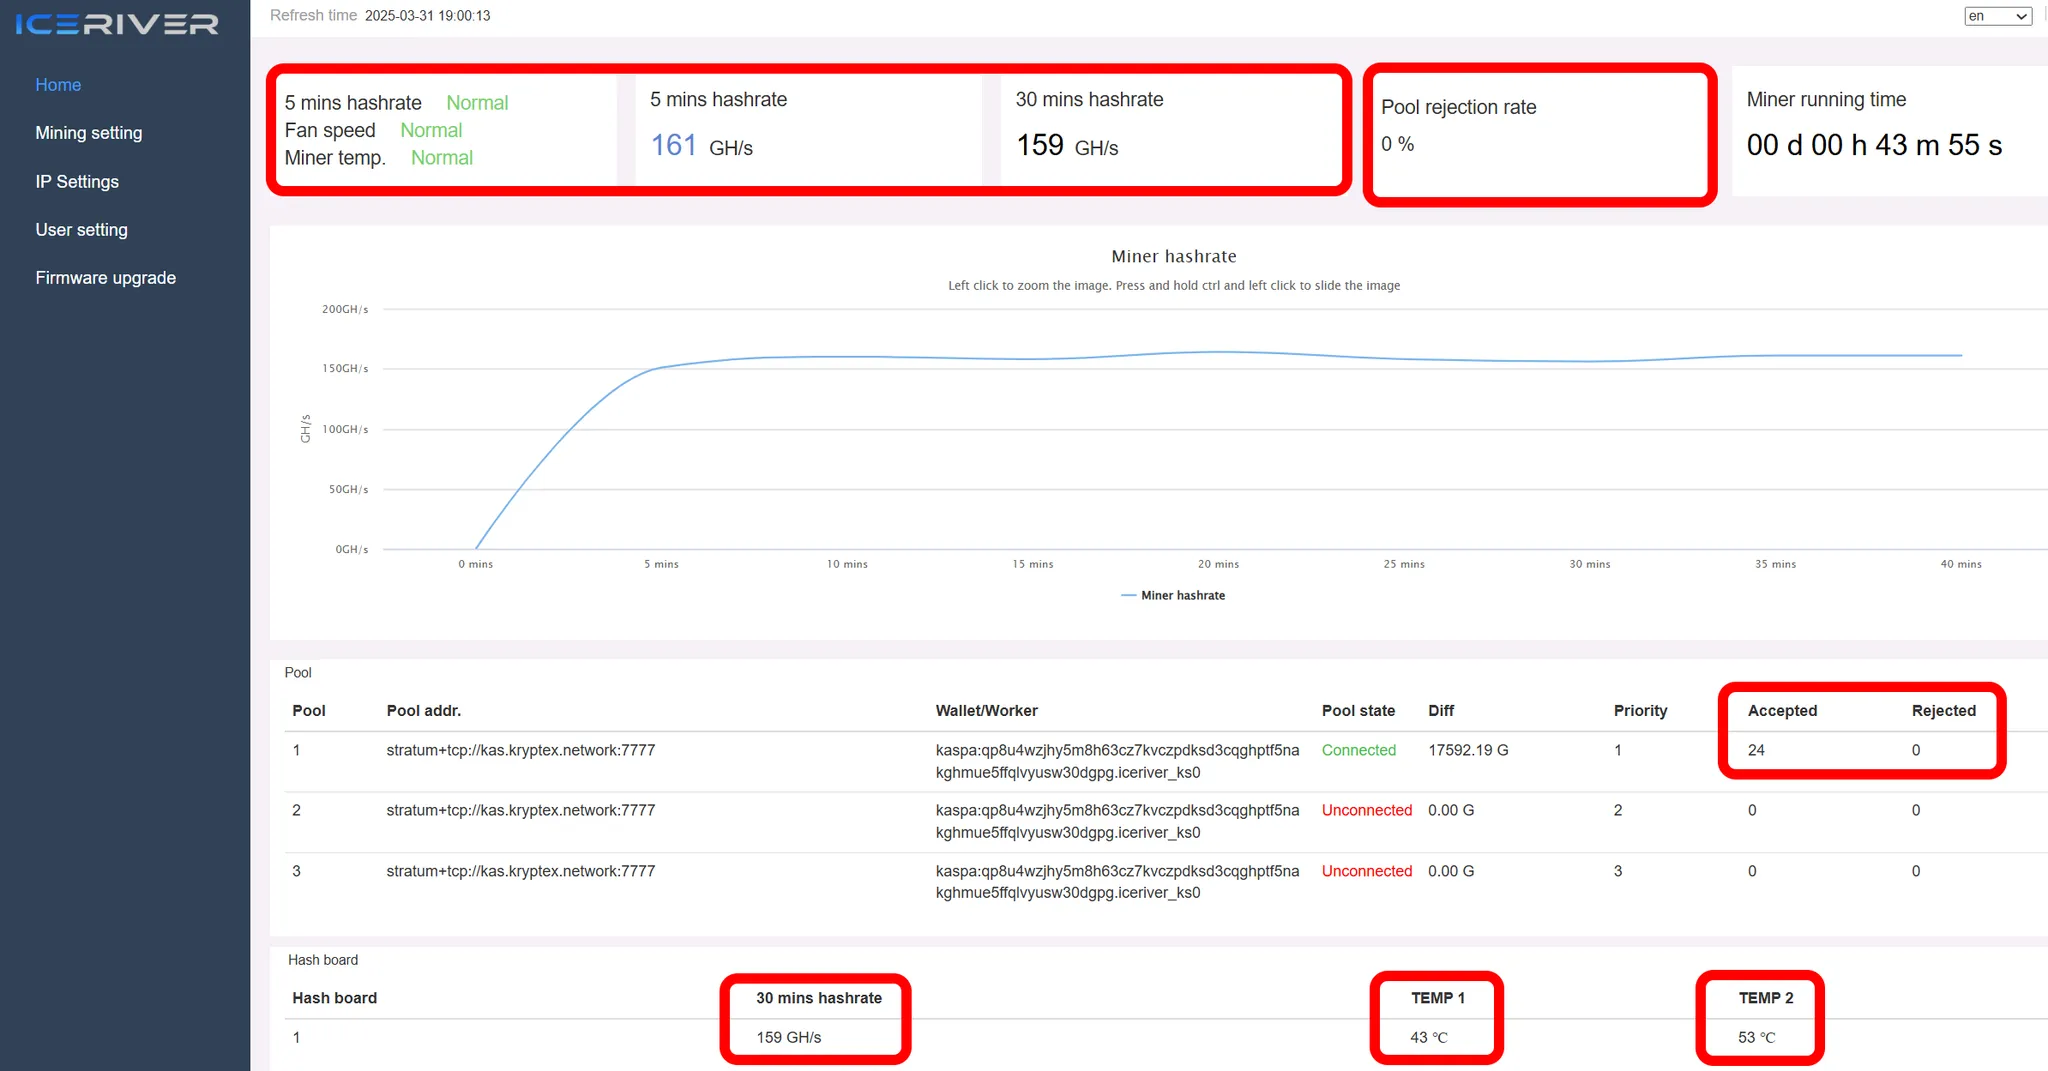
Testing
Plug the device in and turn it on. Ensure chip temperatures are stable and fans are working correctly. Observe its performance closely for the first 24 hours.
🚑 Need Help?
Have questions, something unclear, or trouble connecting?
Contact our support team — we’re happy to help!
Support via email: support@kryptex.com.